Custom Backpack Branding: Logos, Embroidery and Heat Transfer on Bags
Which branding method should a custom backpack use? Embroidery costs more per unit and survives abrasion best, heat transfer reproduces fine detail and gradients at a lower unit cost, and woven labels or rubber patches sit between them. Setup charges and minimum quantities differ by method, so choose before the shell fabric is locked. Runs start at 500 pcs per style and colourway, sampling takes 6-10 working days, and production 35-50 days.
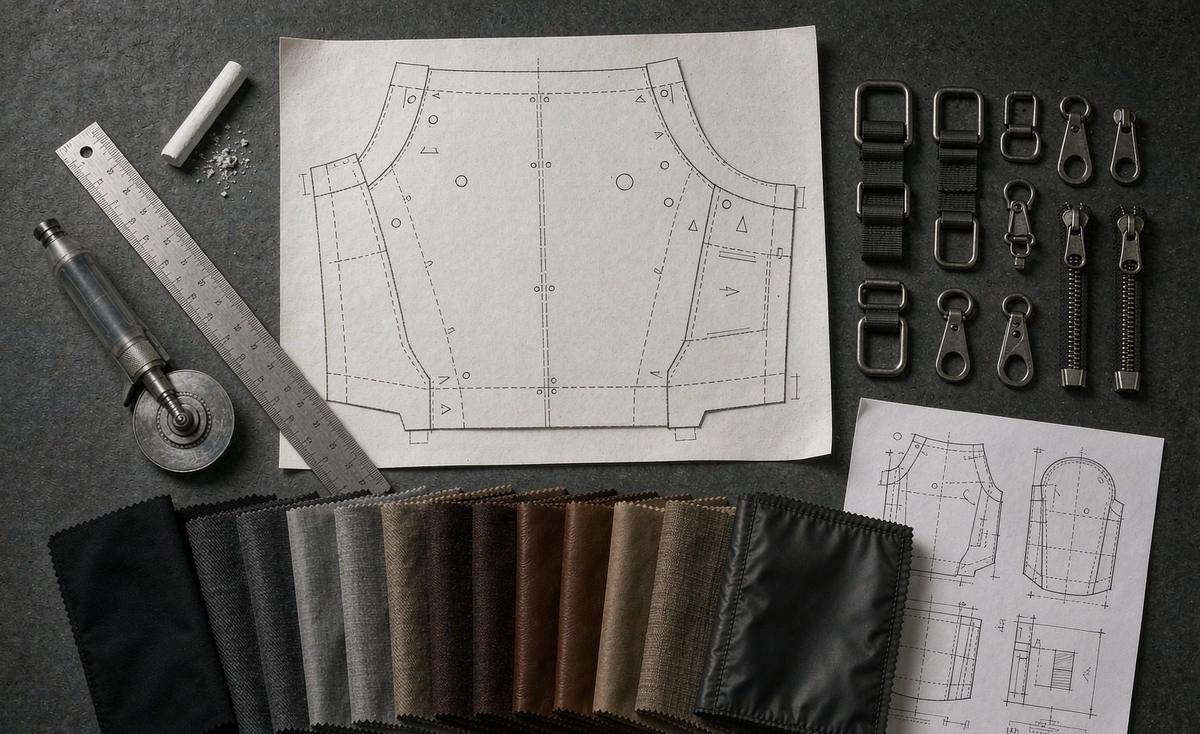
- Choosing a branding method before the fabric
- Embroidery: thread, density and limits
- Woven labels, patches and badges
- Heat transfer: vinyl, digital and sublimation
- Screen printing and plastisol on shells
- Debossing, embossing and hardware branding
- Placement rules for surviving decoration
- Colour matching and artwork approval
- Setup charges, minimums and unit cost
- Durability testing for branded decoration
- Writing the branding spec into the tech pack
Choosing a branding method before the fabric
Branding is usually treated as a finishing decision, decided after the bag is designed and quoted. That sequence produces the two most common branding failures: an embroidery that puckers a lightweight shell, and a heat transfer that will not bond to a heavily coated fabric. Both are avoidable if the decoration method is chosen while the shell is still open, because the method constrains the fabric and the fabric constrains the method.
The decision has three inputs. The first is the artwork: how many colours, whether there are gradients or fine lines, and the smallest legible element. The second is the substrate: the shell fabric, its coating and its surface texture. The third is the use environment: whether the logo sits on a high-abrasion area, whether the bag will be machine washed, and whether it ships folded. Answer those three and the shortlist usually reduces to two methods rather than five.
- Fine detail and gradients point to heat transfer or a woven label; embroidery cannot hold a hairline.
- Lightweight or stretchy shells point away from dense embroidery, which will pucker without a stabiliser.
- Heavily coated or low-surface-energy fabrics need a transfer film matched to the coating, not a general-purpose one.
- High-abrasion placements point to embroidery or a stitched patch rather than a surface print.
- A brand that wants a premium tactile cue usually lands on a rubber patch or a debossed badge rather than on a print.
There is also a campaign-specific consideration. Backers photograph the bag, and the branding is in the photograph. A logo that looks sharp in a vector file can look cheap in a photograph if the decoration method fights the fabric: a thin print on a textured shell reads as blurred, and embroidery on a curved panel can distort. Ask for a decorated sample rather than approving from a digital mock-up, because the sample is the only version that survives contact with a camera and a year of use. Range planning context sits on custom backpacks for Kickstarter and custom bags for Kickstarter.
Key takeaways
- Choose the decoration method while the shell fabric is still open, not after the bag is quoted.
- Embroidery survives abrasion best and suits simple artwork; heat transfer suits gradients and fine detail at lower unit cost.
- Coated and low-surface-energy shells need a matched transfer film, and lightweight shells need a stabiliser under embroidery.
- Placement determines survival: avoid decoration across fold lines, strap anchors and high-abrasion base panels.
- Setup charges differ by method, so ask for the setup cost and the unit cost separately on every quotation.
Embroidery: thread, density and limits
Embroidery is the most durable decoration available on a sewn product, because the thread becomes part of the panel rather than sitting on top of it. It is also the most constrained. Stitches have physical width, so fine lines close up, small text becomes illegible, and gradients are impossible. The typical legibility floor is around 4 to 5 mm for capital letter height in a satin stitch, below which letterforms fill in and the logo stops reading.
| Variable | Typical range | Effect | Buyer note |
|---|---|---|---|
| Thread type | Polyester or rayon | Polyester resists fading and chlorine better | Default to polyester for bags |
| Stitch density | Medium to high | Higher density gives fuller coverage and more stiffness | Over-dense work puckers light shells |
| Underlay | Stabiliser or backing | Prevents puckering and show-through | Essential below roughly 300D |
| Letter height | 4 mm minimum | Below this, letterforms fill in | Simplify the mark if needed |
| Colour count | Up to about 8 to 12 | Each colour adds needle time | Simplify to protect unit cost |
| Backing | Cut-away or tear-away | Affects hand feel and wash stability | Cut-away for washable goods |
Thread choice matters more than most specifications acknowledge. Polyester thread holds colour under light exposure and resists chlorine better than rayon, which is why it is the default for bags even where rayon gives a marginally higher sheen. Where a brand wants a metallic or a specialty thread, test it first: metallic threads are prone to breakage at production speed, which raises both the defect rate and the unit cost. If the artwork depends on a metallic effect, a heat transfer with a foil finish usually performs better and costs less.
Cost in embroidery is driven by stitch count far more than by size. A large logo with open areas can be cheaper than a small, dense one, which surprises buyers who assume area is the driver. Ask for the stitch count on the quotation rather than the logo size, and ask what happens to the unit price if the artwork is simplified. Reducing the colour count by two or opening up the fill is often the cheapest design change available on a branded bag. Specification practice is covered on crowdfunding bag sample prototyping.
Woven labels, patches and badges
Between embroidery and printing sits a family of applied elements: woven labels, printed labels, rubber or PVC patches, and leather-look or faux-leather badges with a debossed or printed mark. Each is applied by stitching, by bonding or by both, and each solves a different problem. Woven labels carry fine detail at small sizes better than embroidery can. Rubber patches give a three-dimensional, premium cue that photographs well. Faux-leather badges give the strongest tactile impression and are the usual choice for a heritage or outdoor positioning.
- Woven label: best for fine text and small marks, applied by stitching into a seam or as a separate patch.
- Printed satin label: best for care and composition content, where legibility at small sizes matters most.
- Rubber or PVC patch: best for a bold three-dimensional mark, bonded or stitched, with a strong photographic presence.
- Faux-leather badge: best for a premium or heritage positioning, debossed or foil stamped, stitched at the corners.
- Embroidered patch: best where the brand wants embroidery but the shell is too light to carry it directly.
The compliance dimension is easy to overlook. A PVC patch and a faux-leather badge are both soft plastic or coated components, which means they fall into the same chemical screening scope as coatings and inks. Where a bag is destined for a children's market or for California, request a material declaration for the patch or badge as a separate line item, because a compliant shell with an undocumented badge is still a non-compliant article. This is one of the more common reasons a screening test comes back with a finding.
Heat transfer: vinyl, digital and sublimation
Heat transfer covers several distinct technologies that buyers often treat as one. A cut vinyl transfer applies a single-colour film cut to shape. A digital or full-colour transfer prints onto a film and applies it with heat and pressure, which is what allows gradients and photographic detail. Sublimation is different again: the dye transfers into the fibres of a polyester substrate rather than sitting on the surface, so it has effectively no hand feel and very good wash durability, but it only works on polyester and only on light colours unless a coated intermediate is used.
| Route | Substrate limits | Detail | Durability | Unit cost |
|---|---|---|---|---|
| Cut vinyl | Most shells, needs a matched adhesive | Single colour, sharp edges | Good, can lift at edges after abrasion | Low to medium |
| Digital transfer | Most shells, needs a matched adhesive | Full colour, gradients, fine lines | Good, edge lift is the main risk | Medium |
| Sublimation | Polyester, light colours only | Full colour, no hand feel | Very good, dye is in the fibre | Medium, needs a suitable shell |
| Foil or metallic film | Most shells | Metallic effects without metallic thread | Moderate, abrasion shows first | Medium to high |
The failure mode that matters is edge lift, and it is a bonding problem rather than a print problem. A transfer applied to a fabric with a durable water-repellent finish or a heavy coating can sit on the finish rather than bonding to it, and it then lifts at the edges after abrasion or after a wash cycle. Specify a film matched to the coating, request a wash and abrasion test on the decorated panel, and require a bonding trial before bulk. That trial is cheap, takes a single sampling cycle, and prevents the single most damaging branding outcome: a logo peeling off in the field.
Transfers fail at the edge, and edge lift is caused by a film that does not match the shell coating. Require a bonding trial on the actual production fabric during the 6-10 working days of sampling window, followed by a wash and abrasion check on the decorated panel.
One practical advantage of transfers is flexibility at low commitment. Because there is no embroidery tape to digitise and no physical patch tooling, artwork changes between sample rounds are straightforward, and a multi-colour mark does not carry the per-colour cost structure that screen printing does. For a campaign that may refine its mark after the page is live, that flexibility has real value. The trade-off is that a transfer has a hand feel, and on a large panel it can stiffen the area it covers.
Screen printing and plastisol on shells
Screen printing has largely been displaced by transfers for short runs, but it still has a place where the artwork is simple, the colour count is low and the run is large enough to amortise the screens. It puts ink onto the surface rather than a film, so on an uncoated or lightly coated fabric the hand feel can be softer than a transfer. Each colour requires its own screen, so the setup cost scales with colour count and the economics improve with quantity.
- Plastisol inks give strong opacity on dark shells but carry phthalate screening considerations, which matters for children's products and for California.
- Water-based inks have a softer hand and a cleaner chemical profile, but lower opacity on dark grounds.
- Puff additives create a raised effect and photograph well, at some cost to wash durability.
- Registration tolerance between colours should be stated in the specification, typically around 1 mm.
- Print placement must avoid seams, folds and strap anchors, because ink does not stretch with the fabric.
For most campaign runs at 500 pcs, the honest comparison is between screen printing and a digital transfer, and the transfer usually wins on total cost once the artwork has more than two colours. Where screen printing does win is on a single-colour mark on an uncoated natural or dyed fabric, where the setup is minimal and the result is durable. Ask the production partner to quote both, with setup shown separately, and compare the total at your actual quantity rather than at a notional one.
Debossing, embossing and hardware branding
Hardware branding is the quietest and often the most effective option. A moulded zip puller, a debossed puller tab, a laser-etched buckle or a branded webbing strip puts the mark on an element the user touches every time they open the bag. It reads as considered rather than loud, and because the mark is formed into the component rather than applied to it, it does not abrade off. The cost is tooling: a moulded puller needs a tool, and the tool cost amortises across the run.
- Decide which hardware items are worth branding: the main zip puller first, then the front pocket puller, then buckles.
- Ask for the tooling charge separately from the unit price, and ask what quantity the tooling amortises over.
- Confirm the tooling lead time, because a custom puller tool can add days to the sampling window.
- Check that a branded puller does not change the zip specification or the pull-off strength of the assembly.
- Where tooling cost is prohibitive, use a branded webbing strip or a debossed faux-leather tab instead.
Tooling changes the sampling maths. A build with a custom puller or a moulded patch takes 12-15 working days rather than the standard 6-10, because the tool has to be made before the sample can be assembled. That difference matters when the campaign has a published delivery month, and it is one of the arguments for launching with a standard hardware set and adding branded components on the re-order. Our programme coordinators flag tooling lead time at quotation stage precisely so it lands in the schedule rather than in the surprises.
Placement rules for surviving decoration
Placement decides whether branding survives. The same decoration method that lasts for years on a front panel will fail within weeks across a fold line or under a strap anchor. The rules are physical: decoration does not stretch the way fabric does, it does not like being compressed repeatedly, and it abrades fastest where something else rubs against it. Write the placement into the tech pack with dimensions from a stated reference point, not with a sketch and an arrow.
| Zone | Suitability | Recommended method | Risk |
|---|---|---|---|
| Front panel, upper third | Best | Embroidery, patch or transfer | Low |
| Front pocket face | Good | Embroidery or woven label | Zip abrasion if placed too close |
| Shoulder strap front | Moderate | Woven label or reflective transfer | Flexing and abrasion from clothing |
| Side or base panel | Poor | Avoid decoration | Highest abrasion area on the bag |
| Across a fold line | Avoid | Not recommended | Decoration cracks or lifts |
| Under a strap anchor | Avoid | Not recommended | Compression and stitch interference |
Durability of placement also interacts with packing. A bag that ships flat-packed will crease, and a decoration sitting on that crease arrives looking damaged even though it is intact. Either move the decoration off the fold or change the packing method with stuffing that holds the panel flat. The same logic applies to a roll-top collar: decoration on the roll area is compressed every time the bag is closed, so any print there will crack. Inspection method and defect classification for decoration are covered on Kickstarter campaign bag QA and QC.
Colour matching and artwork approval
Colour is where branding disputes start, because a brand has a defined colour and a bag is made from a defined fabric, and the two rarely meet exactly. Embroidery thread, transfer film and printed ink each have their own colour gamut, and each behaves differently on a dyed ground. The workable answer is a stated tolerance against a physical reference rather than a demand for an exact match.
- Supply a Pantone reference for the brand colour, and accept the nearest available match in the decoration medium.
- Approve a physical decorated swatch rather than a digital proof, because screens differ and substrates differ.
- State a colour tolerance in the specification, and agree what happens when a match falls outside it.
- Check the decoration under the lighting the product will be photographed in, not only under bench lighting.
- Approve the decoration artwork at the same gate as the pre-production sample, so both freeze together.
Thread and film availability constrain the gamut more than buyers expect. An embroidery thread range has a finite number of colours, so an exact Pantone match may not exist and the nearest available shade has to be accepted. A digital transfer has a wider gamut but is affected by the colour of the ground and by whether a white base layer is used on dark shells. Establish which is in play before the artwork is finalised, because a mark designed in RGB on a screen and then matched to a thread chart is a redesign waiting to happen.
Setup charges, minimums and unit cost
Every decoration method has a fixed setup element and a variable unit element, and the ratio between them determines which method is economical at your quantity. Embroidery has a digitising charge; screen printing has a screen charge per colour; transfers may have a setup or plate charge depending on the technology; patches and badges may have a mould or die charge; and moulded hardware has a tooling charge. At 500 pcs the fixed element is material; at 5,000 pcs it is negligible.
| Method | Fixed setup | Variable driver | Best quantity band |
|---|---|---|---|
| Embroidery | Digitising charge | Stitch count | 500 to 5,000 pcs |
| Woven label | Label loom setup | Label size and quantity | 500 pcs and above |
| Rubber or PVC patch | Mould or die charge | Patch size and quantity | 1,000 pcs and above |
| Faux-leather badge | Die and stamp tooling | Badge size and quantity | 1,000 pcs and above |
| Digital transfer | Low or none | Area covered | 500 to 2,000 pcs |
| Screen print | Screen per colour | Colour count and placement | 1,000 pcs and above |
| Moulded hardware | Tooling charge | Component quantity | 3,000 pcs and above |
Ask for setup and unit cost as separate lines on every quotation, and ask whether the setup charge is refundable or creditable against a re-order. Then compare the total at your actual quantity rather than at a unit price alone, because a method with a higher unit cost and no setup is frequently cheaper than a method with a low unit cost and a significant tooling charge. This is the single most common error in comparing branding quotations, and it is entirely arithmetic. Cost structure discussion continues on bag manufacturing for campaign creators.
Durability testing for branded decoration
Decoration fails differently from the bag around it, so it needs its own tests. A panel can pass every structural check while the logo on it lifts, cracks, fades or transfers colour onto clothing. Four tests cover most of the risk, and all four are cheap to run on a decorated sample during the sampling window rather than expensive to discover after delivery.
- Colour fastness to rubbing: ISO 105-X12 covers dry and wet rubbing and catches a print that transfers onto clothing.
- Colour fastness to washing: relevant for any bag a backer might wash, and the standard test for a decorated panel.
- Abrasion resistance: ISO 12947 or ASTM D3884 on the decorated area, since that is where edge lift and cracking begin.
- Adhesion or peel check: a tape test on a transfer edge after abrasion, which predicts field lift better than a visual check.
Add a packing simulation as well. Pack a decorated sample the way the production run will be packed, leave it for a week, then unpack and inspect the decorated area for creasing, marking or transfer. That test catches the interaction between packing method and decoration that no laboratory method covers, and it is the reason decorated panels are often specified away from the fold. Commercial context on delivery is on crowdfunding rewards fulfilment.
A logo that lifts in month two costs more than the entire decoration budget. Test the decoration, not just the bag.
Campaign bag specialist, branding briefing
Writing the branding spec into the tech pack
A branding specification that says logo on front panel is not a specification. State the method, the artwork reference and version, the size in millimetres, the placement measured from a named reference point, the colours with their references and the tolerance, and the tests the decoration must pass. Attach the vector artwork and name the version number, because artwork version control is the cause of more production disputes than any other single item in a bag tech pack.
- Name the decoration method for each placement, not one method for the whole bag.
- Attach vector artwork with a version number, and record the version on the approved sample.
- Give placement dimensions from a stated reference point, such as the top seam or the centre line.
- State the colour reference and the accepted tolerance in the decoration medium.
- List the durability tests the decoration must pass and the standard for each.
- Require a decorated pre-production sample, approved at the same gate as the bag itself.
Then hold the version. After the pre-production sample is approved, production 35-50 days, and an artwork change inside that window restarts part of it and can invalidate a decorated sample that has already been tested. Where a brand is still refining its mark, the safe route is to launch with the version that exists and to change it on the re-order. Further reading across the category is on the blog, and related guidance sits on custom bags for Kickstarter.
- Minimum order quantity
- 500 pcs per style / colourway
- Sampling lead time
- 6-10 working days, 12-15 for complex builds
- Tooling lead time
- Additional days where a moulded puller or patch die is required
- Bulk production
- 35-50 days after deposit and approved pre-production sample
- Inspection standard
- AQL 2.5 to ISO 2859-1
- Decoration durability
- Colour fastness to rubbing ISO 105-X12, abrasion ISO 12947 or ASTM D3884
- Embroidery letter height
- 4 mm minimum for legible satin stitch
- Trade term
- FOB Xiamen
- Payment terms
- T/T 30/70
- Production floor
- 4,950 m2, SGS-verified
- Monthly capacity
- 200,000 pcs
- Custom backpacks for Kickstarter
- Crowdfunding bag sample prototyping
- Kickstarter campaign bag QA and QC
- Crowdfunding rewards fulfilment
- Bag manufacturing for campaign creators
- Custom bags for Kickstarter
- Contact for a quote
Specify the branding before you lock the shell fabric
Send your artwork, target placements and shell fabric choice to service@junyuanbags.com. Our production team will recommend a decoration method, quote setup and unit cost separately, and return a decorated sample inside the 6-10 working days of sampling window.
Frequently Asked Questions
Which branding method lasts longest on a backpack?
Embroidery, because the thread becomes part of the panel rather than sitting on the surface, and it typically outlasts a print by 2 to 3 years of daily use. A stitched rubber patch or a faux-leather badge is comparable. Transfers and prints last well on low-abrasion placements but fail at the edges when placed on high-abrasion zones.
Can embroidery reproduce a detailed logo with gradients?
No. Stitches have physical width, so gradients are not possible and hairlines close up. Keep capital letter height at 4 mm or above and simplify to a limited colour count. Where gradients matter, use a digital transfer or a woven label instead.
What is the minimum letter height for legible embroidery?
Around 4 mm for capital letters in a satin stitch, and preferably 5 mm. Below that, letterforms fill in and the mark stops reading. If the brand mark is smaller than that, move to a woven label or a digital transfer.
Will a heat transfer bond to a coated or water-repellent shell?
It can, but the film must be matched to the coating. A general-purpose film on a low-surface-energy finish will lift at the edges after abrasion. Require a bonding trial on the production fabric during the 6-10 working days of sampling window, then a wash and abrasion check.
What is the difference between a digital transfer and sublimation?
A digital transfer prints onto a film applied with heat and pressure, and works on most shells. Sublimation dyes into polyester fibres at roughly 200 degrees Celsius, giving no hand feel and very good wash durability, but it only works on polyester and light colours.
How much does embroidery add to the unit cost?
It depends on stitch count rather than size, and typically adds 0.30 to 1.50 USD per placement at 500 pcs. A large open logo can cost less than a small dense one. Ask for the stitch count and a separate digitising setup charge, then compare the total at your actual quantity rather than at a unit price alone.
Is screen printing or a digital transfer cheaper at 500 pcs?
Usually a digital transfer once the artwork has more than 2 colours, because screen printing charges a screen per colour. For a single-colour mark on an uncoated fabric, screen printing can win. Ask to see setup and unit cost as separate lines.
Where should a logo not be placed on a backpack?
Across a fold line, under a strap anchor, on the base panel or on a roll-top collar, which leaves the front panel upper third as the safest of the 6 common zones. Decoration does not stretch with the fabric and abrades fastest where something rubs against it. The front panel upper third is the safest zone.
Does a PVC patch or faux-leather badge need compliance documentation?
Yes. Both are soft plastic or coated components, so they fall into the same chemical screening scope as coatings and inks, adding roughly 1 line item to your declaration file and 1 set of clauses to the test. Request a material declaration for the patch or badge as a separate line item, especially for children's markets and for California.
How do I approve a brand colour on a bag?
Supply a Pantone reference, expect the match in embroidery thread to land within about 1 to 2 steps of the nearest available shade, and approve a physical decorated swatch rather than a digital proof. State a tolerance in the specification and check under the lighting the product will be photographed in.
Does branded hardware add time to the schedule?
Yes. A moulded zip puller or a patch die needs tooling, which moves sampling from 6-10 working days to 12-15 for complex builds. Ask for the tooling charge and lead time separately, and consider launching with standard hardware.
Can I change the artwork after the sample is approved?
Technically yes, but it is expensive. production 35-50 days from pre-production sample approval, and an artwork change inside that window restarts part of it and can invalidate a decorated sample already tested. Launch with the current version.
People Also Ask
Is embroidery or printing better for a Kickstarter backpack?
Embroidery for durability and a premium cue on simple artwork; printing or transfer for gradients, fine detail and lower unit cost. The deciding factors are the shell fabric and where the logo sits, so choose alongside the fabric rather than after it.
Why does my logo peel off the bag?
Almost always edge lift from a transfer film that does not match the shell coating, or from placement on a high-abrasion or fold area. A bonding trial on the production fabric, plus an abrasion check, prevents both before bulk starts.
How small can a logo be on a bag?
For embroidery, keep capitals at 4 mm or above. For a woven label or a digital transfer, smaller marks are legible because the resolution is higher. Choose the method from the smallest element in the artwork, not from the overall logo size.
Should I brand the zip puller?
It is one of the most effective placements, because the user touches it every time they open the bag and the mark is formed into the component rather than applied. It needs tooling, so it suits re-orders or larger runs.
Can I put branding on a recycled fabric bag?
Yes. Embroidery, transfers and woven labels all work on recycled polyester. Hold the GRS transaction certificate for the fabric and screen the decoration materials separately, since the certificate covers the fabric and not the ink or film.