Travel Bag Sample Checks: Zipper, Handle and Wheel Tests
How should a Kickstarter travel bag sample be tested before a 500-piece order? Use repeatable zipper cycles, loaded handle routines and wheel trials tied to written pass criteria, then transfer the same checks into bulk QC. Standard sampling takes 6-10 working days and complex rolling builds take 12-15; production 35-50 days after deposit and approved pre-production sample. Final lot inspection is AQL 2.5 to ISO 2859-1 before FOB Xiamen release.
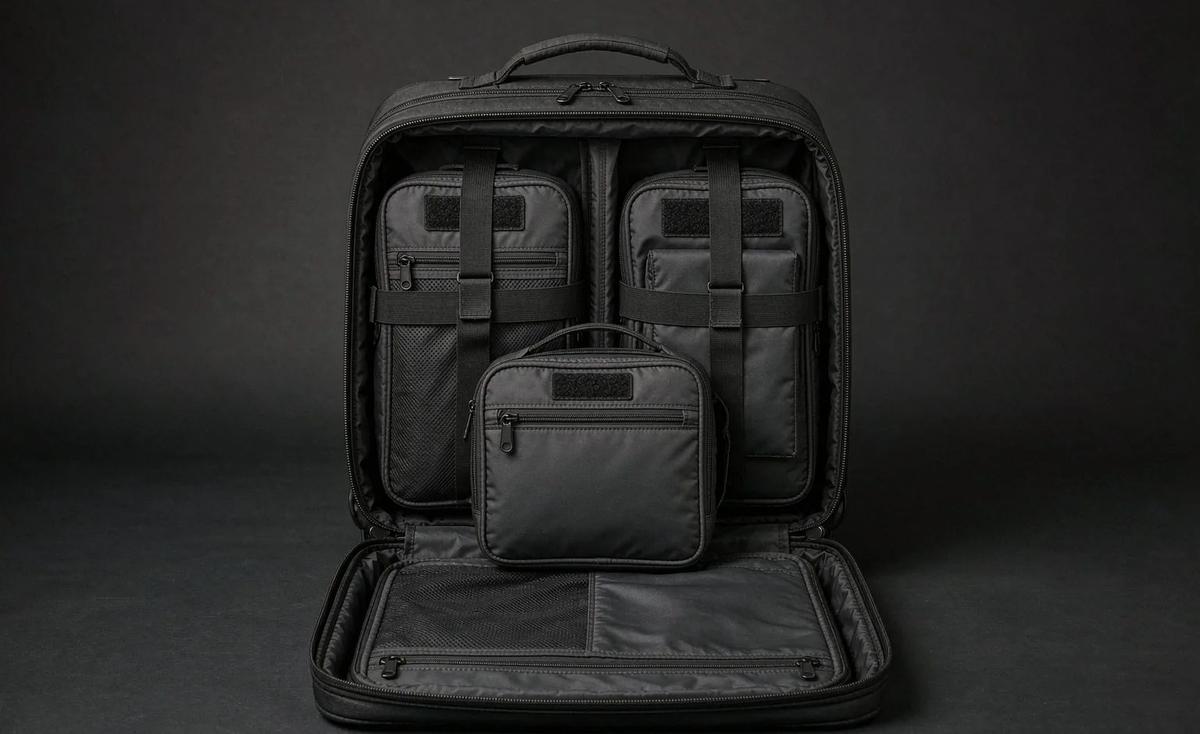
- Turn feature claims into a sample test plan
- Set up round one for construction learning
- Cycle every zipper under representative load
- Challenge top, side and telescopic handles
- Run wheels across more than a smooth floor
- Combine load, drop and carry routines
- Record failures as engineering data
- Approve round two as the production reference
- Connect sample tests to the RFQ and unit cost
- Transfer the method into AQL 2.5 inspection
- Protect the calendar from late retesting
- Release a complete travel-bag test dossier
Turn feature claims into a sample test plan
A sample review that asks whether the bag “feels strong” cannot control a 500-piece order. Start with the campaign claims and convert each one into a repeatable action. Smooth zippers become a loaded cycle routine. Reinforced handles become a static hold plus repeated lifts. All-terrain wheels become a defined distance over selected surfaces with tracking, noise and attachment checks. The result is not a universal certification; it is a project acceptance plan that tells the creator and production partner what evidence is needed before approval.
Write five items for every test: specimen condition, payload, method, quantity and pass criteria. For example, condition the bag for 24 hours, load it to 12 kg, lift the top handle 1,000 times through a stated travel, inspect the attachment and pass only if no seam opens beyond the written tolerance. Numbers turn opinions into decisions. They also expose unrealistic marketing language before it reaches the campaign page.
The sampling brief should cover appearance, dimensions, material identity, construction and function. Hardware tests cannot compensate for a wrong compartment or shifted logo. Keep one master checklist linked to the tech pack, and assign each check to round one, round two, in-line production or final inspection. The crowdfunding sample prototyping process provides the wider approval framework; this article concentrates on zippers, handles and wheels.
Rules for useful prototype testing
- Define payload, cycles, motion and failure before the test begins.
- Treat development routines as project checks unless a named standard truly applies.
- Test the assembled bag because panel balance changes component performance.
- Use round one to learn and round two to verify corrections.
- Photograph setup and damage at fixed angles with specimen identification.
- Carry critical checks into in-line QC and AQL 2.5 inspection.
Set up round one for construction learning
Standard sampling takes 6-10 working days; complex builds take 12-15. Round one should answer whether the pattern, component selection and assembly sequence can deliver the intended function. It does not need to look perfect in campaign photography, but substitutes must be declared because they limit what can be tested. A stock zip may prove opening geometry but not final slider durability. A temporary wheel can prove clearance but not tracking. Mark each result as valid, provisional or not tested.
Measure the sample before applying load. Record exterior dimensions, opening lengths, handle spacing, telescopic-handle extension, ground clearance, wheel alignment and bag mass. Then photograph the unloaded shape. Baseline data makes later deformation visible and helps distinguish a pattern issue from test damage. Use fixed datum points from seams or hardware centres rather than measuring from a soft, moving edge.
| Feature | Baseline record | Functional routine | Round-one decision |
|---|---|---|---|
| Main zipper | Opening length and path | Loaded cycling | Chain, slider or pattern change |
| Top carry handle | Spacing and attachment box | Static hold plus repeated lifts | Webbing, reinforcement or seam change |
| Side handle | Position relative to centre of mass | Loaded carry and tilt | Move location or alter anchor |
| Telescopic handle | Extension and tube play | Extension cycles and loaded pull | Frame or mounting revision |
| Wheels | Alignment and clearance | Distance over defined surfaces | Wheel, axle or housing change |
| Base structure | Board and guard positions | Drop and curb simulation | Reinforcement coverage change |
Keep destructive and non-destructive checks separate. A creator may need the sample for photography, so do not perform a severe drop routine on the only visual unit before images are captured. Ideally, one appearance sample supports campaign media and a second engineering sample absorbs repeated load. If budget permits only one, sequence measurement, fit, photography, cycles and destructive checks carefully, documenting when damage changes the validity of later results.
Cycle every zipper under representative load
Zipper performance depends on the complete opening, not only on the chain brand. Curves, seam bulk, panel tension, lining intrusion and end-stop alignment determine slider effort. Test each zip in the state users will encounter. A main clamshell zip should be cycled with the bag packed; a compression zip should be tested with the expansion panel stressed; a laptop zip should run with the device surrogate inserted. Cycling an empty soft bag can hide the exact distortion that causes backer complaints.
A useful project routine may specify 500 full open-close cycles during development, with inspection every 100 cycles. Record slider resistance, tooth separation, tape wrinkling, coating loss, puller loosening, end-stop movement and lining catches. The count is a project requirement, not a claim that 500 cycles is a universal standard. If the campaign promises unusually intensive service, set a routine that matches that promise and confirm whether manual or jig cycling represents actual pull direction.
| Variable | Example project setting | Why it changes the result | Failure evidence |
|---|---|---|---|
| Bag payload | 12 kg distributed load | Distorts panels and opening path | Weight record and packing photo |
| Cycle count | 500 complete cycles | Makes wear comparable between rounds | Counter log at 100-cycle intervals |
| Opening speed | Steady manual motion | Avoids shock not present in normal use | Short setup video |
| Pull direction | Along the tangent of the zip path | Side loading can jam sliders | Marked operator hand path |
| Inspection interval | Every 100 cycles | Shows when damage begins | Five condition photographs |
| Pass criterion | No separation, snag or loose stop | Turns observation into approval | Signed test sheet |
When a zip fails, diagnose the system before upgrading the chain. If resistance peaks at one curve, the pattern or seam allowance may be the cause. If the lining enters the slider, add a guard or change the internal seam. If the terminal end tears, transfer load into a reinforced panel instead of relying on one bar tack. The cheapest robust fix often sits in geometry, and it must be proven on the next sample before the bill of materials is frozen.
Challenge top, side and telescopic handles
Carry handles fail at the transition between flexible webbing and bag structure. A strong strap attached to weak reinforcement still produces a weak system. Draw the load path from hand grip through webbing, stitch box, reinforcement patch and structural seam. The handle test should use the full bag payload, not a clamp on detached webbing. Detached component data can support material selection, but assembly testing reveals panel distortion and stitch concentration.
Combine a static hold with repeated lifting. A development plan might hold a loaded bag at a defined multiple of working weight for one minute, then complete 1,000 normal lifts at working weight. Those figures must be selected for the product and stated as project routines. After testing, measure handle elongation, inspect stitch holes and look behind the lining for reinforcement movement. Pass criteria should address both sudden failure and progressive damage.
- Test top and side handles separately because their load paths and bag orientation differ.
- Mark handle-anchor corners so stitch growth can be measured after cycling.
- Use the intended grip wrap, since padding can hide webbing twist or seam migration.
- Load all primary compartments in the distribution shown on the campaign page.
- Inspect internal reinforcement rather than judging only the visible stitch box.
- Repeat the carry routine after drop testing if the product claim implies continued use.
Telescopic systems add tubes, stops, grip, mounting plate and base frame. Cycle full extension and retraction while noting button operation, side play and tube scoring. Then pull the loaded bag at the user angle. A handle that works vertically on a bench can bind once the bag weight twists the tubes. Verify that the mounting hardware cannot contact packed contents and that the internal cover remains removable for authorised service where the specification requires it.
Run wheels across more than a smooth floor
A polished sample-room floor confirms only that wheels rotate. Travel bags encounter tile joints, carpet transitions, textured paving, thresholds and curbs. Build a test lane with named surfaces and distances, then keep it consistent between samples. Record wheel diameter, material, bearing or bushing construction, alignment and ground clearance before running. Pull at a controlled angle with the rated payload and measure drift from a straight line over a defined distance.
Two-wheel and spinner systems need different routines. Inline wheels should track and survive repeated edge impacts; four-wheel spinners need rotation freedom, housing strength and stable caster behaviour. A wheel can remain attached yet fail functionally through flat spots, wobble, noise or housing rub. Define acceptable play and sound observations before approval. Film the same camera angle at the start and end so subjective impressions can be compared.
| Surface or action | Suggested project measure | Observe | Typical corrective path |
|---|---|---|---|
| Smooth tile | 200 m loaded pull | Tracking, noise and drag | Alignment or wheel compound |
| Low-pile carpet | 100 m loaded pull | Pull force and heat | Diameter or bearing choice |
| Jointed hard floor | 200 crossings | Vibration and housing movement | Axle and mounting reinforcement |
| Threshold strip | 50 controlled crossings | Clearance and impact | Wheel size or base geometry |
| Small curb simulation | 20 controlled lifts or rolls | Housing and frame stress | Guard and base support |
| Figure-eight turns | 25 circuits | Caster return and stability | Spinner alignment or spacing |
Clean wheels before inspection so damage is visible. Check axle retention, housing cracks, mounting fasteners, frame distortion and clearance to fabric. If the wheel assembly is replaceable, run removal and refit on the sample using the intended tool and confirm the fastener remains secure. Replacement claims create fulfilment obligations, so the campaign must know whether spare parts, instructions and service stock will actually be available.
Combine load, drop and carry routines
Component tests are necessary but do not reproduce the sequence of a journey. Build a combined routine: pack the reference load, carry by top and side handles, pull across the wheel lane, lift over a threshold, place the bag on its base, operate the main zip and repeat. Then apply the planned project drop orientations with a safe surrogate load. Sequence matters because a base impact can misalign wheels or increase zip resistance, revealing interactions that isolated tests miss.
Define the payload with a packing diagram. Dead weight concentrated at the base is harsher on wheels but may under-stress upper panel seams; soft clothing alone may not represent a laptop or toiletry case. Use stable, non-hazardous surrogates with recorded positions. Weigh the loaded bag before and after the routine to detect lost parts. For custom travel bags for crowdfunding, the payload should match the public packing example rather than an arbitrary laboratory number.
- Condition and measure the empty sample for 24 hours before loading.
- Pack the reference payload according to the approved diagram and record total mass.
- Complete handle lifts and carries in top and side orientations.
- Run the defined wheel lane, turns, joints and threshold actions.
- Operate all zippers at the loaded panel tension.
- Apply the written drop sequence using safe internal surrogates.
- Repeat critical zip, handle and wheel checks after impact.
- Open the lining access points and inspect hidden reinforcement and mountings.
Do not test beyond the claim merely to create a dramatic campaign number. Extreme demonstrations can damage a bag in ways unrelated to normal travel and tempt creators to advertise an unsupported limit. Choose routines that reveal likely weakness, document them honestly and keep safety factors inside the engineering file. A useful sample test protects the buying decision; it is not a stunt.
Record failures as engineering data
A failed sample can be valuable if the failure is recorded precisely. Assign a specimen ID, tech-pack revision, component lot, payload, test step and cycle count. Photograph the whole bag, then the damage with a scale. Describe the first observable symptom rather than only the final break. A handle stitch may begin opening at cycle 620 and detach at 740; the first number is more useful for comparing a correction.
Use root-cause categories: specification, component, pattern, assembly, test setup or misuse. A slider jam caused by excess seam bulk requires a different action from a defective slider. Write one corrective action and one verification method. “Use stronger materials” is not complete; “extend the reinforcement patch 25 mm into the side seam and repeat 1,000 lifts at the reference load” can be closed objectively.
| Field | Example content | Decision value |
|---|---|---|
| Specimen and revision | S2, tech pack Rev C | Prevents mixing evidence from different builds |
| Component reference | Main zip Z-03, wheel W-02 | Links the issue to the BOM |
| Test state | 12 kg load, post-drop | Makes reproduction possible |
| Failure point | Slider snag at cycle 184 | Shows onset rather than only final damage |
| Root-cause hypothesis | Lining clearance below 4 mm | Directs the correction |
| Corrective action | Add 12 mm guard and revise seam | Creates an accountable change |
| Verification | Repeat 500 cycles on S3 | Defines closure evidence |
Keep observations that pass as well as those that fail. A complete dossier prevents the next round from retesting random features while missing an altered one. If a reinforcement change affects panel stiffness, repeat the adjacent zip routine even if the original zip passed. Engineering changes have boundaries, but soft-goods systems are interconnected; the revision review should state which previous results remain valid and why.
Approve round two as the production reference
Round two should be built with intended face fabric, lining, foam, zips, handles, wheels, fasteners and branding. If a component remains temporary, the sample cannot provide full approval for that function. Measure all critical dimensions again, verify the bill of materials and run the corrected test subset plus any interaction tests. A complex rolling build can require 12-15 working days because frame and wheel assembly add sourcing and fitting steps.
Approve with a signed document, not a string of chat messages. Identify the physical sample, date, pack revision, artwork revision, accepted deviations and test report. Seal or label the reference and state where it will be held. The pre-production sample becomes the visual and functional comparison for the 35-50 day bulk run, while the written pack controls details that cannot be seen without opening the product.
Film final routines for production and QC use. Short clips can show correct zip travel, telescopic-handle extension, wheel tracking setup and loaded carry orientation. Video does not replace dimensions or pass criteria, but it reduces interpretation across teams. The campaign bag guide recommends keeping every approval artifact under one revision-controlled index so campaign, sourcing and inspection decisions refer to the same product.
The bulk window does not begin because a prototype arrived. Production starts after the pre-production sample is approved in writing and the 30% deposit under T/T 30/70 is received. If either gate remains open, the stated 35-50 day production calendar has not started.
Connect sample tests to the RFQ and unit cost
Testing changes quotation quality. If the RFQ asks only for a rolling bag, bidders can price different wheel systems, reinforcements and zip grades. If it specifies payload, cycle routines, surfaces and pass criteria, every proposed construction must address the same use. Ask for the cost delta of each major system: zip set, carry-handle reinforcement, telescopic assembly, wheels, base guard and service parts. This cost breakdown shows where durability is being purchased.
| System | RFQ detail | Cost question | Evidence before order |
|---|---|---|---|
| Main zipper | Chain, slider, tape, length and 500-cycle routine | What is the upgrade delta? | Loaded sample cycle log |
| Carry handles | Webbing, padding, stitch and reinforcement | What supports the stated payload? | Static and repeated-lift result |
| Telescopic unit | Tube, grip, stops and mounting | Is the frame included in unit cost? | Extension and loaded-pull record |
| Wheels | Diameter, compound, axle and housing | Are spare units available? | Surface-lane result |
| Base protection | Board, guards and clearances | What changes carton weight? | Post-drop inspection |
| Inspection | AQL 2.5 scope and function sample | Is third-party attendance excluded? | Quoted inspection plan |
How much does testing add to a travel bag? Separate one-time development effort from recurring unit construction. A stronger handle patch may add material and sewing to every piece; a sample test jig is mostly development overhead. Clarify what is included in the sample fee and whether repeat testing after a creator-led design change is chargeable. The minimum order remains 500 pcs per style / colourway, so the cost of under-testing should be compared with rework or service on 500 units.
Normalise the supplier shortlist against the same tests. A quotation that excludes wheels, service parts or inspection cannot be compared directly with a complete offer. Review sample response quality as well as price: did the production partner provide measurements, disclose substitutions and explain failure causes? That behaviour predicts how effectively the 35-50 day production window will be managed when an in-line issue appears.
Transfer the method into AQL 2.5 inspection
Final inspection is AQL 2.5 to ISO 2859-1. The standard provides the statistical sampling framework; it does not write the product-specific checklist. Translate prototype routines into feasible inspection checks. A final inspector may not run 500 zip cycles on every sampled bag, but can operate all selected zips, run an intensified cycle on a defined function subset, measure handle attachment and complete a short loaded wheel track. The method and subset must be agreed before booking.
Classify likely failures. Detached handles, sharp exposed hardware or a wheel housing that creates a safety issue require severe treatment under the agreed defect definitions. A non-operating main zip, collapsed telescopic system or wheel that does not rotate is major because it removes intended function. Minor appearance variation should be bounded with visual samples. The Kickstarter campaign bag QA and QC page explains lot acceptance; your appendix supplies travel-hardware checks.
- Verify zipper references and operation across the full opening on sampled units.
- Measure top and side handle position, stitch-box size and visible reinforcement indicators.
- Extend and retract telescopic handles on every function-selected piece.
- Roll loaded function samples over the agreed short lane and check tracking.
- Inspect wheel housings, axle retention, base guards and ground clearance.
- Compare damage examples with approved critical, major and minor defect photos.
- Issue the report before the 70% balance and cargo release decision.
Add in-line checks at the first 50-100 completed units. Final inspection is too late to discover every handle patch was placed outside the load path or each wheel frame was tightened unevenly. Early function samples let the production team adjust method while components remain accessible. Record any correction in the re-order file so the approved process reflects what actually produced a passing lot.
Protect the calendar from late retesting
Testing belongs inside the development calendar, not between finished production and freight booking. Allocate 6-10 working days for a standard sample or 12-15 for a complex build, creator review time, a correction round and verification. Custom hardware can add its own tooling lead time. If a campaign announces delivery from the first render, every failed cycle test becomes a public delay rather than a private design improvement.
production 35-50 days after approval and deposit, followed by inspection and FOB Xiamen handover. Payment is T/T 30/70. The remaining freight, clearance and crowdfunding rewards fulfilment must sit beyond that window. Keep a contingency for re-inspection if the lot fails. Removing tests to save calendar is rarely effective because the untested weakness returns as sorting or backer service after dispatch.
Capacity context can support scheduling discussions: 4,950 m² SGS-verified, 137 staff, 7 production lines, 149 machines and 200,000 pcs monthly stated capacity. The programme was established in 2014 with trade roots since 2004 and has supported 20+ crowdfunding campaigns. Even with capacity, a creator must book a specific slot and meet artwork, material and approval deadlines. General capability does not reserve dates.
Release a complete travel-bag test dossier
The release dossier should contain the current tech pack, bill of materials, specimen register, baseline measurements, test procedures, raw logs, photographs, videos, failures, corrective actions, final report, signed deviations and campaign claim list. Index every file by revision. A future inspector or re-order buyer should be able to trace why a zip, reinforcement patch or wheel was selected without reopening old message threads.
Attach the commercial page: 500 pcs per style / colourway, unit cost, volume pricing, sample charges, 35-50 day window, AQL 2.5, FOB Xiamen, T/T 30/70, carton data and destination. The dossier then connects design evidence to the purchase decision. It also helps creators explain schedule or construction choices to backers without publishing confidential cost details.
For a new programme, send the draft tech pack and test claims before the first sample slot is booked. Our production team can identify which checks require final components, where a second specimen is useful and what can transfer into bulk inspection. Use the request-a-quote page or service@junyuanbags.com with the target payload, wheel type, quantity and delivery month.
- Crowdfunding bag sample prototyping
- Custom travel bags for Kickstarter
- Campaign bag QA and QC
- Crowdfunding rewards fulfilment
- Crowdfunding bag guide
- Request a quotation
Build the test plan before building the sample
Send your travel-bag claims, target payload, wheel format and drawings to service@junyuanbags.com. As your production partner, we can align sample rounds, failure records and AQL inspection checks with the 500 pcs per style / colourway order.
Frequently Asked Questions
How long does a Kickstarter travel bag sample take?
A standard build takes 6-10 working days, while a complex rolling or structured design takes 12-15. Plan 2 rounds so the first reveals construction issues and the second verifies corrections with production-intent components. Review, courier and test time are additional, so the complete approval path can occupy 4 weeks or more.
How many zipper cycles should a prototype complete?
A project may use 500 full open-close cycles as a development routine, with inspection every 100 cycles. The number is not a universal standard; it must match the product claim and method. Record payload, pull direction, opening speed and failure criteria so round 2 can be compared with round 1 objectively.
Should zipper testing be done with the travel bag loaded?
Yes, when load changes panel tension during real use. Pack the approved reference payload, weigh it and photograph the arrangement before cycling. An empty soft bag may let the slider run freely while a 12 kg packed bag distorts a curve or pushes lining into the teeth, hiding the failure the test should find.
How are carry handles tested on a travel bag sample?
Combine a defined static hold with repeated lifts at working load. One project might hold a safety-factor load for 1 minute and then complete 1,000 lifts, but the exact routine belongs in the tech pack. Inspect webbing, stitch holes, reinforcement patches and surrounding panels, not only the visible handle grip.
What surfaces should wheel sampling include?
Use more than smooth tile. A useful lane can include 200 m of tile, 100 m of low-pile carpet, 200 joint crossings, 50 threshold passes and 25 figure-eight turns. These are project examples rather than universal requirements. Keep surfaces and payload constant so tracking, noise, wobble and housing movement can be compared.
When should destructive prototype tests be performed?
Perform fit, measurement and campaign photography first if only 1 sample exists, then run cycles and destructive checks in a documented sequence. A better plan uses 2 specimens: one appearance reference and one engineering unit. Damage from an early drop can invalidate later zip or wheel results, so the order of tests must be written.
What is the MOQ after the sample passes?
The minimum order is 500 pcs per style / colourway. A rolling weekender and a carry-only version are normally different styles; black and olive are separate colourways. Testing one configuration does not automatically approve another. Each promised variant needs a clear relationship to the tested build and its own 500-piece production plan.
When does bulk production start after testing?
The 35-50 day production window begins after the pre-production sample is approved in writing and the 30% deposit is received. Payment is T/T 30/70. A successful test report supports approval, but it does not start production by itself. The booked slot should list line start, completion and inspection dates.
How does AQL 2.5 use the prototype test results?
AQL 2.5 to ISO 2859-1 controls lot sampling and acceptance. Prototype results supply the product-specific methods and defect examples. Final inspection may use a shorter function subset, such as operating every selected zip and rolling defined pieces over a short lane, while in-line checks address longer 500-cycle or repeated-lift routines.
What should a sample failure report contain?
Record at least 7 fields: specimen and revision, component reference, payload, test step, cycle or distance at first damage, root-cause hypothesis and corrective action. Add scaled photographs and a verification method. “Handle failed” is insufficient; “stitch opening began at lift 620 under 12 kg” supports a measurable correction.
Does FOB Xiamen include travel bag testing?
FOB Xiamen is a trade term for cargo handover, not a testing package. Sampling tests, in-line checks and AQL 2.5 inspection must be specified and priced in the RFQ or purchase order. Main freight, import clearance and inland delivery after loading also require separate buyer planning under the FOB structure.
How can testing protect a re-order?
Save the signed sample, bill of materials, methods, raw logs, failure corrections and final inspection report. Those records let a later 500-piece re-order verify a substituted zipper, handle webbing or wheel. Repeat the affected routine when 1 component changes rather than assuming an unchanged exterior guarantees the same performance.
People Also Ask
What should I test first on a rolling travel bag prototype?
Measure and photograph the unloaded sample first, then verify compartment fit and the complete payload. Test zippers and handles before wheel and drop routines create damage. Finish by repeating critical functions after impact. This order preserves baseline evidence and reveals whether combined travel stresses change a previously passing component.
Can one prototype be used for photos and durability tests?
Yes, but sequence matters. Capture approved appearance, dimensions and campaign media before destructive work. With only 1 specimen, document how each routine may affect the next. Two samples are preferable for a complex build: one visual reference and one engineering unit for 500-cycle, repeated-lift and wheel testing.
Are 500 zipper cycles enough to claim lifetime durability?
No. Five hundred cycles can be a useful project development check, but it does not prove lifetime performance. Describe the tested sample, load and method accurately. Stronger claims require an appropriate validated protocol and consistent bulk construction. Avoid turning one limited routine into an absolute warranty statement.
How do I compare travel bag sampling quotations?
Give every shortlisted production partner the same payloads, cycle routines, wheel lane, failure criteria and component specification. Ask what the sample fee includes, which parts are substitutes and what retesting costs after a creator change. Compare evidence quality and assumptions as well as the quoted unit cost at 500 pieces.
When should the final inspection be booked?
Reserve it inside the 35-50 day bulk window once the production schedule is confirmed, then verify the exact date near completion. The order should name AQL 2.5 to ISO 2859-1 and the function subset. Leave contingency for rework and re-inspection before the FOB Xiamen freight booking.