Kickstarter Project Merchandise: Designing Bags That Fit Your Reward Tiers
Reward-tier design is a costing discipline before it is a creative one. Each tier needs a format whose landed cost fits inside its pledge at 500 pcs per style and colourway, sampled in 6-10 working days and produced in 35-50 days. The entry tier carries a small format, the core tier carries the engineering budget, and the premium tier should be a configuration rather than a new construction. Below is the design logic for each, with the levers that read expensive and cost little.
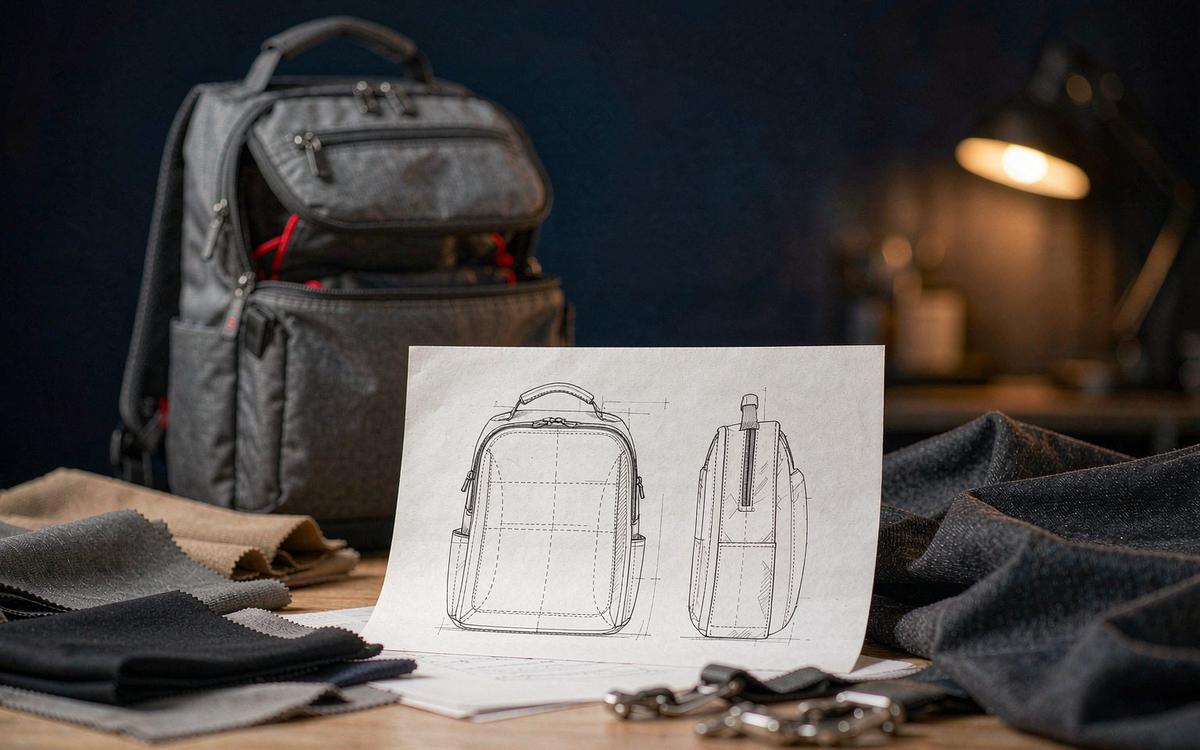
- Design backwards from the tier, not forwards from the sketch
- What the reward ladder asks of the design
- Entry tier design: small format, disproportionate impact
- Core tier design: where the engineering budget belongs
- Premium tier design: configuration over construction
- Design levers that read expensive and cost little
- Sizing, capacity and stating the method
- Colourway strategy inside one minimum
- Branding placement across the tiers
- Packaging as part of the reward design
- Misalignments that break a tier structure
- A design checklist mapped to the tech pack
Design backwards from the tier, not forwards from the sketch
Most campaign bags are designed the way products are designed for retail: start with the object, then work out what it costs. Crowdfunding does not tolerate that sequence, because the pledge price is published before the cost is known and cannot be revised afterwards. The correct sequence is inverted. Fix the pledge ladder first, derive the landed cost ceiling of each rung, then design the bag that fits inside it.
That inversion changes what a design decision means. A welded wet compartment is no longer a nice feature to consider; it is a decision that moves sampling from the 6-10 working day band into the 12-15 working day band and adds a tooling line. A second colourway is not a styling choice; it is a second 500-pcs commitment with its own dye lot. Designing backwards makes every decision legible as cost and calendar before it is committed.
The practical method is a one-page grid. Four rows for the tiers, columns for landed cost ceiling, format, key features, branding and packaging. Fill the cost column first from a three-tier quotation, then design into the space that remains. Campaigns that follow this sequence rarely need to downgrade specification after funding; campaigns that do not, routinely do.
- Minimum order quantity
- 500 pcs per style / colourway
- Sampling
- 6-10 working days (12-15 for complex builds)
- Bulk production
- 35-50 days after deposit + approved pre-production sample
- Inspection
- AQL 2.5 to ISO 2859-1
- Trade term
- FOB Xiamen
- Payment
- T/T 30/70
- Facility
- 4,950 m² SGS-verified, 137 staff, 7 lines, 149 machines
- Capacity
- 200,000 pcs per month
- Experience
- 20+ crowdfunding campaigns supported
What the reward ladder asks of the design
A three-rung ladder creates three genuinely different design briefs, and treating them as one brief scaled up and down is what produces a reward line where the entry tier feels cheap and the premium tier feels padded. Each rung has a different job, and each job implies different design decisions about format, feature count and branding.
| Rung | Job of the tier | Implied design brief | What to avoid |
|---|---|---|---|
| Entry | Convert at the lowest friction point | One idea executed cleanly; small format; minimal hardware; strongest branding placement | A stripped-down version of the hero that looks incomplete |
| Core | Carry the campaign economics | The full engineering budget: structure, compartments, hardware, reinforcement | Feature sprawl that pushes sampling to 12-15 days without adding pledge appeal |
| Premium | Raise average pledge value | The hero plus configuration: bundles, numbering, personalisation, extra modules | A second construction with its own pattern and minimum |
| Add-on | Raise average pledge with no new minimum | Small-panel items cut from the hero fabric lot | Anything needing its own hardware package or lining |
The core rung is the only one that should be expensive to engineer. It carries the volume, it is the product backers compare against retail, and it is what the campaign is remembered for. Put the structural budget there: the back panel, the load path, the compartment tolerances and the hardware. Then design the other rungs around it rather than competing with it.
Entry tier design: small format, disproportionate impact
The entry tier exists to convert, and it converts best when the object is desirable rather than merely affordable. A dopp kit, a sling, a pouch or an organiser set can be genuinely attractive in its own right at a fraction of the hero bag's cost. The failure mode is designing it as a discounted version of the hero, which reads as a compromise and converts worse than a distinct small product would.
- Give it one strong idea. A wipe-clean lining, a hanging hook, a grab handle, a mesh window. One idea executed properly beats three executed adequately.
- Keep the panel count low. Fewer panels means less labour, a lower unit cost and a simpler sampling round in the 6-10 working day band.
- Spend on the visible closure. The zip is the first thing a backer touches. A branded #5 coil zip with a decent pull is the whole perception of quality in a small bag.
- Design for the cheapest parcel band. Small format rewards should ship in the lowest tariff band available, because parcel cost dominates a low pledge.
- Make it giftable. Entry rewards are frequently bought for someone else, so the hangtag and carton matter more here than on the core tier.
The last two points are where entry-tier design is usually won or lost. A reward at USD 55 carries perhaps USD 16-24 of landed cost, and the parcel is the largest single component of that. Design the packed dimensions to a carrier tariff band and the tier becomes viable; ignore it and the tier either loses money or has to be repriced upward, which is where conversion falls.
Core tier design: where the engineering budget belongs
The hero bag is where structure, tolerance and hardware earn their cost. Three areas deserve the budget, and spending it anywhere else is usually a mistake: the load path, the compartment tolerances and the closure hardware. These are also the three areas that generate warranty claims when they are under-specified, so the money spent here is partly risk expenditure.
- Load path. Straps, attachment points, webbing and bar-tacks. Every strap should terminate in a bar-tacked reinforcement on a structural panel rather than on a facing. Bar-tack density is one of the cheapest durability additions available.
- Compartment tolerances. A laptop compartment should be specified by internal clear dimension with 8-12 mm of clearance, and suspended 10-15 mm above the base seam so a dropped bag does not drive the device corner into the floor.
- Closure hardware. Branded coil zips at #5, #8 or #10 depending on load. Reverse coil for weather resistance. Metal or moulded pulls for perceived weight, provided they are standard parts rather than bespoke tooling.
- Back panel and comfort. Where the reward is a backpack, the back panel structure is the difference between a product that gets used daily and one that gets returned.
- Reinforced base. A 900D or 1680D base panel on a load-bearing bag costs little and prevents the most visible wear failure.
Resist feature sprawl on this rung. Every additional pocket is another panel, another seam and another assembly step, and the cumulative effect is a build that moves sampling from 6-10 working days into the 12-15 band without adding anything a backer pledges for. Ask of each feature whether it appears in the campaign video. If it does not, it is costing schedule for no conversion gain.
Key takeaways for tier-aligned design
- Fix the pledge ladder first, derive each rung's landed cost ceiling, then design into the space that remains.
- Put the engineering budget on the core tier: load path, tolerances and closure hardware.
- Design the entry tier as a distinct small product, not a discounted version of the hero.
- Build the premium tier as configuration on the approved hero spec, never as a second construction.
Premium tier design: configuration over construction
The premium rung should raise average pledge value without adding a production programme. That means configuration, not construction: the same hero bag presented with additional modules, a numbered edition, personalisation, a matching accessory set, or a strap and organiser bundle. All of those are additions to an approved specification rather than new patterns with their own minimums.
Personalisation is the strongest of these and needs the most specification discipline. A per-unit identifier, monogram or name requires a data file, a check against that file during packing, and an inspection criterion to catch mismatches. Add it to the AQL 2.5 inspection criteria before production begins, because a mismatch in a personalised reward is a defect backers will find and report, and it cannot be fixed by a replacement from reserve stock.
Numbered editions need the same treatment. Specify how the number is applied, where, and how its correctness is verified during packing. Then decide the edition size against the committed volume: a numbered edition of 200 inside a 500-piece run is easy to administer, while a numbered edition that exceeds the run requires a second production and a second set of numbers to track.
Design levers that read expensive and cost little
Perceived value and unit cost are only loosely coupled in bag production. Several details cost a small fraction of the unit price and materially change how a reward is judged in hand. Spending the design budget here is the most efficient way to make a mid-cost reward feel premium, and it is also the cheapest insurance against a backer comparing the reward unfavourably with a retail equivalent.
| Lever | Perception gain | Cost impact | Sampling impact |
|---|---|---|---|
| Branded coil zip at #8 with a metal pull | High; weight in the hand reads as quality | Low; a small hardware upgrade | None |
| Dense bar-tacking at every load point | Medium; visible on inspection | Very low | None |
| Bound internal seams | High; the interior is where cheap bags show | Low to medium | None |
| Contrast lining colour | High; noticed every time the bag opens | Low if the same fabric grade is used | None |
| Woven label rather than printed label | Medium to high | Low; one-off digitisation charge | None |
| Debossed or moulded logo badge | Medium | Medium; may need tooling | Can add 3-5 days |
| Custom-moulded zip pull | Low to medium | High; tooling plus unit cost | Adds 3-5 days |
| Structured or moulded panel | Medium | High; tooling and assembly | Adds 3-5 days |
Read the last three rows carefully. They are the levers creators reach for first and the ones with the worst ratio. A custom-moulded pull is expensive in tooling, adds days to sampling, and is almost never the reason somebody pledges. Put that money into the zip chain, the bar-tacks and the internal binding instead, and the reward will be judged better by the person who actually receives it.
Sizing, capacity and stating the method
Capacity claims are the most frequently disputed specification in crowdfunding bags, because there is no single agreed method and backers with a measuring jug will test the number. State the method in the tech pack and test it on the physical sample with a repeatable fill. Whether a 28 L bag measures 28 L depends entirely on whether the measurement includes external pockets, the laptop compartment and the volume under a rolled top.
State external dimensions in centimetres alongside the capacity figure, and photograph the bag next to a known object. For device compartments, give the internal clear dimension rather than the nominal screen size. For travel formats, state both the packed-flat and the expanded dimensions, because the compressibility claim is often the reason the reward was pledged for.
Then verify all of it on the second sampling round, not on the first. The first round settles structure and the second settles the finished object, which is when dimensions are final. Recording the measured figures against the approved sample gives the inspection a reference and gives the campaign page a number that has been checked.
Colourway strategy inside one minimum
Colour variety is the most requested and most expensive design decision in a reward line. The minimum is 500 pcs per style and per colourway, so two colours of one bag is a 1,000-piece commitment with two dye lots and two trim packages. For most first campaigns the better structure is one hero colourway plus accessories that share the fabric buy and deliver variety through shape and function rather than through colour.
Where a second colourway is genuinely required, three rules keep it affordable. Use the same fabric grade and the same hardware finish so only the dye changes. Keep the lining consistent across both colourways so the trim package does not double. And place the second colourway in a stretch goal or a re-order rather than in the launch commitment, so the campaign only commits once demand is proven.
Backer-selected colour introduces a third problem, which is allocation. If backers choose colour after funding, the run has to be split before production starts, and the split has to respect the minimum in each colourway. Decide whether colour selection happens at pledge time or in a post-campaign survey, and make sure the survey result cannot produce a split below 500 pcs in any one colourway. Our page on low MOQ bag production for creators covers the arithmetic of splits in more detail.
If backers choose colour after funding and the split lands at 380 and 120, the second colourway is below the 500-pcs minimum and cannot be produced as planned. Either collect colour at pledge time, or design the survey so the outcome cannot fall below 500 pcs in any colourway. Decide this before the campaign launches, not after the survey closes.
Branding placement across the tiers
Branding is where tier differentiation can be achieved at almost no production cost, because a different placement or a different method does not create a new style. The hero can carry an embroidered mark, the entry accessory the same mark as a woven label, and the premium bundle an additional debossed badge. All three share one logo file, one digitisation charge and one set of colour references.
- One artwork, three executions. Embroidery on the hero, a woven label on accessories, a printed carton on the premium. Digitisation is a one-off charge per logo, not per placement.
- Placement drives cost through access, not through size. A mark on an internal facing that must be applied before assembly costs more than the same mark applied to a finished panel.
- Screen count is charged per colour per placement. A two-colour print in three positions is six set-ups, not one.
- Registration matters on small items. A mark that reads well on a backpack may be unreadable on a pouch at the same size. Check it on the physical sample at actual size.
Check every branding decision on the physical sample at actual size and at arm's length, because artwork that reads well on a screen frequently disappears on a textured fabric. Photograph the result under daylight rather than under studio light, since that is closer to how a backer will see it.
Packaging as part of the reward design
Packaging belongs in the tech pack, not in the freight conversation. It drives the landed cost through volumetric weight, it drives the unboxing experience that determines first impressions, and it determines whether the parcel sits in a cheap carrier tariff band. Design it alongside the bag rather than after it.
| Decision | Effect on landed cost | Effect on backer experience | Sampling note |
|---|---|---|---|
| Polybag and hangtag only | Lowest; smallest packed volume | Functional but unmemorable | Confirm the carton size in round two |
| Printed sleeve or belly band | Low; adds one print item | Meaningfully better shelf and unboxing presence | Artwork needed before sampling round two |
| Printed mailer carton sized to a carrier band | Low to medium; avoids a surcharge band | Strong; sets expectations before opening | Test the fit with the packed unit |
| Rigid gift box | High; adds volume and weight | Premium, suits a numbered edition | Check ISTA 3A transit performance |
| Flat-pack with detachable straps | Lowest; up to 40% less volume | Adds an assembly step to document | Confirm folded dimensions on the sample |
The third row is the best value in the table. A mailer carton dimensioned to sit inside a carrier tariff band can cost less overall than an oversized plain carton, because the tariff band penalty on an oversized parcel exceeds the print cost of a right-sized one. Confirm the fit with the actual packed unit during sampling, not from a drawing.
For fragile or structured formats, ask about ISTA 3A transit testing on the packed parcel. It is a standard test method for individual parcel shipments and it is the only way to know whether a rigid box survives the last mile intact. Book it during sampling alongside any compliance testing the destination market requires. Coordinate all of this with your rewards fulfilment plan before the pre-production sample is signed.
Misalignments that break a tier structure
Six misalignments account for most reward-tier failures, and all six are visible in a one-page cost grid if the creator builds one before designing. They are listed here as a diagnostic: if a reward structure shows one of these symptoms, the fix is a design change, not a marketing change.
- The entry tier costs too much to ship. The landed cost is fine but the parcel is not. Redesign to a smaller packed format rather than raising the pledge.
- The premium tier is a second construction. It carries its own minimum and its own sampling rounds. Convert it to a bundle on the hero spec.
- The core tier cannot be produced in the window. Feature sprawl has pushed sampling to 12-15 working days. Remove features that do not appear in the campaign video.
- Every tier uses a different fabric. Three dye lots, three trim packages, three set-ups. Consolidate onto one lot and differentiate by configuration.
- Capacity claims exceed the physical product. State the method, test it on the sample, and publish the figure that was measured.
- Colour selection happens after funding. The split can fall below 500 pcs in a colourway. Collect colour at pledge time.
A design checklist mapped to the tech pack
Close the design phase by converting every decision into a line in the tech pack. If a decision is not in the tech pack, it cannot be quoted accurately, sampled consistently or inspected against. The checklist below is the bridge between the design grid and the production document.
- Per tier: format, external dimensions, capacity with the stated method, and the landed cost ceiling it must fit.
- Materials: shell denier and coating, lining, base panel, webbing width and hardware finish.
- Hardware: zip type and gauge, buckle break strength, pull specification, and whether any part needs tooling.
- Construction: panel count, seam type, reinforcement and bar-tack positions, binding or taping.
- Branding: method per tier, placement, artwork format, colour count and the resulting screen or digitisation charges.
- Packaging: polybag, hangtag, carton dimensions, carrier band target and flat-pack decision.
- Compliance: destination market and the standards that apply, booked during sampling.
With that document a production partner can return fabric options, a three-tier unit cost band and a sampling window that reflects the actual build. Submit it through the quote request form with the pledge ladder attached, so the design can be tested against the prices you intend to publish. For category-level starting points see custom bag categories, for structural guidance read how to design a backpack that funds, and for the verification side see kickstarter campaign bag QA and QC.
Build a grid with a row for each tier and columns for landed cost ceiling, format, key features, branding and packaging. Fill the cost column first from a three-tier quotation, then design into the space that remains. Campaigns that design this way rarely need to downgrade specification after funding.
- Custom Bags for Kickstarter — campaign sourcing hub
- Custom bag categories and reward formats
- Custom backpacks for Kickstarter campaigns
- Low MOQ bag production for creators
- Crowdfunding rewards fulfilment planning
- Kickstarter campaign bag QA and QC
- Request a campaign bag quotation
- More campaign sourcing articles
Test the tier design against real costs
Send the reward grid, target quantity and launch date. You receive fabric options, a three-tier unit cost band per rung and the sampling window for each design within one business day.
Frequently Asked Questions
How should a creator design a bag reward for an entry pledge tier?
Design it as a distinct small product rather than a discounted version of the hero. A dopp kit, sling, pouch or organiser set with one strong idea, a low panel count and a branded #5 coil zip converts better and ships in the cheapest parcel band.
Where should the engineering budget go on a hero bag?
On the load path, the compartment tolerances and the closure hardware. Bar-tack every strap attachment to a structural panel, specify laptop compartments by internal clear dimension with 8-12 mm clearance, and use branded coil zips at #5, #8 or #10 depending on load.
Should a premium reward tier be a different bag?
No. It should be a configuration of the hero: bundles, extra modules, numbering, personalisation or accessory sets. A second construction carries its own 500-pcs minimum, its own pattern and its own sampling rounds, which endangers the delivery date for no conversion gain.
How should capacity be stated on a campaign page?
State the method and test it on the physical sample with a repeatable fill. Whether a bag measures 28 L depends on whether external pockets, the laptop compartment and roll-top volume are included. Publish external dimensions alongside the figure so backers have something checkable.
Can a campaign offer backer-selected colours?
Yes, but collect the choice at pledge time. If selection happens in a post-campaign survey, the split can land below the 500-pcs minimum in one colourway and that colour cannot be produced as planned. Either fix the split at pledge or design the survey so no colourway falls below 500.
What are the cheapest ways to make a reward feel premium?
Hardware weight, dense bar-tacking, bound internal seams and a contrast lining. Each costs a small fraction of unit price and each is noticed in hand. Custom-moulded pulls and structured panels have the worst ratio: high tooling cost, three to five extra sampling days, and little effect on pledging.
Does a different branding placement create a new minimum?
No. A different placement or method on the same construction is not a new style, so it does not carry a new 500-pcs commitment. A different pattern, closure system or internal structure does. One logo file can serve embroidery on the hero and a woven label on accessories.
How is screen printing costed on a bag reward?
Per colour per placement, so a two-colour print in three positions is six set-ups rather than one. Embroidery carries a one-off digitisation charge per logo, reusable on re-orders. Placement also affects cost through access, because a mark applied before assembly costs more than one applied to a finished panel.
When should packaging be designed?
Alongside the bag, and specified in the tech pack. Carton dimensions drive volumetric weight and determine which carrier tariff band the outbound parcel falls into, so a right-sized printed mailer can cost less overall than an oversized plain carton.
What testing should accompany a packaged reward?
ISTA 3A transit testing for individual parcel shipments, particularly for rigid boxes or structured formats, booked during sampling. Compliance testing for the destination market runs in parallel: CPSIA, REACH, Prop 65, OEKO-TEX Standard 100 or GRS as applicable.
How many colourways should a launch reward line offer?
One. Each colourway is a separate 500-pcs commitment with its own dye lot and trim package, so two colours doubles the commitment. Deliver variety through accessories cut from the shared fabric lot, and hold additional colourways for a stretch goal or re-order.
What is the most common reward-tier design mistake?
Designing the product first and costing it second. The pledge is published before the cost is known and cannot be revised, so fix the ladder first, derive each rung's landed cost ceiling from a three-tier quotation, then design into the space that remains.
How should personalisation be specified on a premium tier?
As a production step: a data file, a check against that file during packing, and an inspection criterion at AQL 2.5 to catch mismatches. Personalisation is the strongest premium anchor available, but a mismatch cannot be fixed from reserve stock, so verification has to be built in.
What belongs in a tech pack for a three-tier reward line?
Per tier: format, dimensions, capacity with method and cost ceiling. Shared: materials with denier and coating, hardware with gauge and break strength, construction notes, branding method per tier, packaging format, and the compliance standards for the destination market.
People Also Ask
How do I design a reward bag that fits my pledge price?
Work backwards. Fix the ladder, derive each rung's landed cost ceiling from a three-tier quotation at 500 pcs, then design the format, features and packaging that fit inside it.
Should my cheapest reward be a smaller version of my main bag?
Usually not, because it reads as a compromise. A distinct small product with one strong idea converts better and ships in a cheaper parcel band than a scaled-down hero.
What makes a bag feel premium without raising costs much?
Hardware weight, dense bar-tacking at load points, bound internal seams and a contrast lining. All are cheap per unit and all are noticed immediately in hand.
Can I let backers choose the colour after the campaign?
Only if the resulting split cannot fall below 500 pcs in any colourway. Safer to collect colour at pledge time, otherwise one colour may be unproducible at the minimum.
How do I state bag capacity without backers disputing it?
State the measurement method, test it on the physical sample with a repeatable fill, and publish external dimensions alongside the litre figure so the claim is checkable.