Tech Bag Branding for Kickstarter: TPU Prints, Embroidery, RFID
Tech audiences reward restraint. The strongest branding on a laptop bag is usually one confident mark plus two quiet details, not a logo repeated on five panels. Choose the route by surface and audience: embroidery on woven panels, heat transfer or TPU film on coated surfaces where needles would perforate a coating, and a hidden touch such as a custom zipper pull or a debossed patch. Minimum quantity is 500 pcs per style and per colourway, sampling runs 6 to 10 working days, and an RFID blocking pocket typically adds USD 0.80 to 2.20 per unit.
- Why tech audiences punish loud branding
- The decoration routes available on a tech bag
- Artwork preparation: what your designer must deliver
- Embroidery: stitch economics and its real limits
- TPU films, silicone badges and heat transfer
- Screen printing, reflective and tonal options
- Hardware branding: pulls, plates and hidden details
- RFID pockets: what they do and what you can claim
- Placement rules for laptop bags and sleeves
- Colour matching and how it usually goes wrong
- How each route interacts with MOQ and cost
- Testing branding through sampling into production
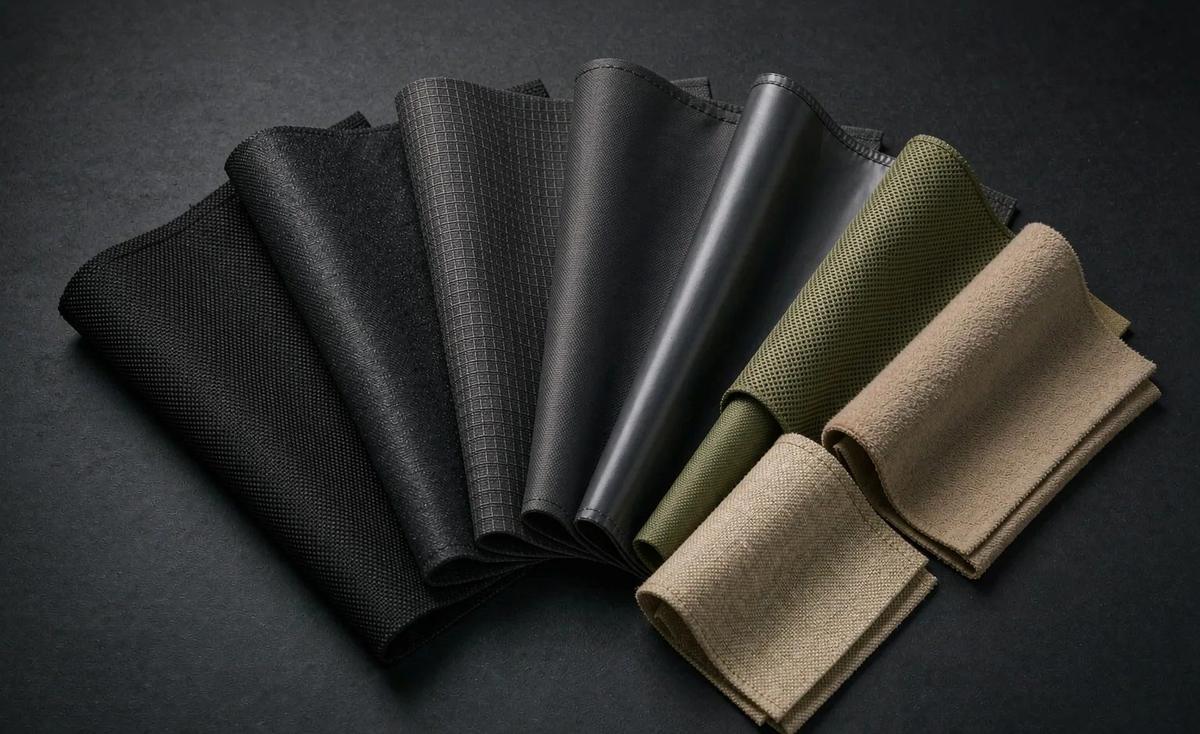
A tech campaign audience is not a general consumer audience. These backers have usually owned several bags, they read specification tables, and they are notably hostile to a product that looks like a giveaway. The practical consequence is that branding on a laptop or tablet bag should be quieter, better executed and more precisely engineered than on almost any other crowdfunding reward. Get it right and the bag becomes a piece of identity that gets carried daily for years. Get it wrong and it reads as promotional merchandise, which is the exact perception that kills repeat purchase and word of mouth.
This guide walks through every decoration route realistically available on a tech bag, what each one costs, what each one requires from your designer, and where each one fails. It also covers RFID blocking pockets, which are requested constantly, understood rarely, and priced as though they were free. Start with the construction baseline in custom laptop bags for Kickstarter, because every branding decision below assumes a defined panel structure to sit on.
Branding is the last 5 per cent of unit cost and roughly the first 50 per cent of perceived value. It deserves more engineering attention than it usually gets.
Why tech audiences punish loud branding
The economic logic behind restraint is straightforward. A tech backer already owns a premium bag or expects to justify buying one. They accept branding when it signals membership in something they respect, and they reject it when the mark dominates the object. In practice this means a large centred logo on the front of a laptop bag performs measurably worse with this audience than a small off centre mark, even though the large one is more legible in a campaign render. Legibility is not the same as desirability.
The second behavioural factor is review photography. Tech backers unbox on camera and post the interior layout. That audience inspects lining prints, zipper garage details and pull tabs, because those are the details a reviewer looks for. Spending your branding budget on the interior rather than the exterior therefore earns disproportionate attention from exactly the people whose content drives your later sales. A printed lining pattern or a debossed interior patch costs very little and appears in far more unboxing frames than a front logo.
Third, consider the secondary market signal. A bag with restrained branding holds resale value and gets used for longer, which extends the period during which your logo walks around a city. A bag that looks like conference swag goes into a cupboard in three months. If your campaign has any retail or evergreen ambition afterwards, branding restraint during the campaign protects the product's ability to sell at full price later. That is a strategic argument, and it is also the one most often ignored at concept stage.
The decoration routes available on a tech bag
Five routes cover nearly every tech bag programme. Embroidery sews thread into a woven panel and reads as durable and crafted. Heat transfer printing applies a film or ink layer under heat and pressure, suited to gradients and fine detail. TPU or silicone badges mould a raised, rubber like mark and read as premium and modern. Woven or printed labels carry small marks at low cost. Hardware branding puts the mark on metal or moulded components such as zipper pulls, end caps and buckles.
Each route has a hard physical constraint that dictates where it can be used. Embroidery requires a needle to pass through the face material, so it is unsuitable for coated waterproof fabrics where perforation would compromise the coating, and it is impossible on a moulded panel. Heat transfer requires a flat, heat tolerant face and fails on textured or heavily pebbled surfaces unless a specialist low temperature adhesive is used. Moulded badges require a sewing or bonding margin around the mark, so they need at least 8 to 12 mm of clear space beyond the logo boundary.
| Route | Indicative setup | Per unit cost | Best surface | Watch out for |
|---|---|---|---|---|
| Embroidery | USD 25 to 60 digitising | Low to moderate | Woven panel, unstructured face | Perforates coatings, poor on fine gradients |
| Heat transfer print | USD 100 to 300 per separation | Low | Flat smooth polyester or nylon | Adhesion failure on textured faces |
| TPU or silicone badge | USD 500 to 1,500 mould | Low once tooled | Flat bonded or sewn panel | Tooling only pays above roughly 1,000 pcs |
| Woven label | USD 80 to 200 setup | Very low | Any seam or interior edge | Minimum quantities often 1,000 pieces |
| Hardware branding | USD 300 to 900 die | Low to moderate | Zipper pull, end cap, buckle | Lead time on component manufacture |
Note the pattern in that setup column. Three of the five routes carry a one time charge, which means the cost logic is entirely different at 500 pcs and at 2,000 pcs. At the minimum quantity you should generally choose by total programme cost rather than per unit cost, and the arithmetic behind that is set out with real numbers in laptop bag pricing by quantity. At higher quantities the tooling routes become steadily more attractive.
Artwork preparation: what your designer must deliver
More branding errors originate in the artwork file than in the workshop. Ask your designer for a vector file, ideally AI, EPS or SVG, with all text converted to outlines and all strokes expanded. Supply Pantone references for every colour in the mark, even for processes that will not match them exactly, because a named reference gives everyone something concrete to aim at. Finally supply a single colour version of the logo, because tonal applications, embossing and debossing all require one, and converting a multi colour mark on the fly is how campaigns end up with muddy results.
- Vector original. AI, EPS or SVG with outlines created and strokes expanded, never a flattened image.
- Pantone references. One per colour, stated explicitly in the technical pack.
- Minimum reproduction size. State the smallest width in millimetres at which the mark must remain legible.
- Clear space rule. At least 8 to 12 mm around the mark for any moulded or sewn application.
- Single colour variant. Required for tonal, embossed and debossed treatments.
- Placement drawing. A dimensioned diagram showing every position measured from panel edges.
Then set a minimum stroke width. This is the specification most often missed and it explains most legibility failures. For embroidery, any element thinner than roughly 1.5 mm at final size will not hold cleanly because the needle needs somewhere to put its thread. For heat transfer, elements below about 0.5 mm can lift during application or crack in use. For a moulded badge, relief features narrower than about 1 mm tend not to fill consistently in the tool. Tell your designer these numbers before they finalise the artwork, not after.
One further practical note. If your brand exists mainly as a logotype in a light typeface, ask your designer to prepare a slightly heavier cut for physical application. Type that reads beautifully on screen frequently disappears at 25 mm on fabric, particularly in embroidery where thread direction and stitch density soften edges. Many brands quietly maintain a heavier variant for exactly this purpose, and creating one is a small investment that pays back on every physical product you ever make.
Embroidery: stitch economics and its real limits
Embroidery remains the most requested route, and it is genuinely excellent on unstructured woven panels. Cost is driven by stitch count, not by visual area, and this distinction surprises people. A dense filled block uses far more thread than a large open outline, so two logos of identical physical size can differ in cost by a factor of three or more. When our team reviews a spec for this reason, the first check is whether a filled area can sensibly become an outline, which often cuts cost with no loss of impact.
The second driver is size relative to the panel. Embroidery pulls the fabric. On a large unstructured front panel, a dense logo can create visible puckering and halo unless the panel is stabilised or the stitch density is reduced. Solutions include adding a backing stabiliser, reducing density, or relocating the mark to a structurally supported area. All three work, all three cost almost nothing, and all three must be decided during sampling rather than after the first inspection.
- Digitising is one time per size. USD 25 to 60 typically, and every size change needs a fresh file.
- Stitch count drives cost. Ask your partner for the count; 5,000 and 15,000 stitches are very different products.
- Under 1.5 mm strokes struggle. Simplify thin elements or the result will look ragged at close range.
- Gradients do not embroider. Thread cannot blend like ink; reduce to flat colour separations.
- Placement near seams is risky. Keep at least 15 mm from any seam edge for machine clearance.
- Always approve a physical strike off. A digital preview will not reveal puckering or halo.
A physical strike off is non negotiable for embroidery. Request it on the actual production fabric in the actual production colourway, because stitch behaviour varies substantially with coating and weave. When our sourcing partner prepares strikes off, we ask for two variants whenever the mark is borderline: one at the requested density and one slightly reduced. Looking at them side by side under normal lighting answers in seconds what an email thread will take days to resolve.
TPU films, silicone badges and heat transfer
TPU has become the default premium finish on modern tech bags for good reason. It is flexible, quiet in handling, resists cracking far better than older PVC based prints, and can be produced matte, satin or gloss to sit deliberately against the base fabric. A matte TPU badge on a matte woven face is one of the most effective restrained treatments available, because the mark is visible by relief and slight sheen contrast rather than by loud colour.
Two application methods matter. Heat applied film bonds directly to the face fabric under temperature and pressure, typically around 140 to 160 degrees Celsius for 10 to 15 seconds depending on the adhesive system, and gives a very low profile result. Sewn or bonded badges are separate components attached to the panel, giving higher relief but requiring a margin. The film route costs far less to set up; the badge route reads as more premium and survives abrasion better over years of contact with chair backs and desk edges.
Ask specifically about wash and abrasion performance, because this is where cheap TPU fails. Poorly specified film delaminates at the edges after repeated flexing, and once an edge lifts it picks up dirt and looks like a manufacturing defect. A reasonable specification requires resistance to repeated laundering or cleaning cycles with no edge lift, plus a peel strength expressed in newtons. Our team specifies these numbers in the technical pack and verifies them on the second round sample rather than the first construction sample.
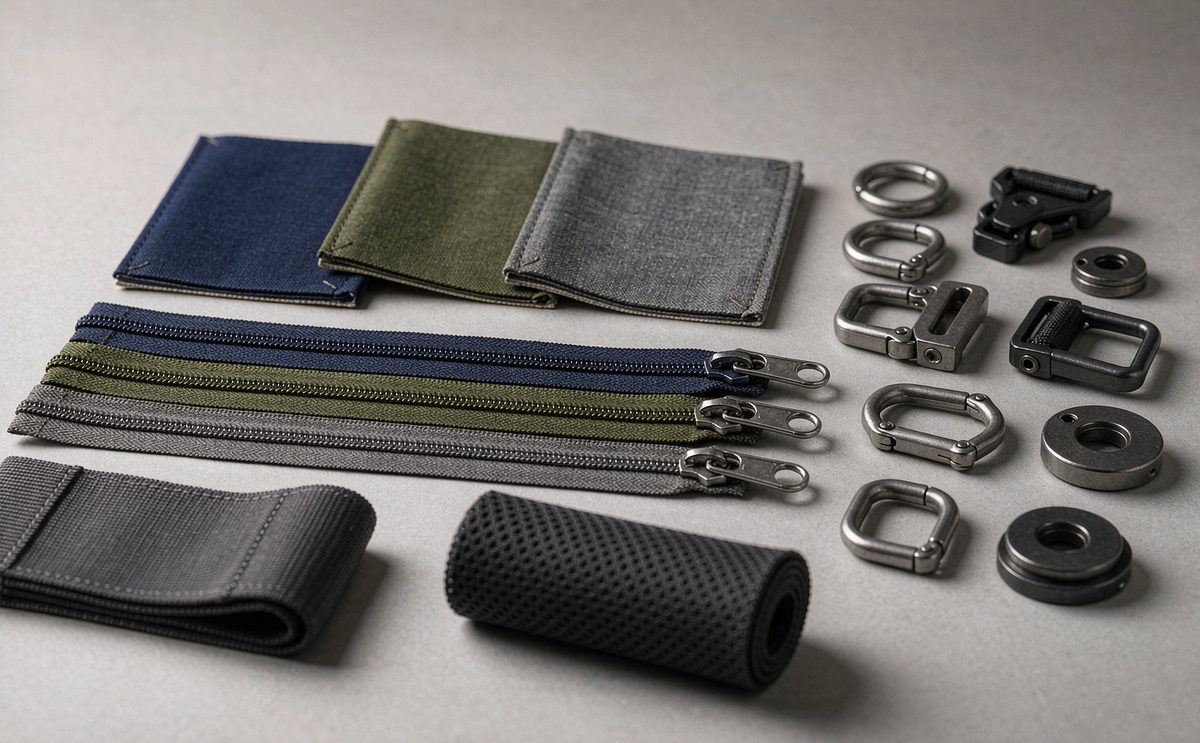
Silicone badges behave similarly but softer and thicker, with better grip and a more tactile result. They are excellent on grab handles and strap pads, where the tactile quality adds functional value. The trade off is weight and cost: silicone is heavier per unit area, and on a bag where weight is scrutinised because the backer is already carrying a heavy machine, a few grams across a large badge is not nothing. Keep silicone small and functional; use film or TPU for anything large.
Screen printing, reflective and tonal options
Screen printing is the workhorse of simple marks on flat panels, and it is still the right answer for many campaigns. Its economics favour larger quantities and fewer colours, since each colour separation adds setup cost and each print pass adds handling. For a two or three colour mark on a smooth polyester face, nothing competes on cost per unit. Its weakness is fine detail and gradients, both of which need either halftone screening, which produces visible dot structure, or a switch to transfer printing.
Tonal and monochrome printing deserve particular attention for this audience. Printing the logo in a shade two or three steps darker than the base fabric produces a ghosted effect that photographs beautifully and reads as sophisticated rather than promotional. It is also highly forgiving of small registration errors, because nobody can see where a nearly invisible mark was slightly off. If your brand identity can survive the loss of colour, tonal printing is often the single best value decision available to a tech bag campaign.
Reflective transfer is functional rather than decorative, and it earns a place on a commuter bag. Applied correctly to the front panel and at least one side, reflective detail raises visibility for a cyclist or a walker at night. The important word is correctly: reflective transfer must sit where a headlight hits it from multiple approach angles, which usually means a vertical element rather than a horizontal one and coverage on both sides of the bag. A reflective logo on the front panel alone does very little.
Hardware branding: pulls, plates and hidden details
Hardware is the most underused branding surface on a bag and frequently the most valued. A custom zipper pull costs USD 300 to 900 in tooling for a standard shape, adds a small per unit cost, and touches the backer's hand every single time they open the bag. Repetition of contact is what builds brand memory, and few other placements achieve it. Options range from a moulded rubber pull with your mark debossed into it, through a metal pull with an etched logo, to a pull tape with your wordmark woven into it.
Debossed synthetic leather patches are the second high value route. They sit where a traditional leather patch would sit, they sew on cleanly, they do not raise animal material questions, and they age attractively. Minimum sizes matter here: below roughly 35 by 20 mm a debossed patch loses legibility, so this route suits a compact mark rather than a full logotype. Colour-wise, a patch one or two tones darker than the body fabric reads as deliberately contrasting and premium, and it hides scuffs better than a light patch does.
A warning on metal logo plates. They look excellent in renders and can disappoint in use. A rigid plate on a soft panel creates a pressure point, which matters more than usual on a laptop bag because the object strapped next to it is exactly the kind of thing that does not enjoy being pressed. If you use metal, place it away from the laptop bay, use it small, and ensure all edges are radiused and smooth to touch. Then check this on the second sample, not in the render.
RFID pockets: what they do and what you can claim
RFID blocking is requested on most tech bag briefs and understood by very few. The technology is simple: a layer of metallic or metallised fabric forms a partial Faraday cage around the pocket contents, attenuating radio energy at the frequencies used by contactless payment cards and passports, typically around 13.56 MHz for NFC based credentials. Constructed properly, a reader held against the closed bag fails to read the card. Constructed sloppily, energy leaks around a scant seam or an unshielded edge and the pocket does nothing at all.
Complete enclosure is the requirement, and this is where cost is genuinely incurred. Every seam on the shielded pocket needs to be either overlapped, conductively bound, or covered by a folded continuation of the shielding layer. A pocket assembled with standard single pass seams will usually leave a leakage path at each corner. Our team recommends specifying the shielded pocket as a fully bound sub assembly, with the lining extending at least 10 mm beyond every sewn edge, which adds material and labour but produces a pocket that actually performs.
- Typical added cost per pocket
- USD 0.80 to 2.20 depending on coverage and size
- Shielding material
- Metallised non woven or copper nickel polyester laminate
- Target frequency
- Around 13.56 MHz for NFC credentials
- Critical construction rule
- Full enclosure with every seam overlapped or bound
- Test method
- Reader held against the closed pocket fails to read
- Recommended protection
- Screening is one control, not a guarantee against determined theft
On claims, be careful and be honest. A shielded pocket makes casual electronic pickpocketing materially harder, which is the accurate benefit. It is not a guarantee against a determined attacker with a high power reader, and it does nothing about physical theft, which remains overwhelmingly the larger risk for anyone carrying a laptop. State the benefit accurately, avoid language that implies absolute protection, and do not rely on regulatory compliance claims you have not actually tested against. Have your own adviser confirm what wording is defensible in your target markets.
Test before production, not after. The practical protocol is elementary: place a contactless card in the shielded pocket, close the bag, and attempt a read from several distances and angles with a reader at normal power. Then test an empty pocket adjacent to a shielded one to check for cross talk gaps. Run this on the second round sample and during pre shipment inspection, because shielding degradation from a material substitution is invisible to the eye and invisible to a standard AQL 2.5 appearance check.
Placement rules for laptop bags and sleeves
Placement should follow how the object is carried and touched, not how it is photographed. On a backpack, the strongest positions are the upper third of the front panel, the top webbing handle, and either shoulder strap. Skip the lower third of the front panel, which contacts chair backs and car seats constantly and abrades faster than any other area. On a shoulder messenger bag, the flap closure and the base corner are read most often, along with the strap pad, which sits against clothing and therefore benefits from a soft branded application.
On a laptop sleeve, which is flat and often carried inside another bag, external branding is largely pointless. The audience for a sleeve is buying protection and minimalism. Put your mark inside: a branded loop label at a seam, a printed lining, or a debossed patch at the interior edge near the opening. Those are seen every time the machine comes out, which is precisely when attention is highest, and none of them compromises the clean appearance that drew the buyer to the sleeve in the first place.
- Count the positions. Three placements maximum on a laptop bag, two on a sleeve.
- One hero, two supporting. One prominent mark, and two subtle ones in low contrast.
- Avoid the laptop bay panel. Nothing hard or raised belongs against the machine it protects.
- Interiors are undervalued. Linings, hold loops and edge labels appear in every unboxing video.
- Symmetry is not mandatory. An off centre small mark often reads better than a centred large one.
Finally, remember that fit is a branding decision. Nothing damages a brand more than a bag advertised as fitting a 16 inch machine that arrives 4 mm short. Write the largest supported device into your copy, put the internal dimension in millimetres into the technical pack, and have the bay checked against that exact model during inspection. The protection protocol and measurement routine are covered fully in laptop bag quality testing.
Colour matching and how it usually goes wrong
Colour matching fails in three predictable ways. First, matching a Pantone reference onto a textured or coated fabric is inherently approximate, because the reference assumes a flat coated surface and your panel does not have one. Second, dyed fabrics vary between dye lots, and a reorder six months later will not be an exact match unless the lot is referenced and retained. Third, transfer and print colours sit on top of the base colour, so a white ink on charcoal differs visibly from the same mark on black, even from the same file.
The workable process has four steps. Approve a physical reference swatch in writing rather than a photograph. Request a strike off or printed proof on production material and approve it physically. Record the dye lot and material batch on the approval document. Then, for any reorder, require cross checking against the retained approval sample in the same lighting conditions. Our standard tolerance conversation references a commercially acceptable match within a stated tolerance, rather than an exact match, because exactness is not achievable on fabric and pretending otherwise just shifts the argument to later.
Where your brand depends critically on colour accuracy, design around the constraint instead of fighting it. Use standard thread colours and standard film colours from the supplier's existing range rather than custom matching, since stocked colourways are inherently more consistent and faster. Alternatively use construction to signal brand: a distinctive panel arrangement, a signature webbing colour or a specific zipper treatment can carry identity more reliably than a perfectly matched corporate hue ever will. Every branding route above is verified during crowdfunding bag sample prototyping, where the strike off, the placement drawing and any RFID shielding test should be recorded before production is booked.
How each route interacts with MOQ and cost
Every decoration choice interacts with the 500 pcs per style and per colourway minimum, mostly through its own component minimums rather than through the bag quantity. Woven labels commonly carry a 1,000 piece minimum, so labelling a 500 unit run often means paying for 1,000 labels and holding 500 for the reorder. Custom branded zipper tape frequently carries minimums well above your order. Custom moulded badges have tooling rather than material minimums, so their constraint is cash rather than quantity.
Our practical guidance by quantity band is as follows. At 500 pcs, favour embroidery and heat transfer, both of which carry modest setup and no heavy tooling, and accept that features like leather patches or a second colourway are difficult to fund. At 1,000 pcs, most TPU and silicone tooling becomes sensible, since a USD 900 die adds under USD 1.00 per unit here. At 2,000 pcs and above, custom hardware such as moulded pulls and branded buckles is comfortably affordable and adds noticeable perceived value.
There is also a timing cost that rarely appears in a quote. Custom components extend lead time because the component itself must be produced before the bag can be assembled. A metal pull can add one to two weeks to the calendar. Against a sampling window of 6 to 10 working days for standard builds or 12 to 15 working days for complex ones, and a bulk window of 35 to 50 days, that extra time is usually absorbed inside the 50 day production figure, but it can push you toward the upper bound. Plan it in rather than discovering it.
Testing branding through sampling into production
Branding should be verified on the same sample rounds in which you verify construction. Use the first sample to confirm that the chosen route is physically possible: does embroidery pucker this panel, does film adhere to this coating, does the moulded badge sit flat on this curvature. Use the second sample to confirm appearance against production materials, including the strike off, the colour reference and the placement drawing measured in millimetres from panel edges. Only then should you sign the sample approval that locks the specification.
- Route trial. Confirm the method physically works on the real face fabric and panel structure.
- Strike off approval. Approve a physical proof on production material in production colourway.
- Placement measurement. Every position measured in mm from stated panel edges, recorded.
- Durability check. Abrasion, flex and cleaning cycles appropriate to the method.
- RFID verification. Reader test against the closed pocket at multiple angles and distances.
- Written approval. Every element recorded on the sample approval document before production starts.
Then keep the loop closed in production. Branding defects are appearance defects under AQL 2.5 to ISO 2859-1, which means they are counted and classified like any other. Add branding to your critical dimension checklist: centred within tolerance, correct orientation, no edge lift, no loose threads, no mis registration beyond a stated limit in millimetres. Include the approved sample photographs in the inspection reference set, because a written description of a tonal logo is far less useful to an inspector than a picture.
Key takeaways
- One strong mark plus two quiet interior details outperforms five loud placements with a tech audience every time.
- Every decoration route that touches an RFID claim needs a physical test in sampling, because shielding failure is invisible in appearance inspection.
Build a branding spec your backers will not hide
Send us your vector artwork, the Pantone references, your target positions in millimetres and your target quantity. As your production partner we will recommend the routes that suit your surface and budget, quote the tooling, and return samples at 6 to 10 working days with a booked 35 to 50 day production window inspected to AQL 2.5. Write to service@junyuanbags.com.
Frequently Asked Questions
What is the best logo method for a laptop bag?
For most tech campaigns, embroidery or a tonal heat transfer on an unstructured panel offers the best balance of cost and restraint. TPU badges suit a premium positioning once you are above roughly 1,000 pcs. Avoid anything raised or rigid on the panel adjacent to the laptop bay, because it creates a pressure point against the machine.
How much does a TPU logo typically add to unit cost?
A heat applied TPU film carries modest setup around USD 100 to 300 and a low per unit application cost. A moulded TPU or silicone badge carries tooling of USD 500 to 1,500 but a low unit cost once tooled. At 500 pcs the film route is usually better value; above about 1,000 pcs the badge becomes competitive.
How many logo positions should a laptop bag have?
Three maximum, structured as one hero mark and two subtle supporting touches. Tech audiences read excessive branding as promotional merchandise. Prioritise an interior position, because every unboxing video and every machine extraction exposes it, and interiors get more genuine attention than another external logo.
Does an RFID pocket actually work in a bag?
Yes when the shielding fully encloses the pocket, including seams. Every seam must be overlapped, conductively bound or continued as a folded shielding layer, because even a small gap creates a radio leakage path. Test it physically with a reader at several angles before production rather than trusting the material specification alone.
How much does an RFID blocking pocket add per unit?
Indicatively USD 0.80 to 2.20 per unit depending on pocket size and construction method. The cost sits mostly in the extra lining material and the additional labour for binding rather than in the shielding fabric alone. Fully bound sub assembly construction costs more and is usually the version worth specifying.
Can I put embroidery on any bag fabric?
No. Embroidery perforates the face material, so it is unsuitable for coated waterproof fabrics where the coating provides water resistance, and impossible on moulded panels. It works well on unstructured woven panels. Keep elements wider than about 1.5 mm and accept that gradients cannot be reproduced in thread.
What artwork files do I need to supply?
Vector AI, EPS or SVG, with text converted to outlines and strokes expanded. Supply Pantone references for every colour, a minimum reproduction width in millimetres, a single colour variant for tonal and embossed applications, and a dimensioned placement drawing showing each position measured from panel edges.
How do I avoid embroidery puckering the panel?
Reduce stitch density, add a backing stabiliser, or relocate the mark to a structurally supported area near a seam or panel edge. All three are cheap fixes that must be chosen during sampling. Always approve a physical strike off on the production fabric, because a digital preview will not reveal puckering.
Are custom zipper pulls worth the tooling cost?
Frequently yes, because the pull is touched every time the bag is opened and that repetition builds brand memory. Tooling runs USD 300 to 900 for a standard shape. Below 500 pcs it is hard to justify; above 1,000 pcs it usually pays back in perceived value and costs well under USD 1.00 per unit.
What MOQ applies if I want two colourways with different logos?
Each colourway is a separate 500 pcs commitment per style. A variant swap within a single production run can sometimes be agreed at quotation stage when only one or two panels differ. If the logos differ, decoration is straightforward, but if dyed lots differ, each carries its own material minimum.
How long does custom branding add to the schedule?
Sampling itself runs 6 to 10 working days, or 12 to 15 for complex builds, and bulk production runs 35 to 50 days. Custom hardware such as metal pulls typically adds one to two weeks because components must exist before assembly begins. That usually fits inside a 50 day window but pushes you toward its upper bound.
How is branding quality checked during inspection?
Treat branding as an appearance defect class within AQL 2.5 to ISO 2859-1. Set numeric tolerances for centring, rotation, edge lift and colour shift, state them in millimetres, and give the inspector reference photographs from the approved sample alongside the written specification.
People Also Ask
Which is better for a tech bag, embroidery or TPU?
Embroidery suits unstructured woven panels and lower quantities; TPU suits a clean modern look and becomes cost effective around 1,000 pcs. Both can look restrained and premium. The deciding factor is usually the face material and whether a needle can pass through it without ruining a coating.
Do I really need an RFID blocking pocket?
Backers ask for it, so it has marketing value, but build it properly or skip it. A partially shielded pocket performs no better than none and adds weight. Fully bound seams with at least 10 mm overlap are the standard we recommend when the feature is specified.
How small can my logo be and still read?
As a working rule, keep embroidery elements above 1.5 mm wide and moulded relief features above 1 mm. Below those figures the mark loses definition at normal viewing distance, especially in thread, where stitch density softens every edge.
Does branding affect the laptop protection claim?
It can. Anything rigid or raised located on the panel adjacent to the laptop bay creates a pressure point against a device designed to dislike pressure. Keep heavy marks away from that panel, radius all metal edges, and verify on the second sample rather than in a render.
Should I brand the outside of a laptop sleeve?
Usually not. Sleeve buyers choose the product for protection and simplicity. Interior placements such as a woven loop label at a seam, a printed lining or a debossed edge patch are seen whenever the machine is removed, which is the moment of highest attention.
Can I match my exact brand colour on fabric?
Not exactly. Coated and textured fabrics scatter light differently than a flat reference book. Approve a physical strike off on production material, record the dye lot, and use stocked thread or film colours where accuracy matters, since those are inherently more consistent.
What is the cheapest way to look premium?
Tonal printing one or two shades darker than the body fabric. It photographs well, reads as sophisticated rather than promotional, and is forgiving of small registration errors because differences between the mark and the ground are hard to see.