Kickstarter Tech Bag Sampling: Testing Padded Compartments and Zips
A sampling round on a tech bag exists to answer two questions with measurements rather than impressions: does the padded compartment protect and fit the device it claims to, and will the zips survive the life of the product. Everything else in the round supports those two. Sampling runs 6-10 working days for a standard build and 12-15 for a complex one, and the campaigns that finish in one round are the ones that arrive with a written test list. production 35-50 days after deposit and approved sample.
- What a sampling round is actually for
- Round one: the construction sample and geometry check
- Testing the padded compartment: measurable checks
- Zip selection, cycle testing and failure modes
- Fit testing with real devices
- Load, carry and closure testing on the sample
- Documenting mark-up: writing a revision list that works
- Round two and the pre-production sample
- Timing: 6-10 days, 12-15 days and what pushes a build over
- The cost of sampling rounds and revision discipline
- From approved sample to bulk release
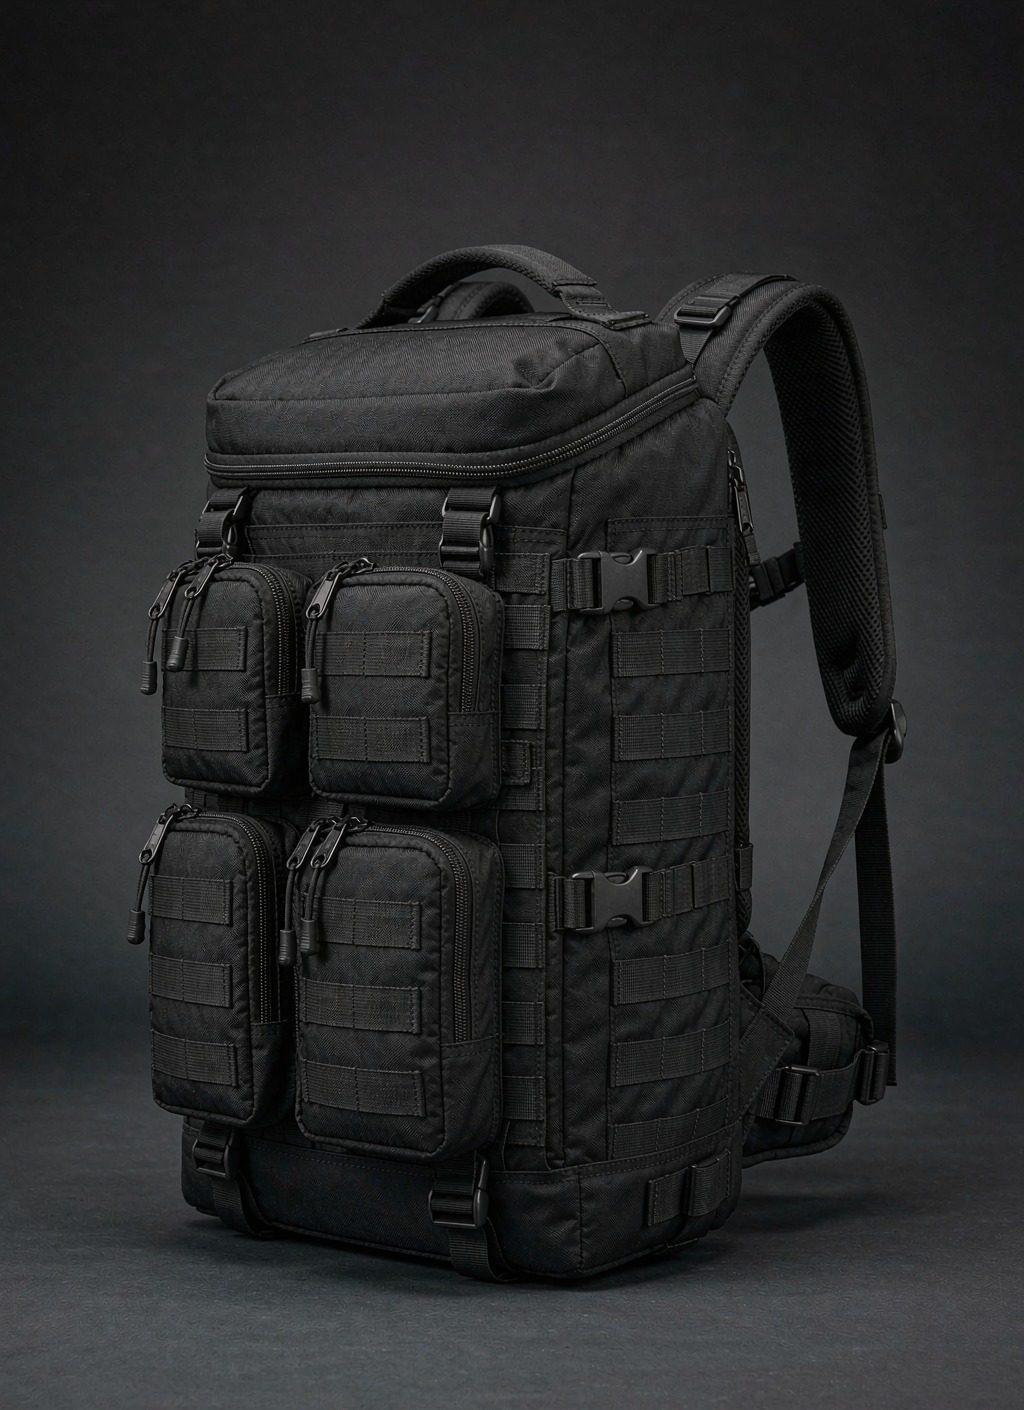
What a sampling round is actually for
A sampling round is not a preview and it is not a photograph opportunity, although it is useful for both. Its purpose is to convert a written specification into a physical object and then check whether the two agree. That is a narrower job than most creators assume, and defining it narrowly is what keeps the round short. A round that is asked to settle the design, the branding and the price at once will not settle any of them.
On a tech bag the job narrows further, because two assemblies account for most of what can go wrong. The padded device compartment has to fit a specific machine within a few millimetres and protect it from a specific impact. The zips have to open and close thousands of times under load, on curved panels, often in dusty conditions. Everything else, from webbing to pocket count, is secondary and can be adjusted without another round if it is measured correctly the first time.
Framing the round that way changes how a creator prepares. Instead of waiting for the sample and then deciding whether it feels right, the creator arrives with a test list: a device to insert, dimensions to measure, a load to apply, a cycle count to run. That list is what makes a single round possible, and it is the difference between a six-day sampling window and a six-week one with three rounds inside it.
There is also a commercial reason for the discipline. production 35-50 days and the clock starts at sample approval, so every additional round is added directly to the delivery promise the campaign made to backers. A sampling process that needs three rounds where one would do costs a month of calendar, which on a crowdfunding campaign is a serious and entirely avoidable problem. Our crowdfunding bag sample prototyping page sets out how the round structure and approval gate are organised.
Round one: the construction sample and geometry check
The first sample is a construction sample, and it should be evaluated as one. It is built to confirm geometry, panel layout and assembly sequence, not to confirm colour, branding or finishing. Evaluating it on the wrong criteria produces a revision list full of items that were never in question and misses the two that were. Expect the first sample to be roughly right in shape and unfinished in detail, and judge it accordingly.
The geometry check is a measurement exercise. Measure every dimension the campaign intends to publish: internal device compartment width, height and depth, external dimensions, capacity if it is claimed, empty weight and strap length at its adjustment range. Write each measured figure next to the specified figure in a single table, because a table of differences is a revision list that can be actioned in one pass and a paragraph of impressions cannot.
| Dimension | Specified | Measured | Action if out of tolerance |
|---|---|---|---|
| Device compartment internal width | Stated in mm | Measured | Adjust the sleeve pattern; affects the panel layout |
| Device compartment internal height | Stated in mm | Measured | Adjust the sleeve pattern and retention strap |
| Device compartment internal depth | Stated in mm | Measured | Adjust the gusset; check a cased device still fits |
| Sleeve base suspension | 15-20 mm | Measured | Add a false bottom; the cheapest drop protection available |
| Padding thickness on both faces | 5-8 mm typical | Measured | Confirm material and lamination; padding is quietly reduced |
| External dimensions | Stated in mm | Measured | Check against any carry-on frame the campaign claims |
| Empty weight | Stated in g | Weighed | Publish the measured figure, not the design estimate |
One caution about tolerance. Every dimension has a manufacturing tolerance and a sample is one unit, so a single millimetre of deviation is measurement noise rather than a defect. Agree the tolerance before the round: plus or minus 3 mm on internal dimensions and plus or minus 5 percent on weight is a reasonable frame for a soft goods build. Without an agreed tolerance, every measurement becomes an argument.
Expect the first sample to be unbranded and in a stock colour unless the fabric is already confirmed. That is deliberate: branding and colour are confirmed at the pre-production stage, and applying them to round one wastes days on a sample whose geometry may still change.
Testing the padded compartment: measurable checks
Padding is the specification most likely to be quietly reduced, because it is invisible in photography and expensive in materials. It is also the specification that determines whether the product does its job. Testing it therefore means measuring it, not pressing it with a thumb and declaring it adequate. Four checks cover the assembly, and all four take minutes.
- Thickness on both faces. Measured in millimetres on the front and back of the compartment, not just at the opening where it is easiest to check.
- Material type. Closed-cell EVA or PE rather than open-cell foam, confirmed by compression and recovery, because open-cell foam takes a permanent set.
- Corner reinforcement. Checked visually and by feel at all four corners, since corners take the impact and are where a device actually fails.
- Base suspension. The sleeve floor standing 15-20 mm above the pack base, measured, because it is the cheapest real drop protection available.
- Retention. A strap or elastic at the compartment mouth that stops the device sliding out when the bag is opened.
Compression and recovery is the check that distinguishes foam types, and it is simple to run. Compress the padding to roughly half its thickness for a minute, release it and measure the recovery after five minutes. Closed-cell foam returns almost fully; open-cell foam does not. A compartment lined with open-cell foam will protect adequately on day one and progressively less over a season, which turns into a warranty claim long after the campaign update cycle has ended.
If a drop figure is claimed on the campaign page, test it during sampling rather than assuming it. A loaded bag dropped from 0.8-1.0 m onto a hard surface with a representative device inside, with no device damage and no seam failure, is a workable frame. The test needs the production fabric and the production padding to mean anything, which is precisely why it belongs in the sampling window and not in the final production week.
Zip selection, cycle testing and failure modes
Zips fail more often than any other component on a bag, and they fail in three distinct ways: the slider wears and stops gripping, the tape separates from the coil under load, or the whole assembly binds because the panel geometry is wrong. The first two are component quality problems and the third is a design problem, and telling them apart during sampling is what prevents a field failure across 500 units.
| Failure mode | Cause | Test during sampling | Fix |
|---|---|---|---|
| Slider stops gripping | Worn or low-grade slider | 500-1,000 open and close cycles | Specify a graded slider and a stated gauge |
| Tape separates from the coil | Insufficient tape strength or stitching | Pull test perpendicular to the tape | Reinforce the tape stitch and specify tape strength |
| Binding on a curved panel | Panel radius too tight for the tape | Open and close with the bag packed | Ease the tape or increase the panel radius |
| Coil jams on dust or sand | Exposed coil on an external compartment | Cycle after light dust exposure | Reverse-coil zip or a storm flap |
| Pull breaks off | Weak pull attachment | Pull test on the slider and pull | Specify a metal pull or a reinforced attachment |
Cycle testing sounds laborious and is not. Five hundred open-and-close cycles on one zip takes a few minutes and reveals almost everything: smoothness, binding, slider feel and any tendency for the tape to twist. Run it on every zip, not just the main compartment, because the small pockets are where the cheapest hardware usually sits and where failures therefore concentrate.
Test packed, not empty. An empty bag closes smoothly because the panels are unstressed; a packed bag puts the panel geometry under tension and that is when a zip running around a tight radius binds. This single distinction explains a large share of zip complaints that appear only after delivery, and it is the cheapest test in the entire programme.
Specify the zip in writing: gauge, coil type, whether it is reverse-coil, the slider grade and the pull type. Zips are the component most easily substituted when a quotation is squeezed, and a substitution is invisible until the product fails. A line in the tech pack naming the specification is the only protection, and it costs nothing.
Fit testing with real devices
Fit testing is where a tech bag sample either earns approval or goes back, and it has one rule: use the real device. Not a block of foam of equivalent volume, not a specification sheet and not a similar machine from a different year. A 16-inch laptop from one manufacturer differs from another by several millimetres, and a compartment cut to the average of them fits neither properly.
Test with the largest device the campaign claims to carry, in the condition the campaign claims to fit. If the page says a cased device fits, test a cased device. If it says a tablet fits alongside, put both in. Then close the compartment and the bag, because a device that fits with the bag open may not fit with the closure done up, and a closure under strain is a zip failure waiting to happen.
- Insert and remove five times. Catches padding compression and any retention problem at the mouth.
- Test a cased device if that is the claim. A hard case adds several millimetres of depth.
- Close every compartment with the device in. Catches a closure straining against the sleeve.
- Check the device does not press against a bottle pocket. A crushable pocket adjacent to the sleeve defeats the padding.
- Weigh the loaded bag. Confirms the harness specification against the real load it will carry.
If the campaign serves a tech audience more broadly, consider testing two devices rather than one: the largest the page claims and the most common in the audience. That reveals whether the sleeve is sized generously enough for the realistic range without being loose. Our custom laptop bags for Kickstarter page sets out how the device fit line should be written in the first place, which is the input this test checks.
Load, carry and closure testing on the sample
A tech bag carries dead weight, and dead weight is what tears straps. The load test is deliberately undramatic: fill the bag to a representative weight, hang it, and look at the attachment points. On a laptop bag a realistic load is 4 to 7 kg including the device, charger and daily items. Leave it for a stated dwell time, then inspect every load point for distortion or stitch lift.
What the test catches is the difference between a bar-tacked strap root and a merely stitched one. Bar-tacks are cheap to add during sampling and effectively impossible to retrofit after approval, so this is the moment to insist on them. Count them: state the number of bar-tacks at each load point in the operation sheet, because a count is inspectable and a drawing is not.
Carry testing is the human version of the same check and it takes fifteen minutes. Load the bag, wear it, walk, and note three things: where the load sits on the back, whether the straps dig or slip, and whether the bag swings. A bag that passes the static load test and fails the walk test has a harness geometry problem, and it is far cheaper to correct at sample stage than to discover in a review three months after delivery.
Closure testing under load completes the set. Open and close every compartment with the bag loaded and worn, because that is the condition in which a zip binds and a flap misaligns. A bag that must be put down to be opened is a legitimate design choice for some categories and a fatal one for a commuter tech bag, and the sample is where that becomes obvious.
Documenting mark-up: writing a revision list that works
The revision list is the deliverable of a sampling round, and the quality of the list determines whether there is another round. The rule is that every item must be a measurement or a named component change. Impressions cannot be actioned: a note saying the padding feels thin will produce a sample with marginally thicker padding and a second round. A note saying the padding measures 4 mm against a specified 8 mm produces exactly the right sample.
| Weak mark-up | Actionable mark-up | Why the second works |
|---|---|---|
| Padding feels thin | Padding measures 4 mm on the back face; specification is 8 mm | A measurement can be corrected and re-measured |
| The zip is stiff | Zip binds over the top 120 mm when the bag is packed | Names the location and the condition |
| The laptop is a tight fit | A 356 x 248 mm device leaves 3 mm clearance; 10-15 mm specified | States the device and the shortfall |
| Straps look weak | Strap root has 1 bar-tack; specification is 4 | A count can be checked at inspection |
| It feels heavy | Empty weight is 1.35 kg against a published 1.1 kg | Gives a figure to work to |
Photograph the mark-up. A photograph of the sample with a tape measure or callipers in frame settles any ambiguity about what is being described, and it costs seconds. Send the photographs with the written list rather than instead of it, because the list is what gets entered into the tech pack and the photograph is what makes it unambiguous.
Order the list by severity and say which items are mandatory and which are preferences. A revision list with twelve items where three matter produces a sample that addressed the nine and missed the three, because nobody was told which were the three. Numbering by severity prevents that, and it also prevents the list growing on the second pass.
Say which items are mandatory and which are preferences. A list of twelve items where three matter produces a sample that addressed the nine and missed the three, because nobody was told which were which. Numbering by severity prevents that outcome and prevents the list growing on the second pass.
Round two and the pre-production sample
Round two should be the last. Its job is to confirm that the revision list has been actioned and that nothing else moved, which is why the second evaluation is a comparison against the first rather than a fresh assessment. Measure the same dimensions, run the same tests and check the same items. Anything that changed without being asked for is as important as anything that did not change when it should have.
The pre-production sample is the gate. It is built on the production fabric, with the production hardware and the final branding, and it is the unit against which bulk will be judged. Approval of that sample is what releases bulk production, and it is the point at which the specification freezes. Changes after that point arrive as a surcharge and a delay rather than as a revision, because the fabric is cut and the line is scheduled.
- Confirm every item from the revision list. Measure, do not estimate.
- Check for unintended changes. Compare against round one measurements.
- Fit the real device again. Padding and geometry both moved during revision.
- Run the zip cycle test again. A revised panel geometry can introduce binding.
- Confirm branding against the artwork. Placement, colour and adhesion.
- Retain the approved sample. It is the reference for inspection and for disputes.
Retaining the approved sample is the step most often skipped and most often needed. One physical unit, signed and dated, resolves every later question about shade, dimension and construction by direct comparison. Keep it until the campaign has shipped and the complaint window has closed, and refer to it in the inspection criteria so the production run is judged against it.
Timing: 6-10 days, 12-15 days and what pushes a build over
Sampling runs 6-10 working days for a standard build and 12-15 working days for a complex one. That range is real and it reflects the number of operations a sample needs, not a buffer. Understanding what puts a build in the upper band lets a creator decide whether the extra days are worth the feature, rather than discovering the delay after committing to a launch date.
| Feature | Window impact | Worth it? |
|---|---|---|
| Standard padded sleeve and stock zips | Base; 6-10 working days | Yes; the default |
| Lay-flat 180-degree device compartment | No change if decided before round one | Yes; strong for business travellers |
| Reverse-coil zips in a stock colour | No change if stocked | Yes; visible and functional |
| Die-cut foam insert | +2-3 working days for the die | Yes where a fixed cavity is needed |
| Welded seams and a roll-top closure | +4-8 working days | Rarely on a first campaign |
| Moulded back panel or tray | Tooling decision; longest lead | Only on a premium tier |
| Custom fabric colour from the mill | Adds the mill's lead time, not the sampling window | Only if central to the brand |
The most common cause of a missed sampling window is not a complex feature. It is artwork that arrives late or arrives as a low-resolution raster file, which adds days while it is redrawn. Supply vector artwork with the RFQ and the single largest avoidable delay in the programme disappears. The second most common cause is a device dimension that is still undecided, which is entirely within the creator's control.
Plan the window backwards from the launch or delivery date. Sampling at 6-10 working days plus production 35-50 days plus the shipping leg is the real calendar, and it should be published rather than replaced with an optimistic figure. If the calendar is tight, the lever is a complete specification at RFQ stage, not a compressed production window, because compression carries a premium and a complete specification does not.
Weekends and public holidays sit outside working-day windows in both directions, so a 6-10 working days of sampling requested before a holiday period runs longer in calendar terms. Plan the calendar in working days and then convert, rather than assuming ten calendar days.
The cost of sampling rounds and revision discipline
Sampling has a cost in money and a larger cost in calendar. The monetary cost is the sample charge, which is modest against a 500-pcs order and is best thought of as insurance rather than as an expense. The calendar cost is the real one: each additional round adds its window to a schedule that already contains 35-50 days of bulk and a shipping leg, and on a crowdfunding campaign that delay is visible to every backer.
Revision discipline is the control, and it has two parts. The first is completeness at RFQ stage: device dimensions, quantity, fabric target, hardware grade, branding artwork and the test list. That single document determines whether round one is close or far. The second is restraint during evaluation: fix what is measurably wrong, defer what is merely preferable, and do not reopen the design because a sample has made other options visible.
There is a specific trap worth naming. Seeing a physical sample makes improvements obvious that were not obvious on paper, and the temptation is to use round two to pursue them. Some of those improvements are worth having and most belong in a second-season re-order. The discipline is to ask whether a change affects the campaign's central claim: if a bag claims to fit a 16-inch device and protect it, changes to the sleeve are mandatory and changes to pocket layout are usually not.
One legitimate exception is a change that prevents a complaint. If the sample reveals that the device compartment is 4 mm short, or that the main zip binds when packed, those are fixed now regardless of the calendar, because a campaign that ships either problem will spend more time managing the aftermath than the revision would have cost. Fix defects, defer preferences, and the round count stays at two.
From approved sample to bulk release
Approval releases bulk, and the release has a specific meaning: the specification is frozen, the fabric is ordered, the hardware is booked and the line is scheduled. production 35-50 days. Understanding what happens in those 35 to 50 days helps a creator interpret progress updates and set realistic expectations for the campaign.
The sequence is material arrival, cutting, printing or embroidery if the branding requires it, assembly, finishing, inspection and packing. Fabric arrival is the step most likely to move, because a mill's schedule is not the production floor's schedule. Assembly is the longest step. Inspection runs at AQL 2.5 to ISO 2859-1 and happens before cartons close, which is the point at which functional criteria agreed during sampling are actually verified against the approved sample.
- Freeze the specification at approval. Later changes are a surcharge and a delay.
- Confirm the inspection criteria in writing. The functional checks agreed during sampling, not just cosmetic classes.
- Agree the carton and the packing ratio. Freight is charged on volume and is quoted before the line starts.
- Keep the retained sample accessible. It is the reference the inspector works to.
- Plan the shipping leg. FOB Xiamen means the clock stops at the port.
Payment follows T/T 30/70: 30 percent deposit to release the order and 70 percent before shipment. That structure is worth planning for in campaign cash flow, because the deposit falls before funding closes in most campaign calendars and the balance falls before a single backer has received anything. Creators who model this in advance are not surprised by it; creators who do not are.
The final point is that sampling and inspection are the same document viewed twice. The tests run on the sample become the criteria checked in bulk, and a campaign that writes them down once uses them twice. That is the whole argument for doing the test list properly the first time: it is not extra work, it is the same work done early rather than late. For the QA side of that document, see our page on Kickstarter campaign bag QA and QC.
Plan a sampling round with a test list
Send the device dimensions, the fabric and hardware targets and your launch window. You get a sampling plan with the test list, the window for your build and the bulk schedule within one business day. Write to service@junyuanbags.com or use the quote form.
- Minimum order quantity
- 500 pcs per style / colourway
- Sampling
- 6-10 working days (12-15 for complex builds)
- Bulk production
- 35-50 days after deposit + approved pre-production sample
- Inspection
- AQL 2.5 to ISO 2859-1
- Trade term
- FOB Xiamen
- Payment
- T/T 30/70
- Team
- 137 staff / 7 production lines / 149 machines
- Founded
- 2014; founder in the trade since 2004
- Campaigns supported
- 20+ crowdfunding campaigns
Frequently Asked Questions
How long does tech bag sampling take?
Six to ten working days for a standard build and 12 to 15 working days for a complex one. Welded seams add 4 to 8 working days, a die-cut foam insert adds 2 to 3, and a moulded panel requires a tooling decision and the longest lead. The most common avoidable delay is artwork arriving late or as a raster file rather than vector.
What should I test on the first sample?
Geometry and the two assemblies that decide the product: the padded compartment and the zips. Measure the internal device dimensions, padding thickness on both faces, sleeve base suspension, empty weight and external dimensions, then run 500 to 1,000 zip cycles with the bag packed. Judge the first sample as a construction sample, not as a finished product.
How is padded compartment protection verified?
By measurement. Check foam thickness on both faces against the specification, confirm closed-cell material by compression and recovery, check corner reinforcement and measure the sleeve base suspension at 15-20 mm above the pack floor. If a drop figure is claimed, test it during sampling at 0.8-1.0 m onto a hard surface with a representative device inside.
How many zip cycles should I run during sampling?
Five hundred to one thousand open-and-close cycles on every zip, not just the main compartment, because small pockets are where the cheapest hardware sits. Run it with the bag packed, since an empty bag closes smoothly and a packed one reveals binding on a curved panel. It takes a few minutes per zip.
Why do zips bind when a bag is full but not when it is empty?
Because the panel geometry is under tension only when the bag is packed. A zip running around a tight radius binds when the panel is stressed, which is exactly the condition of real use. Testing empty therefore misses the failure that appears after delivery, and it is the cheapest test in the programme to fix.
Should I test the device fit with a bare or a cased laptop?
With whichever the campaign page claims. If the claim is that a cased device fits, test a cased device, because a hard case adds several millimetres of depth. Use the real machine rather than a foam block of equivalent volume, since 16-inch devices differ by several millimetres between manufacturers.
How should I write a sample revision list?
Every item must be a measurement or a named component change. Write that the padding measures 4 mm against an 8 mm specification rather than that it feels thin, and that the zip binds over the top 120 mm when packed rather than that it is stiff. Photograph the mark-up, order items by severity and mark the mandatory ones.
What is a pre-production sample?
The sample built on production fabric with production hardware and final branding. It is the gate: approval releases bulk production and freezes the specification, after which changes arrive as a surcharge and a delay. Retain one approved unit, signed and dated, as the reference for inspection and for any later dispute.
How many sampling rounds should a tech bag need?
Two is normal and achievable. Round one confirms geometry and construction, round two confirms that the revision list was actioned and nothing else moved. A third round usually means the revision list contained impressions rather than measurements, or that the specification was reopened rather than corrected.
What tolerance should I accept on sample dimensions?
Agree it before the round: plus or minus 3 mm on internal dimensions and plus or minus 5 percent on weight is a reasonable frame for a soft goods build. A sample is one unit, so a single millimetre of deviation is measurement noise rather than a defect. Without an agreed tolerance every measurement becomes an argument.
What happens between sample approval and delivery?
Material arrival, cutting, branding, assembly, finishing, inspection at AQL 2.5 to ISO 2859-1 and packing, taking 35-50 days. Fabric arrival is the step most likely to move because a mill's schedule is independent. Payment is T/T 30/70, with the balance before shipment, and FOB Xiamen means the clock stops at the port.
Is it worth paying to compress the sampling window?
Rarely. Compression carries a premium and the cheaper lever is a complete specification at RFQ stage: device dimensions, quantity, fabric and hardware targets, vector artwork and a written test list. That document is what makes round one close, and it costs nothing extra.
People Also Ask
How long does sampling take for a custom tech bag?
Six to ten working days for a standard build and 12 to 15 for a complex one. Welded seams, moulded panels and die-cut inserts each add days, so decide those before the first round.
What is the most common sampling mistake?
Evaluating the first sample as a finished product rather than as a construction sample. Judge geometry and assembly first; colour and branding belong to the pre-production sample.
Do I really need to cycle test the zips?
Yes. Five hundred to one thousand cycles with the bag packed takes minutes and catches binding, slider wear and tape separation, which are the three ways zips actually fail.
Can I approve a sample without the real device?
No. A foam block of equivalent volume will not reveal a 3 mm shortfall or a closure straining against the sleeve. Test the largest device the campaign claims, in the condition it claims.
What makes a good revision list?
Measurements instead of impressions, photographs alongside the written items, severity ordering and a clear mark on which items are mandatory. That structure lets a round be actioned in one pass.
When does bulk production start?
After deposit and approval of the pre-production sample. production 35-50 days and ends with inspection at AQL 2.5 to ISO 2859-1 before cartons close.