Kickstarter Tote Bag QC: Strap Attachment and Handle Tear Tests
Handles are where tote rewards fail. A static load test, a cyclic load test and a tear test at the attachment point will catch almost every handle failure before bulk ships, and all three cost a fraction of one replacement shipment. Specify the handle as a tested assembly: webbing width and material, stitch pattern at the root, stitch density, thread type, reinforcement patch and a stated failure threshold in newtons. This guide sets out the exact tests, the pass thresholds worth writing into a technical pack, and how they sit inside an AQL 2.5 inspection to ISO 2859-1. Minimum order 500 pcs per style and colourway, sampling 6-10 working days, production 35-50 days.
- Why handles fail first and what the failure actually looks like
- Four handle constructions and how each one fails
- Stitch patterns at the handle root, ranked by holding power
- The static load test: setup, duration and pass threshold
- The cyclic load test that catches what static testing misses
- Tear testing the fabric at the attachment point
- Webbing and thread specification in numbers
- Reinforcement patches, plates and hidden structure
- Building the inspection plan: critical, major and minor
- Three inspection gates before, during and after production
- Documentation, golden samples and the re-order file
- What to send with your RFQ so the tests are quoted correctly

Ask any experienced campaign bag specialist where a tote fails and the answer is immediate: at the handle root, not in the panel. The physics explains it. A bag holding 8 kg puts that load through four narrow attachment points, and every one of them concentrates force into a few square centimetres of fabric and a short run of stitches. Add the dynamic effect of walking, where the load spikes well above static weight with every step, and the handle root becomes the most heavily stressed feature on the entire product.
Yet handle specification is the part of the technical pack most often left blank. Creators specify fabric, dimensions, colour and print in careful detail, then write a line that says durable handles and trust that the result will be fine. It usually is fine for the first month. The failures arrive in month four to month nine, which is exactly when backers are still posting and when a wave of broken-handle photos can damage a campaign that otherwise went well. Building the test into the specification costs almost nothing and removes the risk entirely. See our Kickstarter campaign bag QA and QC guide for how these tests sit in the wider programme.
Why handles fail first and what the failure actually looks like
These three tests belong on any custom tote bags for Kickstarter brief, because a handle failure is the defect most often reported by backers. Handle failure happens in one of four ways, and each one points to a different specification gap. The first is stitch pull-through, where the stitches remain intact but tear out of the fabric, leaving a clean row of holes. That is a fabric strength or seam allowance problem. The second is thread breakage, where the thread itself snaps; that is a thread specification problem, usually a thread that is too fine or one that has degraded under UV or heat.
The third is webbing tear at the stitch line, where the needle perforations have weakened the webbing enough that it rips along the stitch row. That is a stitch density or needle size problem: too many holes too close together in a narrow webbing. The fourth is progressive creep, where the handle slowly elongates or the stitching gradually loosens over weeks without any single dramatic event. That is a stitch pattern problem, and it is the one that gets reported as the bag just came apart rather than as a specific incident.
Distinguishing between those four matters because the fixes are different and some of them cost money. Stitch pull-through is fixed with a wider seam allowance or a reinforcement patch. Thread breakage is fixed by moving to a bonded polyester or corespun thread of the right count. Webbing tear at the stitch line is fixed by reducing stitch density or widening the webbing. Progressive creep is fixed by changing from a straight stitch to a box-X or bar-tack pattern. Guessing at the fix wastes a sampling round; testing tells you which one you need.
Four handle constructions and how each one fails
The first construction is a self-fabric handle, cut from the same cloth as the bag and folded into a strap. It is the cheapest and the most cohesive-looking option, and it is the weakest, because the load runs through a folded edge of bag fabric. It suits light-duty totes and shopping bags. If you use it, specify a minimum of three plies of fabric in the strap, a turned edge on each side, and an anchor point that runs below the top hem rather than stopping at it.
The second is a flat polyester webbing handle, typically 25 mm to 38 mm wide. This is the workhorse for campaign totes and the right default for a heavy-duty reward. It is strong, cheap, available in many colours and easy to brand with a woven-in jacquard mark. Its failure mode is tear at the stitch line, which is controlled by webbing width and stitch density. A 25 mm webbing is adequate for most loads; a 38 mm webbing is noticeably more comfortable under a heavy load and resists tear better.
The third is a tubular or filled webbing handle, which is softer in the hand and used on higher-value rewards. It costs more and it changes the stitching approach, because the rounded profile must be captured without crushing. The fourth is a rope or cord handle, common on fashion totes. Rope handles look good and fail at the knot or at the entry point into the bag, so they need a metal or plastic end-stop and a reinforced entry. Avoid rope handles on any reward that is marketed as heavy duty.
| Construction | Typical width | Relative strength | Best use | Main failure mode |
|---|---|---|---|---|
| Self-fabric strap, folded | 25-40 mm | Low to moderate | Light shopping totes | Tear along the fold edge |
| Flat polyester webbing | 25 mm | High | Standard reward totes | Tear at the stitch line |
| Flat polyester webbing | 38 mm | Very high | Heavy-duty and laptop totes | Creep if stitch pattern is weak |
| Tubular or filled webbing | 20-30 mm | High | Premium comfort handles | Crushing at the attachment |
| Rope or cord handle | 6-12 mm | Low to moderate | Fashion totes | Failure at the knot or entry point |
Stitch patterns at the handle root, ranked by holding power
The stitch pattern at the root does more for handle strength than almost any other single decision, and it is free. A straight stitch running across the webbing is the weakest option and should not be used on a load-bearing handle. A cross or X stitch is better, because it distributes load in two directions. A box stitch enclosing a rectangle is better again, and a box-X stitch, a rectangle with a diagonal cross inside it, is the standard for load-bearing straps.
A bar tack is a dense zigzag cluster produced by a dedicated bar-tacking machine, and it is the strongest and most repeatable option. It is the pattern used on seat belts and climbing equipment for good reason. Bar tacks cost a little more in machine time, roughly a few cents per unit, and they require a bar-tack machine on the line. Specify them by length and width in millimetres, for example 20 mm by 8 mm, and by stitch count, because a short, sparse bar tack is not a bar tack in any useful sense.
The other half of the pattern decision is the anchor geometry. The webbing should run down the body of the bag, not stop at the top hem. A handle anchored only into the hem puts all the load into the hem fold and the top row of stitches. A handle that continues 60 to 100 mm down the body panel spreads the load across a much larger area of fabric and stitch. This is a design change as much as a sewing change, and it is the single most effective free improvement available on a tote.
Key takeaways
- A
- n
- c
- h
- o
- r
- t
- h
- e
- w
- e
- b
- b
- i
- n
- g
- 6
- 0
- t
- o
- 1
- 0
- 0
- m
- m
- d
- o
- w
- n
- t
- h
- e
- b
- o
- d
- y
- p
- a
- n
- e
- l
- r
- a
- t
- h
- e
- r
- t
- h
- a
- n
- s
- t
- o
- p
- p
- i
- n
- g
- a
- t
- t
- h
- e
- h
- e
- m
- ,
- a
- n
- d
- c
- l
- o
- s
- e
- i
- t
- w
- i
- t
- h
- a
- b
- a
- r
- t
- a
- c
- k
- .
- B
- o
- t
- h
- c
- h
- a
- n
- g
- e
- s
- c
- o
- s
- t
- a
- l
- m
- o
- s
- t
- n
- o
- t
- h
- i
- n
- g
- .
The static load test: setup, duration and pass threshold
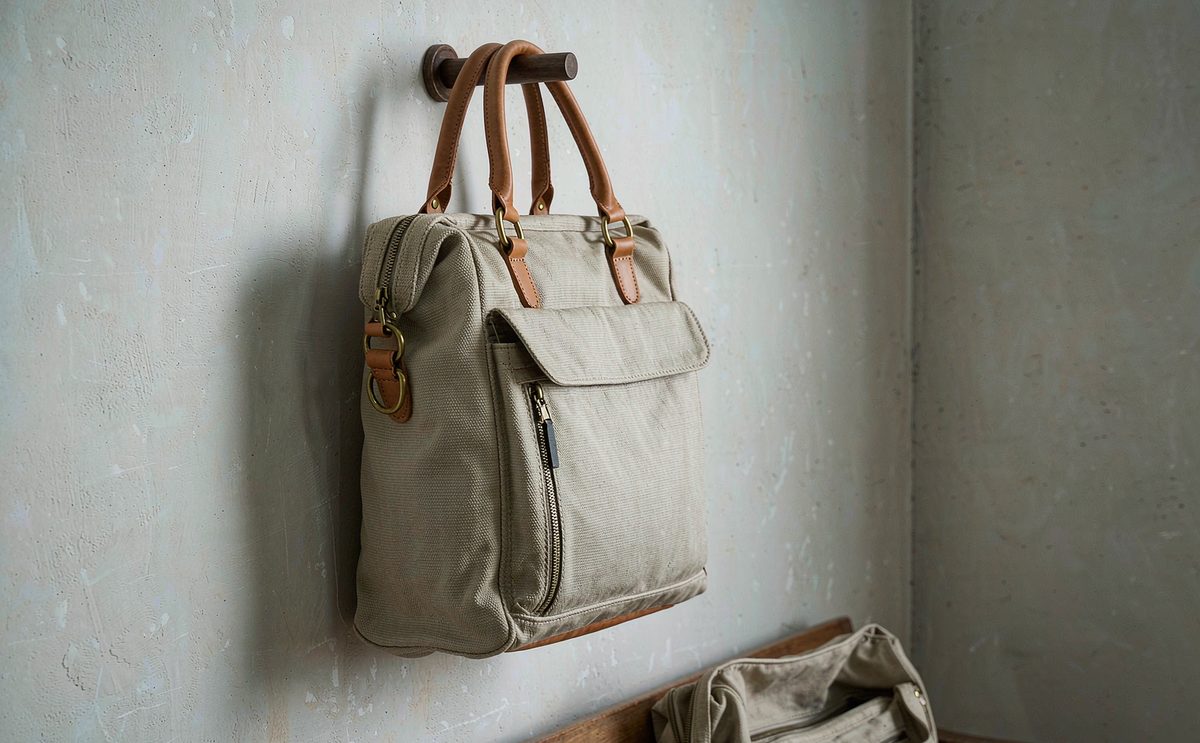
A static load test answers one question: how much weight can this handle hold before something gives? The setup is simple. Suspend the empty bag by its handles from a fixed beam, load the bag with a calibrated mass, and hold for a defined duration. A reasonable protocol for a campaign tote is a load of 15 kg held for 30 minutes with the mass distributed evenly and resting on the base of the bag rather than hanging from the sides.
The pass criterion should be stated in advance and should cover appearance as well as survival. A good specification is: no stitch breakage, no webbing tear, no detachment, and permanent elongation of the handle or the attachment area of no more than 3 mm measured after the load is removed and the bag has rested for ten minutes. Requiring a deformation limit rather than mere survival is important, because a handle that survives but stretches visibly has effectively failed from the backer's point of view.
For a reward marketed as heavy duty, hold the test at roughly two to three times the stated carrying capacity. If your campaign copy says the bag carries a laptop and a week of shopping, that is roughly 8 kg in use, so test at 15 to 20 kg. The multiplier is not arbitrary: it covers the dynamic spikes of walking, the uneven loading of real contents, and the variation between individual production units. Test at least three units per colourway, from different parts of the production run rather than from the first hour of it.
The cyclic load test that catches what static testing misses
Static testing has a blind spot: it does not reproduce fatigue. A handle that holds 15 kg perfectly well once may still fail after 5,000 walking steps at 5 kg, because each step spikes the load and each spike works the stitches a little looser. Cyclic testing reproduces that. The common rig drops or lifts a loaded bag repeatedly, or oscillates the load between a low and a high value, for a set number of cycles.
A practical protocol for a campaign tote is 2,000 cycles between roughly 2 kg and 10 kg, at a rate of about 20 to 30 cycles per minute, with an inspection at 500, 1,000 and 2,000 cycles. The pass criterion is no visible stitch loosening, no elongation beyond 5 mm, and no change in the attachment geometry. This test takes a few hours on a rig and it is the one that distinguishes a handle that will last from a handle that will merely survive the first outing.
If you do not have access to a rig, a simplified version is still worth running. Load the bag to its stated capacity, walk a fixed route with it for a set distance, and repeat over several days while logging any change in the handle geometry. This is less repeatable than machine testing but it catches gross problems, and backers perform exactly this test for free and in public. Treat any movement you can see or feel at the root as a failure of the specification, not as normal bedding-in.
Tear testing the fabric at the attachment point
The third test is a tear test on the fabric at the attachment point, and it is the one most often skipped. The method is to cut a small slit at the edge of the attachment area and measure the force required to propagate it. This matters because a bag that has been nicked, snagged or over-stuffed will develop a small tear, and the question is whether that tear stops or runs. Polyester fabric resists propagation better than cotton canvas, but the reinforcement patch matters more than the base fabric.
Specify a minimum tear strength in newtons for the body fabric in both warp and weft, and require that the reinforcement patch, if used, raises the local value rather than lowering it. A patch that is stitched with a dense row of perforations can actually weaken the area it is meant to protect, which is a real and surprisingly common defect. The fix is to stitch the patch with a perimeter seam rather than a dense field of stitching, and to use a patch material with a tear strength equal to or better than the body fabric.
Also test the attachment after a wash cycle. Fabric finishes, softeners and shrinkage all change tear behaviour, and a bag that passes dry may fail wet. Run the tear test on both a dry unit and a unit that has been through three domestic wash cycles and line dried. Cotton canvas in particular changes character after washing, and the change is usually beneficial in hand feel but not always in strength.
Webbing and thread specification in numbers
Write the webbing specification in numbers, not adjectives. State the material, typically polyester for strength and colour fastness or nylon for a softer hand and better abrasion resistance. State the width in millimetres and the thickness in millimetres. State a minimum breaking strength in newtons or kilograms, which a competent webbing supplier will provide on a test certificate. A 25 mm polyester webbing suitable for tote handles typically carries a breaking strength well above any realistic bag load, so the limiting factor is almost always the stitch line, not the webbing.
Specify the thread as carefully. Bonded polyester or corespun polyester is the right default: it has high strength, low stretch, good UV resistance and it does not rot. Avoid cotton thread on a load-bearing seam, because it loses strength when wet and degrades faster. Thread count matters: a Tex 40 or Tex 70 thread suits most tote handles, and going finer to save cost is a false economy measured in cents that buys failure measured in replacements.
Set the stitch density explicitly, in stitches per inch or per centimetre, and set the needle size. Counter-intuitively, more stitches is not always stronger: a very dense stitch row perforates the webbing and the fabric repeatedly along the same line and creates a tear path. A range of 7 to 9 stitches per inch is typical for a tote handle, with a needle size matched to the thread and the material. Ask for the needle size to be logged, because an oversized needle is a common hidden cause of webbing tear failures.
Reinforcement patches, plates and hidden structure
A reinforcement patch is a piece of fabric placed behind or over the attachment area to spread the load. It can be made from the body fabric, from a scrap of webbing, or from a purpose-made tape. The cheapest and most effective version for a tote is a length of webbing or a folded tape laid behind the top hem, so that the handle stitching passes through the hem, the body fabric and the reinforcement in one operation. This turns a two-layer attachment into a three-layer one for a few cents.
For heavier totes, a hidden structural plate in the base or a stiffener in the top hem changes the whole load path. A stiffened hem stops the bag mouth from collapsing, which reduces the sideways force on the handle roots. A base plate stops contents from sagging, which reduces the peak load when the bag is lifted. Both are invisible in the finished product and both deliver a disproportionate improvement in perceived quality, because the bag simply feels more solid in the hand.
There is a cost and weight trade-off to manage. Reinforcement adds material and, in the case of plates, shipping mass. A sensible rule is to reinforce at the handle roots and the base corners, which is where failures originate, and to leave the rest of the bag as light as the design allows. Our production team can usually show two reinforcement options side by side on a sample so the trade-off is visible rather than theoretical.
Specify reinforcement by material, dimensions and stitch pattern. Words like reinforced or heavy duty in a tech pack mean nothing without those three numbers.
Building the inspection plan: critical, major and minor
A tote inspection plan needs three defect classes. Critical defects are safety or function failures with zero tolerance: any handle detachment, any stitch breakage at a handle root, any tear at an attachment point, any broken bar tack. Major defects affect saleability: visible stitch looseness at a root, misplaced reinforcement, asymmetric handle lengths beyond tolerance, loose thread ends longer than a stated length. Minor defects are cosmetic: slight shade variation within tolerance, small marks, minor thread ends.
Our production programme inspects finished totes to AQL 2.5 to ISO 2859-1 for major and minor defects, with a separate zero-tolerance gate for critical defects. That split is the point: a general AQL level applied to handle failures would permit a small number of them, and a small number of broken handles across 2,000 units is a visible wave of complaints. Critical defects must be excluded from the statistical plan entirely and rejected at any count.
Also decide what happens on a critical find. The right default is a 100 percent re-inspection of the lot plus a root-cause review before production restarts, not simply picking out the failed units. Handle failures are almost never random; they come from a machine setting, a needle, a thread lot or an operator technique, and if the cause is not found the next batch will fail the same way. Ask for the corrective action to be documented and filed with the order record.
Three inspection gates before, during and after production
Gate one is incoming material inspection, before cutting. Verify the webbing against its breaking-strength certificate, verify the body fabric mass and shade against the approved lab dip, and verify the thread lot. Material problems found here cost a delay; the same problems found after cutting cost the entire run. This gate is the cheapest quality investment available and it is the one most often skipped under schedule pressure.
Gate two is in-process inspection during sewing. Pull units off the line at intervals and check the bar tack dimensions, the stitch density, the needle size in use and the anchor geometry against the golden sample. In-process checks catch drift early, and drift is exactly what happens on a long run: a needle is changed, a tension is adjusted, an operator rotates, and the handle attachment quietly becomes weaker than the sample you approved.
Gate three is final random inspection on packed goods, at AQL 2.5 to ISO 2859-1 for major and minor defects plus the zero-tolerance critical check. Add the functional tests here too: run the static load test on a small number of units drawn at random from the finished shipment, and repeat it on the re-order. A test performed only on a pre-production sample proves the design; performing it on finished goods proves the production.
Documentation, golden samples and the re-order file
Keep a golden sample for every style and colourway: a finished unit signed off by you and retained by our programme coordinator as the reference for every subsequent run. Photograph the handle attachment from a fixed angle at a fixed distance, and keep those photographs with the written specification. When a re-order is quoted twelve months later, the golden sample and the photographs remove an entire category of ambiguity about what was actually approved.
Keep the test reports with it. A static load result, a cyclic result and a tear result, each dated and each tied to a production batch, make the difference between an evidence-based conversation and an argument. If a backer reports a failure, you can check whether the batch passed its tests and respond with facts. If a re-order is being quoted, you can require the same thresholds rather than renegotiating them from memory.
Finally, keep a corrective action log. Every defect found, every root cause identified and every fix applied should be one line in one document. Over a campaign programme that runs to several styles and several re-orders, that log becomes the most valuable artefact you own, because it tells the next production run exactly what went wrong last time. Our team has supported more than 20 crowdfunding campaigns and the programmes with a live corrective action log consistently ship with fewer surprises.
What to send with your RFQ so the tests are quoted correctly
Testing is only quoted accurately when the handle is specified in full. Send the handle construction type, the webbing material, width and thickness, the webbing breaking strength, the stitch pattern at the root with dimensions, the stitch density, the thread type and count, the anchor geometry with the length running down the body panel, and any reinforcement patch with its material and dimensions. Then state the tests you want and the pass thresholds.
- Handle construction type: self-fabric, flat webbing, tubular webbing or cord.
- Webbing material, width in mm, thickness in mm and minimum breaking strength.
- Stitch pattern at the root: box-X or bar tack, with dimensions in mm and stitch count.
- Stitch density in stitches per inch and the needle size used.
- Thread type and count, for example bonded polyester Tex 70.
- Anchor geometry: how far the webbing runs down the body panel, in mm.
- Reinforcement: material, dimensions and the stitch pattern used to attach it.
- Static load test: load in kg, duration, and maximum permitted permanent elongation.
- Cyclic load test: cycle count, load range, inspection intervals and pass criterion.
- Tear test: minimum tear strength in newtons, dry and after three wash cycles.
- Inspection standard: AQL 2.5 to ISO 2859-1 plus a zero-tolerance critical-defect list.
- Quantity per style and colourway, target date, FOB Xiamen and T/T 30/70 terms.
With that list attached, our sourcing partner can quote the handle assembly and the test programme together, and sampling can begin inside the standard 6-10 working day window, or 12-15 working days for a complex construction with reinforcement and hardware. Bulk then runs 35-50 days. If you would like a second opinion on a handle specification you have already written, send it over and we will mark up the risks before you commit to tooling. You can also compare fabric choices in our heavy-duty tote fabric guide, since fabric and handle strength interact directly.
Send us your tote handle specification and target quantity, and our production team will mark up the risk points and quote a test programme.
Frequently Asked Questions
What load should a tote handle be tested at?
Test at two to three times the stated carrying capacity. If your campaign copy says the bag carries a laptop and shopping, that is roughly 8 kg in use, so a static test at 15 to 20 kg held for 30 minutes is appropriate. Require no stitch breakage, no webbing tear and no permanent elongation beyond 3 mm after the load is removed.
What is a bar tack and do I need one?
A bar tack is a dense zigzag stitch cluster produced on a dedicated machine, and it is the strongest and most repeatable way to anchor a strap. Specify it by dimensions and stitch count, for example 20 mm by 8 mm with a stated stitch count. It costs a few cents more in machine time and is worth it on any reward marketed as heavy duty.
How many cycles should a handle survive?
A practical protocol is 2,000 cycles oscillating between roughly 2 kg and 10 kg, at 20 to 30 cycles per minute, with inspections at 500, 1,000 and 2,000 cycles. The pass criterion is no visible stitch loosening, no elongation beyond 5 mm and no change in the attachment geometry. Static testing alone will not catch fatigue failures.
Should the handle be anchored into the hem or down the body?
Down the body, by a clear margin. A handle anchored only into the top hem puts all the load into the hem fold and one row of stitches. Running the webbing 60 to 100 mm down the body panel spreads the load across a far larger area of fabric and stitch, and it is the most effective free improvement available on a tote.
What thread should be used on tote handles?
Bonded polyester or corespun polyester is the right default, in the region of Tex 40 to Tex 70 for most tote handles. Avoid cotton thread on load-bearing seams because it loses strength when wet and degrades faster. Also specify the needle size, since an oversized needle is a common hidden cause of webbing tearing along the stitch line.
Is more stitching always stronger?
No. A very dense stitch row perforates the webbing and fabric repeatedly along the same line and creates a tear path. A range of 7 to 9 stitches per inch is typical for a tote handle. The stitch pattern matters more than the count: a box-X or bar tack at moderate density outperforms a dense straight stitch by a wide margin.
What is the MOQ for a tested tote handle programme?
The minimum order is 500 pcs per style and per colourway. Destructive testing consumes a small number of units, so add roughly 5 to 10 units per style per test round to your order quantity so the delivered count is not short. Sampling runs 6-10 working days and production 35-50 days.
How are handle defects classified at inspection?
Handle detachment, stitch breakage at a root, tears at an attachment point and broken bar tacks are critical defects with zero tolerance and are excluded from the statistical plan. Visible stitch looseness, misplaced reinforcement and asymmetry are major. Cosmetic issues are minor. Finished totes are inspected to AQL 2.5 to ISO 2859-1 for major and minor defects.
What happens if a critical defect is found?
The correct response is a 100 percent re-inspection of the lot plus a documented root-cause review before production restarts, not simply picking out the failed units. Handle failures are rarely random; they come from a machine setting, needle, thread lot or operator technique, and if the cause is not found the next batch will fail the same way.
Should I test handles after washing?
Yes. Fabric finishes, softeners and shrinkage all change tear behaviour, and a bag that passes dry can fail wet. Run the tear test on both a dry unit and a unit that has been through three domestic wash cycles and line dried. Canvas in particular changes character after washing, usually improving in hand feel but not always in strength.
Can I use a rope handle on a heavy duty tote?
It is not advisable. Rope handles look good but they fail at the knot or at the entry point into the bag, and they need an end-stop plus a reinforced entry to be reliable. For any reward marketed as heavy duty, use flat polyester webbing at 25 mm or 38 mm, anchored with a bar tack down the body panel.
Do I need a reinforcement patch on the handle?
For a heavy-duty reward, yes. A length of webbing or folded tape laid behind the top hem turns a two-layer attachment into a three-layer one for a few cents. Stitch the patch with a perimeter seam rather than a dense field of stitching, because dense perforation can weaken the area it was meant to protect.
People Also Ask
How much weight can a tote bag handle hold?
A well-specified webbing handle anchored with a bar tack will hold far more than any realistic bag load; the limiting factor is almost always the stitch line, not the webbing. Test at two to three times your stated carrying capacity to confirm.
What is a bar tack stitch?
A dense zigzag stitch cluster made on a dedicated machine to anchor straps and stress points. It is the standard for load-bearing attachments and should be specified with dimensions and a stitch count.
Why do tote bag handles rip off?
Usually because the webbing is anchored only into the top hem, the stitch pattern is a plain straight stitch, or the stitch density is too high and has perforated the webbing into a tear path. All three are fixed at specification stage.
What is AQL 2.5 in bag inspection?
AQL 2.5 to ISO 2859-1 sets the acceptable number of major and minor defects in a random sample. Critical functional failures such as handle detachment should sit outside the statistical plan at zero tolerance.
Should webbing run below the hem of a tote?
Yes. Running the webbing 60 to 100 mm down the body panel spreads the load across much more fabric and stitch, and is the cheapest available strength improvement.
How do you test bag handle strength?
With a static load test held for 30 minutes, a cyclic load test of around 2,000 cycles, and a tear test at the attachment point, run dry and after three wash cycles. Pass thresholds should be written into the technical pack.
What thread is best for bag handles?
Bonded or corespun polyester around Tex 40 to Tex 70. It has high strength, low stretch and good UV resistance, and unlike cotton it does not lose strength when wet.
How long does tote sampling and production take?
Sampling takes 6-10 working days, or 12-15 for complex builds, from a complete technical pack. production 35-50 days before freight, with a minimum order of 500 pcs per style and colourway.