Kickstarter Tote Branding: Inside-Pocket Labels and Embossed Logos
A Kickstarter tote can carry your logo in six places, but only two of them survive the way backers actually use a tote. Inside-pocket labels and embossed or debossed patches are the branding methods that stay legible after a year of grocery runs, while a chest-height screen print is usually the first thing to crack. This guide compares inside-pocket labels, woven tabs, embossed patches, screen print, heat transfer and embroidery on the fabrics that matter for campaign totes, with unit-cost bands at 500, 1,000 and 2,000 pieces, durability test expectations, and the artwork files you need to send. Minimum order is 500 pcs per style and per colourway, sampling takes 6-10 working days, and production 35-50 days.
- Six places a tote can carry a logo and which ones backers notice
- Why inside-pocket labels outlive every exterior print
- Woven, printed and satin labels: what each one costs and how long it lasts
- Embossed and debossed logos: when the effect is worth the tooling
- Screen print, heat transfer and embroidery on tote bodies
- Branding cost per unit at 500, 1,000 and 2,000 pieces
- Contrast and legibility on canvas versus polyester
- How to test branding before you commit 2,000 pieces
- Artwork files and the brand specification your production team needs
- Sampling, approval and the two-week window most creators waste
- Branding decisions that change your fulfilment pack-out
- The RFQ checklist that produces an accurate branding quote
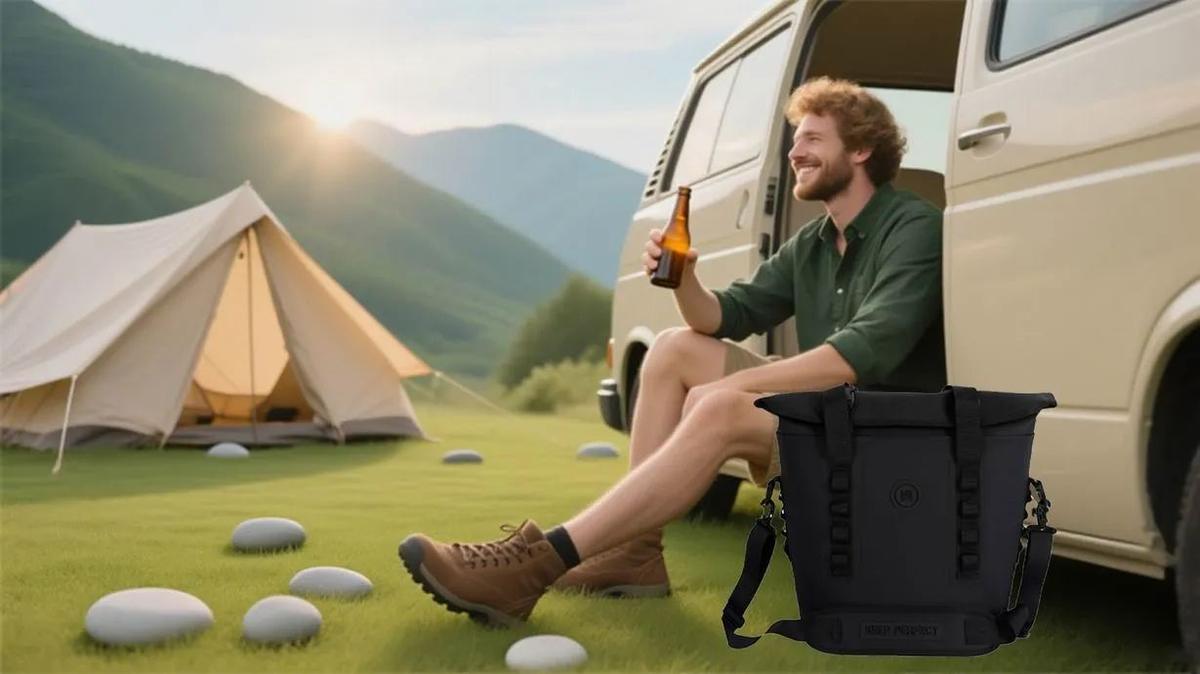
Most campaign totes are branded in the wrong place. Creators spend their artwork budget on a large front-panel print, watch the first backer photos come in, and then discover that the print has cracked along the fold line by week three. The reason is simple: a tote is not a poster. It is a soft, unstructured object that gets folded, stuffed, washed and dragged across car boots. The branding positions that survive that life are the ones that are either protected from abrasion or pressed into a material that has no ink layer to crack. Plan your custom tote bags for Kickstarter around those positions and the reward still looks like a designed product twelve months after delivery.
Six places a tote can carry a logo and which ones backers notice
A tote offers six realistic branding positions: the front panel, the gusset, the handle, the interior lining, an interior pocket, and a hangtag or removable badge. Each one has a different cost, a different durability profile and a different communication job. The front panel is the billboard and it is where backers expect a logo, which is why it is also the position most exposed to abrasion and folding. The gusset is cheap to brand and rarely noticed. The handle is an excellent repeat-exposure position but only works with woven or tubular webbing that carries a jacquard or woven-in mark, and it raises webbing cost.
The interior lining is the sleeper. A lining print is protected from abrasion almost entirely, costs about the same as an exterior print of the same size, and is seen every single time the owner opens the bag. The interior pocket is even better, because the label sits on a small, flat, reinforced area that is easy to sew, easy to inspect, and easy to reprint in a later re-order without changing the whole bag. The hangtag is the only position that costs almost nothing to change after production, which makes it the right place for a campaign-specific message such as a backer number or a launch date.
In practice a well-branded campaign tote uses three of the six: a restrained front-panel mark, an inside-pocket label that carries the full brand story, and a hangtag that can be swapped per reward tier. That combination costs less than a single oversized multi-colour front print and gives you three chances to be remembered. When you brief our production team, ask for the three positions to be costed separately so you can drop one without re-engineering the entire bag.
Why inside-pocket labels outlive every exterior print
An inside-pocket label is sewn into a seam, usually the top edge or the side seam of a slip pocket. Because it sits inside the bag, it never rubs against a hip, a car door or a supermarket trolley. It does not sit on a fold line. It is not stretched when the bag is overloaded. Those three facts alone explain why a sewn-in label still reads crisply long after the same artwork, printed on the outside of the bag, has faded. For a reward that is meant to represent your brand for years, that longevity is worth more than the extra 0.04 to 0.12 USD per unit the label typically adds at 1,000 pieces.
There is a second reason inside-pocket labels matter commercially. Backers photograph interiors. When someone posts a what is in my bag shot, the camera looks into the bag, not at it. A legible interior label is the only branding that appears in that shot. Creators who treat the interior as a branding surface consistently get better organic reach after delivery, because the reward keeps generating photography instead of going quiet the week it ships.
The third reason is practical: an inside-pocket label is the cheapest way to carry information that would otherwise need a printed insert. Care instructions, fibre content, country of origin, your brand URL and a reward tier mark can all sit on one 50 mm by 25 mm label. That removes a printed card from your pack-out, saves one insertion step per unit in the fulfilment centre, and removes a piece of paper that backers throw away. Plan the label early, because the pocket has to be specified with a seam allowance wide enough to take it; adding a label after the pattern is cut means adding a pocket, which costs far more.
Key takeaways
- A
- n
- i
- n
- s
- i
- d
- e
- -
- p
- o
- c
- k
- e
- t
- l
- a
- b
- e
- l
- c
- o
- s
- t
- s
- a
- f
- e
- w
- c
- e
- n
- t
- s
- ,
- a
- d
- d
- s
- a
- y
- e
- a
- r
- o
- f
- b
- r
- a
- n
- d
- l
- i
- f
- e
- t
- o
- t
- h
- e
- r
- e
- w
- a
- r
- d
- ,
- a
- n
- d
- r
- e
- m
- o
- v
- e
- s
- o
- n
- e
- p
- r
- i
- n
- t
- e
- d
- i
- n
- s
- e
- r
- t
- f
- r
- o
- m
- e
- v
- e
- r
- y
- f
- u
- l
- f
- i
- l
- m
- e
- n
- t
- p
- a
- c
- k
- -
- o
- u
- t
- .
Woven, printed and satin labels: what each one costs and how long it lasts
Three label constructions cover almost every campaign tote. A woven label is made on a jacquard loom, with the design formed by threads rather than ink. It is the most durable option, holds fine detail reasonably well down to about 1.5 mm letter height, and typically costs 0.04 to 0.12 USD per piece at 1,000 units depending on size and thread count. A printed satin label uses ink on a smooth polyester tape. It holds finer detail and photographic gradients, costs roughly 0.03 to 0.08 USD at 1,000 units, but the ink can crock under heavy rubbing and it feels less premium to the touch.
A heat-transfer label, sometimes called a tagless label, is printed or pressed directly onto the lining fabric with no tape at all. It costs the least, around 0.02 to 0.05 USD at 1,000 units, adds no thickness and no scratchy edge, and is the right choice for a tote that will be worn against bare skin in summer. Its weakness is that it cannot be repositioned once applied and it needs a smooth, heat-tolerant substrate, so it is a poor match for a brushed or heavily textured lining.
- Woven label: best durability and perceived value, limit letter height to 1.5 mm or more, allow 0.04 to 0.12 USD per unit.
- Printed satin label: best for fine detail and gradients, 0.03 to 0.08 USD per unit, specify a rub-fastness requirement.
- Heat-transfer label: lowest cost and zero bulk, 0.02 to 0.05 USD per unit, requires a smooth heat-stable substrate.
- End-fold versus mitre-fold: end-fold labels are sewn into a seam on both ends and lie flat; mitre-fold labels show on two faces and suit a pocket top edge.
Ask for the label to be specified in the technical pack with its fold type, because the fold changes how the pocket seam is sewn. An end-fold label is captured at both ends inside a seam and lies completely flat against the lining. A mitre-fold label is folded at 45 degrees on each end so it presents the design on two faces, which is what you want on the top edge of a slip pocket. Getting this wrong is one of the most common sampling defects we see, and it costs a full 6-10 working days of sampling cycle to correct.
Embossed and debossed logos: when the effect is worth the tooling
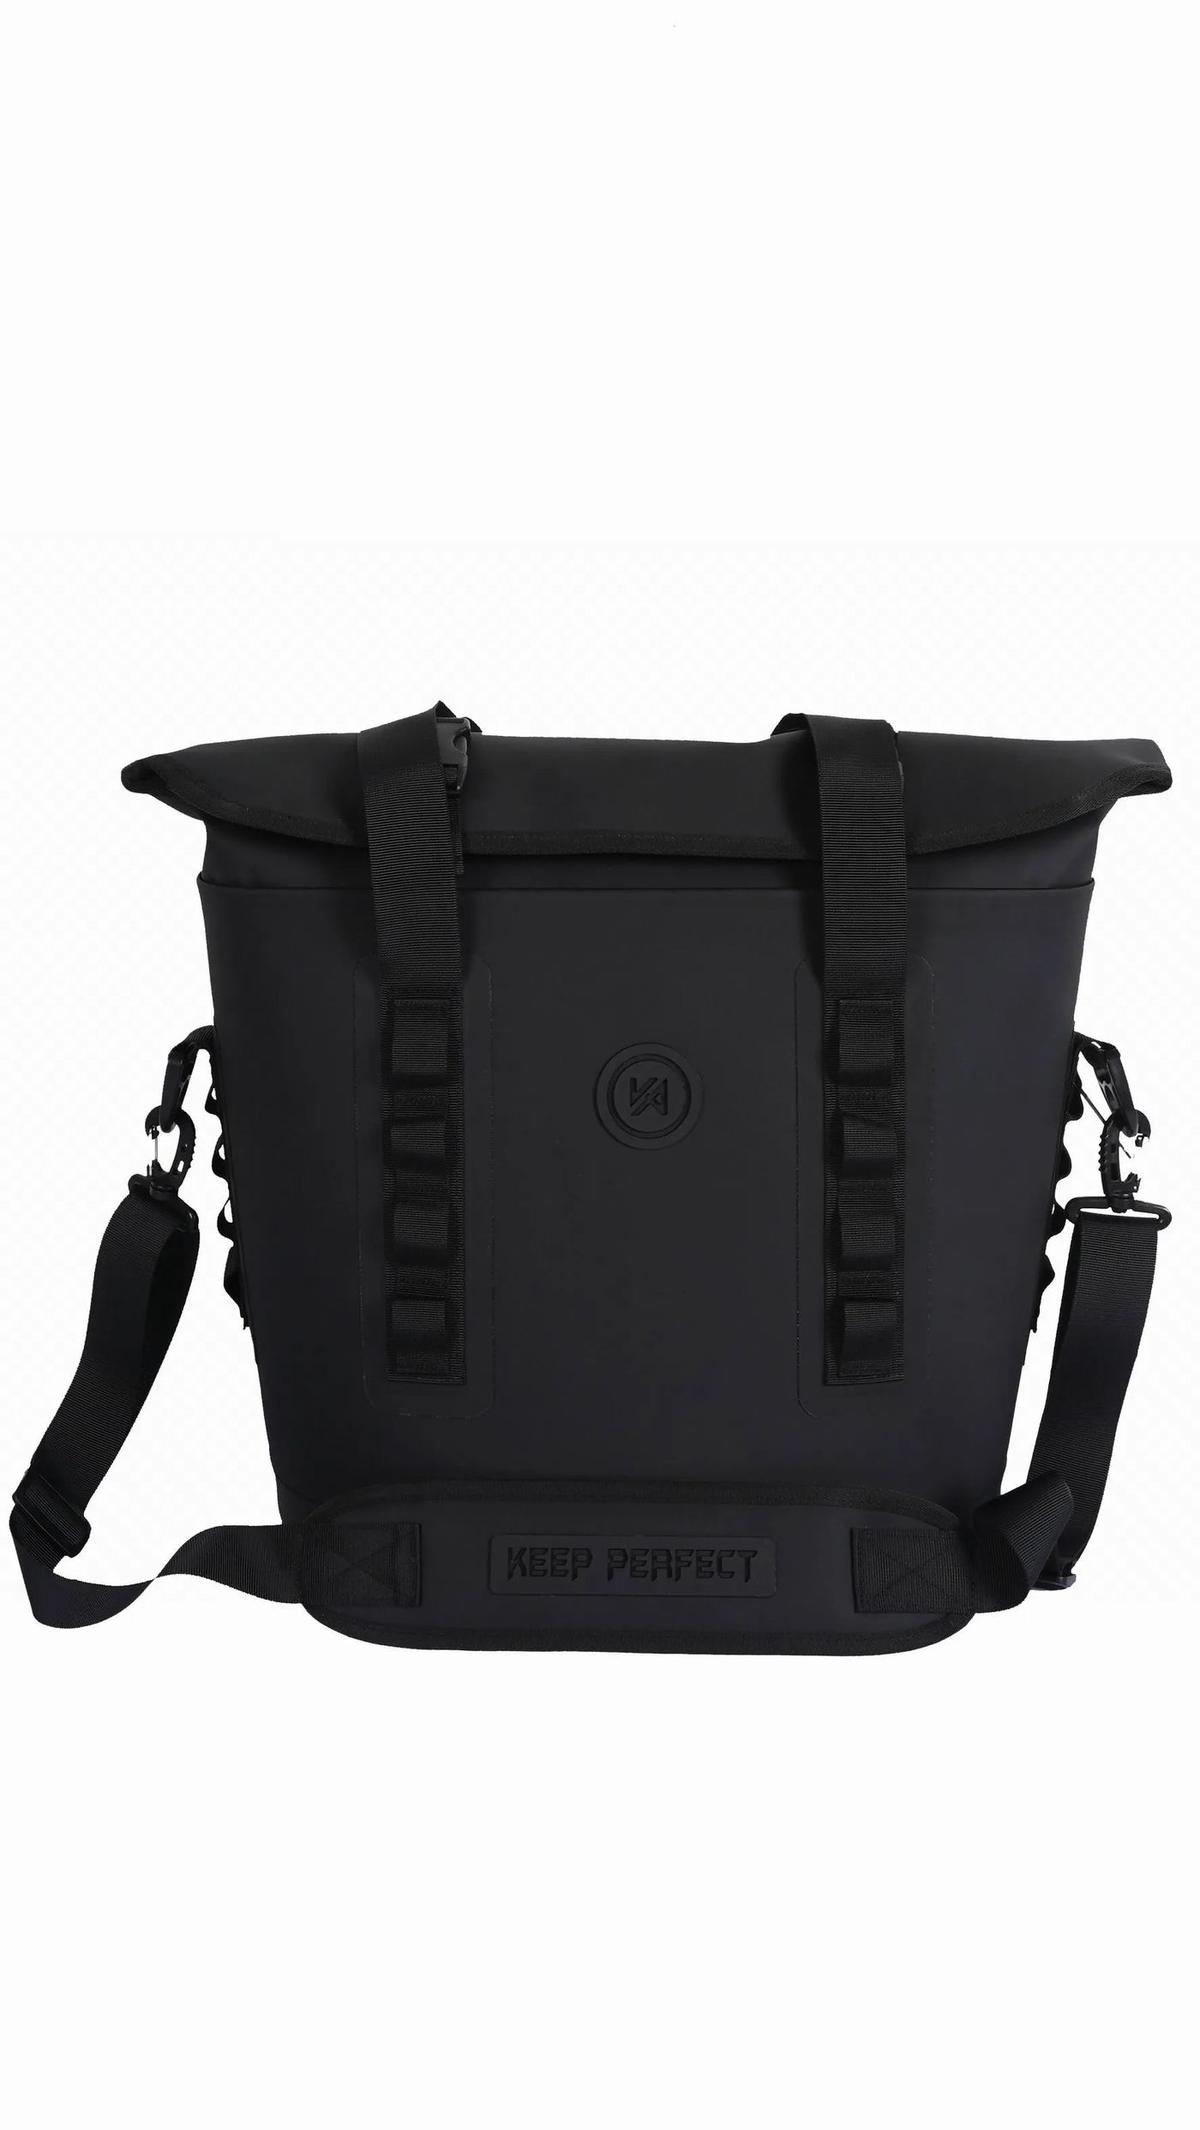
Embossing raises a design above the surface; debossing presses it in. On a tote, the effect is applied to a patch rather than to the body fabric, because open canvas and open-weave polyester do not hold a crisp impression. The patch is usually polyurethane leather, genuine leather, or a thick silicone or rubber badge, and it is then stitched or heat-pressed onto the bag. Tooling for a brass or magnesium embossing die typically runs 150 to 400 USD one-off, and the patch itself costs 0.25 to 1.20 USD per unit depending on material and size.
The economics only work at volume. At 500 pieces, a 300 USD die adds 0.60 USD to every unit before you have paid for the patch. At 2,000 pieces the same die adds 0.15 USD. That is why our sourcing partner recommends embossing only when the design is already fixed, the campaign is likely to re-order, and the reward tier is priced above roughly 45 USD. Below that tier, a dense woven patch or a thick silicone badge gives a similar tactile impression with no tooling cost and a lower risk if you need to change the artwork between tiers.
There is a quality trap worth knowing about. A debossed logo on a cheap PU patch will relax and flatten within a few months, especially if the reward ships in a compressed carton and sits in a warehouse. Specify the patch substrate by hardness and ask for a heat-age result, or simply choose silicone, which holds its shape. Silicone badges also survive machine washing, which matters because a meaningful share of tote owners will wash the bag at some point regardless of what the care label says.
Screen print, heat transfer and embroidery on tote bodies
For the front panel you have three mainstream options. Screen printing lays down a thick plastisol or water-based ink layer, costs 0.15 to 0.60 USD per unit per colour at 1,000 pieces, and gives the strongest colour on light canvas. Its weakness is cracking across fold lines and a plastic hand feel on large areas. Heat transfer applies a pre-printed film, handles photographic artwork and gradients, runs 0.25 to 0.90 USD per unit at 1,000 pieces, and can peel at the edges if the press temperature or dwell time is wrong.
Embroidery is the most expensive at 0.50 to 2.50 USD per unit depending on stitch count, and it is the only option that looks better after washing than before. It is also the only option that adds stiffness, which on a lightweight tote can make the panel pucker. Keep embroidered areas under roughly 80 mm by 80 mm on a 10 oz body, or move the design to a reinforced patch. A digitising charge of 30 to 90 USD applies per design, and the digitised file should be kept on record because it removes that charge on every re-order.
A hybrid approach often wins on campaign totes: a small embroidered or woven mark on the front panel plus a large, inexpensive single-colour screen print that carries the campaign artwork. This keeps the expensive decoration small, keeps the visual impact large, and lets you reprint the bag for a later campaign without re-digitising. Whichever route you choose, ask for a wash-test result on the actual production fabric before approving the sample, not on a generic swatch.
Branding cost per unit at 500, 1,000 and 2,000 pieces
The table below gives typical per-unit branding cost bands from our production programme at the volumes creators actually order. These are decoration costs only and exclude the bag itself. Treat them as bands to build a budget from; the final number depends on size, colour count, stitch count and placement, and every project is quoted individually against a technical pack.
| Branding method | 500 pcs | 1,000 pcs | 2,000 pcs | One-off tooling |
|---|---|---|---|---|
| Woven inside-pocket label | 0.06 - 0.15 | 0.04 - 0.12 | 0.03 - 0.09 | 0 (loom setup included) |
| Printed satin label | 0.05 - 0.11 | 0.03 - 0.08 | 0.02 - 0.06 | 0 - 40 |
| Heat-transfer label | 0.03 - 0.07 | 0.02 - 0.05 | 0.02 - 0.04 | 0 - 30 |
| Screen print, 1 colour | 0.22 - 0.55 | 0.15 - 0.40 | 0.11 - 0.30 | 20 - 60 per screen |
| Heat transfer print | 0.35 - 1.10 | 0.25 - 0.90 | 0.20 - 0.75 | 40 - 120 |
| Embroidery | 0.70 - 3.00 | 0.50 - 2.50 | 0.40 - 2.10 | 30 - 90 digitising |
| Debossed PU or silicone patch | 0.45 - 1.60 | 0.32 - 1.30 | 0.25 - 1.10 | 150 - 400 die |
Read the table as a decision tool rather than a price list. The cost of a woven label barely moves between 500 and 2,000 pieces, so there is no reason to skip it on a small run. The cost of tooling-heavy methods such as embossing falls steeply with volume, so they belong on the tier you expect to re-order. And note that the quantity bands apply per colourway: a 1,000-piece order split across four colours is four 250-piece runs, which misses the 500 pcs per colourway minimum and will be quoted at a higher unit cost.
Contrast and legibility on canvas versus polyester
Canvas and polyester behave very differently under ink. Open-weave cotton canvas absorbs ink, so fine lines spread and a 1 pt stroke can disappear entirely. Practical minimums on 10 oz to 12 oz canvas are roughly 1.5 mm stroke weight for screen print and 2 mm for anything with a serif. Polyester, especially a calendered 600D, has a smoother and less absorbent surface, which allows finer detail but introduces a different problem: dye migration. Some polyester dyes, particularly on dark reds and navy, migrate into plastisol ink and turn a white logo pink within days. Ask for a low-bleed or poly-blocking underbase on dark polyester.
Contrast is the other half of legibility, and it is worth being ruthless about. A tone-on-tone logo looks sophisticated in a product render and disappears in a backer photo taken indoors. Aim for a contrast ratio that reads at arm's length: dark ink on a natural canvas body, or a light mark on a saturated body. If your brand palette will not produce that contrast on the fabric you have chosen, change the fabric before you change the logo, because a reward nobody can read is a reward nobody shares.
One more consideration for campaigns with stretch goals. If you plan to release additional colourways as stretch rewards, design the branding so it works on all of them from the start. A single-colour mark plus a hangtag is far cheaper to extend across six colourways than a four-colour print that needs a new screen set and a new colour-matching approval for each one. Our team regularly sees creators lose two to three weeks of a fulfilment schedule to colour approvals that a simpler branding scheme would have avoided.
How to test branding before you commit 2,000 pieces
Branding failures are cheap to find and expensive to discover late. Build four checks into your sampling stage. First, a crock or rub test: rub the printed or labelled area with a white cotton cloth under a fixed load for a set number of cycles and look for colour transfer. Second, a wash test: run the sample through a domestic cycle at the temperature on your care label and inspect for cracking, peeling or edge lift. Third, a fold test: fold the printed panel along the line the bag will actually fold on and crease it firmly ten times.
Fourth, an abrasion check on the label edges. A sewn label with a heat-cut edge is fine; a sewn label with a raw cut edge will fray and itch. Run your thumbnail along the edge of the sample label. If it feels sharp, specify an ultrasonic or heat-cut finish. These four checks take under an hour, cost nothing beyond the sample fee, and they are the difference between a reward that generates press and a reward that generates complaint tickets.
For the bulk run, hold the branding to the same inspection standard as the construction. Our production programme inspects to AQL 2.5 to ISO 2859-1, and branding defects count as defects: misregistration beyond tolerance, ink cracks, peeling edges, wrong colour, and misplaced labels are all countable. Agree the tolerance in writing before bulk starts. A 2 mm placement tolerance on a front print is reasonable and cheap; a 0.5 mm tolerance is achievable but will raise reject rates and therefore unit cost.
Ask for the branding defect list to be written into the inspection criteria. A beautiful bag with a crooked logo is still a reject, and backers will say so loudly.
Artwork files and the brand specification your production team needs
Send vector artwork. An .ai, .eps or .svg file with outlined fonts and no embedded raster images lets the loom, the screen engraver and the embroidery digitising software all work from one source of truth. If you only have a PNG, expect a redraw fee of 20 to 80 USD and a delay of one to two days. For woven labels, supply the design at final size with the letter heights marked, because the loom programme is derived from the actual dimensions, not from a scaled preview.
Your brand specification should state, in one document: Pantone references for every colour, with a tolerance such as Delta E 2.0 or visual match to a signed swatch; exact placement measured from two fixed reference points such as a seam and the bag bottom; logo size in millimetres; the decoration method; and the substrate. Add a note on what is not allowed, for example no ink on the interior of a pocket that will hold cosmetics, or no embroidery through a waterproof coating. A one-page brand spec prevents more sampling rounds than any amount of email.
Finally, keep a version log. Campaigns change: a stretch goal adds a colourway, a co-branding partner adds a second logo, a late decision changes the URL. Every change needs a version number on the artwork file and on the tech pack. Our programme coordinator keeps that log for you, but the discipline of numbering your files costs you nothing and removes the single most common cause of a wrong-logo bulk run.
Sampling, approval and the two-week window most creators waste
Sampling runs 6-10 working days for a standard tote and 12-15 working days for a complex construction with multiple decoration methods. That clock starts when the technical pack, the artwork and the material confirmation are all complete, not when you first send an email. Creators routinely lose two weeks at this stage by sending artwork in three separate messages, or by approving a fabric before confirming the branding method that will sit on it.
Sequence the approvals so they do not block each other. Approve the fabric and the body construction first, because those decisions constrain everything else. Approve the branding placement second, on a physical sample rather than a digital mock-up, because placement looks different on a sewn bag than on a flat render. Approve the colour last, against a signed swatch under the same lighting you will use for your campaign photography. If you have a hard launch date, work backwards from 35-50 days of bulk production and add two weeks of buffer for a second sample round.
Consider ordering a pre-production sample in addition to the first sample. The first sample proves the design can be made. The pre-production sample, made on the bulk line with bulk materials and bulk branding, proves it can be made repeatedly. The extra cost is modest and the extra time is usually 5-7 working days. For a 2,000-piece reward run that will be photographed by every backer, that confirmation is worth having. You can see how this stage fits the wider sequence in our crowdfunding bag sample prototyping walkthrough.
Branding decisions that change your fulfilment pack-out
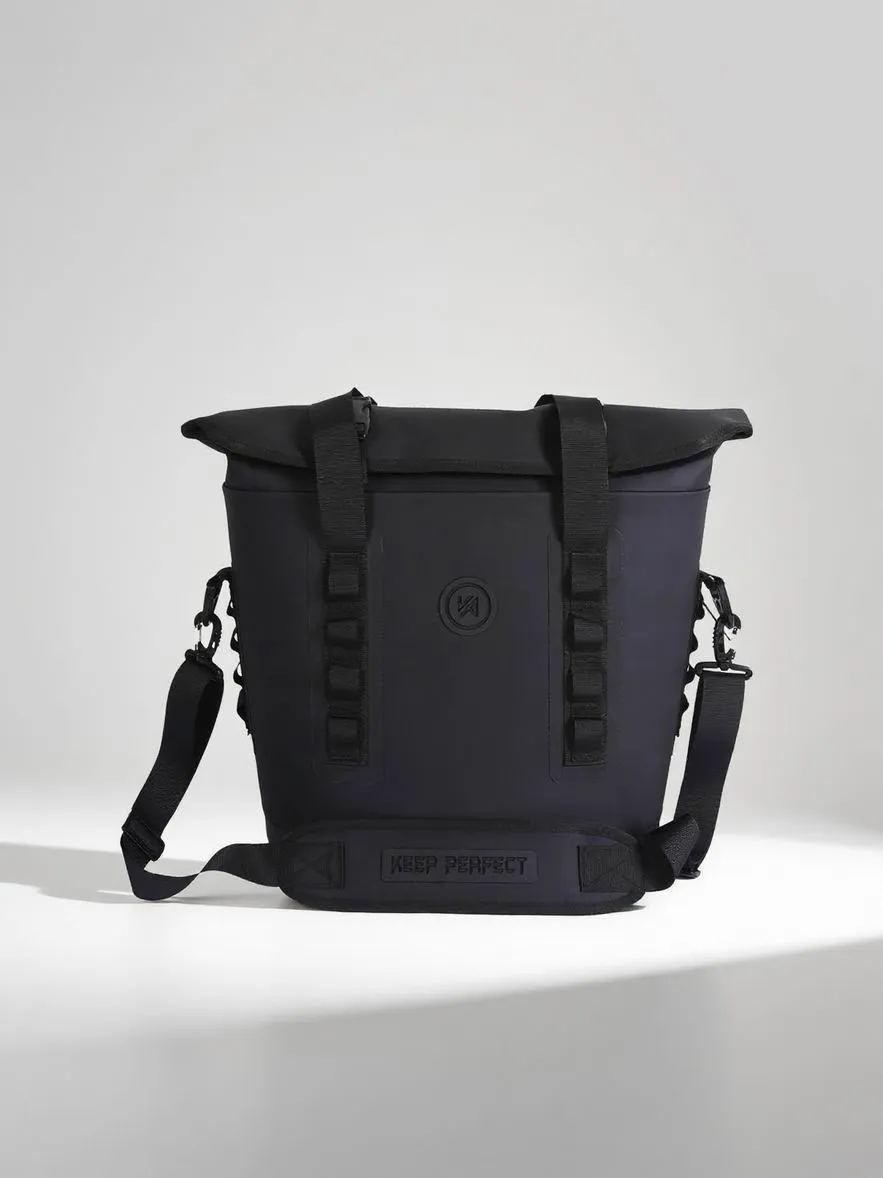
Branding and fulfilment are usually planned separately, and that separation costs money. If your tote carries a hangtag with the backer tier, someone has to attach the right tag to the right bag. If your inside-pocket label carries the care and content information, you do not need an insert card. If your polybag is printed with the tier name, the picker at the fulfilment centre can identify the variant without opening the bag. Each of those is a branding decision that either adds or removes a manual step in pack-out.
A single manual insertion step costs roughly 0.08 to 0.25 USD per unit in a third-party fulfilment centre, and on 2,000 units that is 160 to 500 USD. Designing the branding so that the bag self-identifies is often cheaper than paying for that step. Ask your fulfilment partner for their per-step handling rate before you finalise the branding plan, then decide whether a printed polybag, a woven label or a hangtag does the identification job most cheaply. The answer changes with volume, because printed polybags have their own minimum order quantity.
Also think about the barcode. If any retailer or stockist will ever carry the bag, the barcode needs a home, and the inside-pocket label or the hangtag is the natural place for it. Adding a barcode later means reprinting labels and possibly re-sewing pockets. Decide at sampling stage, not after the campaign funds. Our team has supported more than 20 crowdfunding campaigns through this stage, and the ones that plan the pack-out early are consistently the ones that ship on the date they promised.
The RFQ checklist that produces an accurate branding quote
A branding quote is only as accurate as the request behind it. Send these eleven items and you will get a firm number rather than a range that moves later: bag style and dimensions; body fabric and weight; lining fabric; colourway count and quantity per colourway; every branding position; the method for each position; logo size in millimetres; Pantone references; artwork in vector format; placement measured from two reference points; and target delivery date. Add the test standard you expect, such as AQL 2.5 to ISO 2859-1, and the shipping term, which is FOB Xiamen by default.
- Bag style, dimensions and body fabric with weight in oz or denier.
- Quantity per style and per colourway, remembering the 500 pcs minimum applies to each colourway.
- A numbered list of branding positions with the method specified for each one.
- Logo size in millimetres and Pantone references with an agreed tolerance.
- Vector artwork files with fonts outlined and versions numbered.
- Placement dimensions measured from two fixed reference points on the bag.
- Decorative hardware and patch substrates, specified by hardness where relevant.
- Test and inspection standard, typically AQL 2.5 to ISO 2859-1.
- Target delivery date, worked backwards from 35-50 days of bulk production.
- Shipping term and payment term, FOB Xiamen and T/T 30/70 by default.
- Fulfilment pack-out requirements: polybag, hangtag, barcode, insert or none.
With that list in hand, our sourcing partner can usually return a costed branding plan within two working days, and you can cross-check the schedule against our crowdfunding bag guide before you publish a delivery date, and sampling can start immediately after approval. If you are still deciding between a woven label and a debossed patch, say so and ask for both to be sampled on one bag; seeing them side by side on the real fabric settles the question faster than any amount of discussion. Send us a brief with your artwork and target quantity, and we will come back with a costed plan and a sampling date.
Send us a brief with your tote artwork, target quantity and launch date, and our production team will return a costed branding plan within two working days.
Frequently Asked Questions
What is the minimum order for a branded Kickstarter tote?
The minimum order is 500 pcs per style and per colourway. That means a 1,000-piece order in two colourways is two compliant runs, but a 1,000-piece order split across four colourways is not, and it will be quoted at a higher unit cost. If your reward tiers need several colours, either consolidate to two or three, or plan the smaller colourways as a later re-order once the campaign has funded.
How long does a branded tote sample take?
Standard sampling runs 6-10 working days once artwork, technical pack and material confirmation are complete. A complex tote with multiple decoration methods, such as a debossed patch plus a woven label plus a lining print, runs 12-15 working days. The clock starts on a complete brief, not on first contact, so sending artwork and fabric choice together is the single fastest way to protect your launch date.
Is an inside-pocket label more durable than a front print?
Yes, in normal use it is substantially more durable. A sewn label inside a pocket is protected from abrasion, sits away from fold lines and is not stretched when the bag is overloaded. A front-panel print is exposed to all three. Typical cost difference is small: a woven label adds roughly 0.04 to 0.12 USD per unit at 1,000 pieces, against 0.15 to 0.40 USD for a single-colour screen print that will crack sooner.
How much does embossing tooling cost for a tote?
An embossing or debossing die typically costs 150 to 400 USD one-off. At 500 pieces that adds 0.30 to 0.80 USD per unit, which is hard to justify. At 2,000 pieces the same die adds 0.08 to 0.20 USD per unit, which is easy to justify. Choose embossing only when the artwork is final and you expect to re-order; otherwise a silicone badge gives a similar tactile result with no tooling cost.
Can I put a logo on both the inside and the outside of a tote?
Yes, and most well-branded campaign totes use two or three positions. A common scheme is a restrained exterior mark, an inside-pocket woven label carrying the full brand story and care information, and a removable hangtag for tier-specific messaging. Costing the positions separately lets you drop one without re-engineering the bag, which is useful if the campaign funds lower than expected.
What artwork format should I send for a woven label?
Send vector artwork in .ai, .eps or .svg format with fonts outlined and no embedded raster images. Supply the design at final size with letter heights marked, because the loom programme is derived from actual dimensions. Keep strokes and letter heights above roughly 1.5 mm on woven labels; below that the design fills in and becomes unreadable on the loom.
Will my printed logo crack on a canvas tote?
Any ink layer laid over a fold line will eventually craze, and canvas creases more than almost any other tote fabric. Reduce the risk by keeping large prints away from the natural fold line across the bag body, using a thinner ink deposit or a water-based system, and specifying a fold test at sampling stage. A woven patch or embroidery in the same position will outlast a print by years.
What is dye migration and does it affect polyester totes?
Dye migration is the movement of fabric dye up into an ink layer, which turns light inks muddy or pink. It affects polyester more than cotton, and it is worst on dark reds, navy and some blacks. The fix is a low-bleed or poly-blocking underbase ink. Ask for it explicitly when printing light colours on dark polyester, and request a heat-age test on the production fabric before approving the sample.
How is branding inspected during bulk production?
Branding defects are countable defects under AQL 2.5 to ISO 2859-1. Misregistration beyond the agreed tolerance, ink cracks, peeling edges, wrong colour shade and misplaced labels all count. Agree the placement tolerance in writing before bulk begins: 2 mm is reasonable and economical, 0.5 mm is achievable but raises reject rates and therefore unit cost.
Can I change my logo between reward tiers?
Yes, but manage it carefully. Each variant is a separate artwork version and, for screen print, a separate screen set. Because the 500 pcs minimum applies per colourway and effectively per printed variant, splitting a small run across many logo variants raises unit cost. The cheaper approach is one bag with one logo and a hangtag or polybag sticker that differs by tier.
How much does embroidery cost on a tote bag?
Embroidery typically runs 0.50 to 2.50 USD per unit at 1,000 pieces, depending on stitch count, plus a one-off digitising charge of 30 to 90 USD per design. It looks better after washing than any print, but it adds stiffness, so keep embroidered areas under roughly 80 mm by 80 mm on a 10 oz body or move the design onto a reinforced patch to avoid puckering.
Do I need a barcode on my tote label?
Only if a retailer or stockist will ever carry the bag, but decide at sampling stage rather than later, because adding a barcode afterwards means reprinting labels and possibly re-sewing pockets. The inside-pocket label or the hangtag is the natural place for it. If you plan any retail or stockist channel after the campaign, reserve a 20 mm by 12 mm clear area on the label artwork now.
People Also Ask
Where is the best place to put a logo on a tote bag?
Use two or three positions: a restrained front-panel mark for recognition, an inside-pocket woven label for durability and care information, and a hangtag for tier-specific messaging. Inside-pocket labels outlast exterior prints because they avoid abrasion and fold lines.
Are woven labels better than printed labels?
Woven labels last longer and feel more premium, costing about 0.04 to 0.12 USD at 1,000 units. Printed satin labels hold finer detail and cost slightly less, around 0.03 to 0.08 USD, but the ink can rub off over time.
How much does it cost to brand a tote bag?
Budget 0.03 to 0.12 USD for a sewn label, 0.15 to 0.40 USD for a one-colour screen print, 0.50 to 2.50 USD for embroidery and 0.32 to 1.30 USD for a debossed patch at 1,000 units, plus tooling where it applies.
Can you emboss a logo onto canvas?
Not directly, because open-weave canvas will not hold a crisp impression. The embossed or debossed design goes onto a PU, leather or silicone patch that is then stitched or heat-pressed onto the bag.
How long does tote bag sampling take?
Standard sampling takes 6-10 working days and complex builds take 12-15 working days, starting from a complete brief. production 35-50 days before freight.
Will a screen printed tote logo survive washing?
It will survive several gentle cycles but will eventually craze, especially across fold lines. Request a wash test on the production fabric at sampling stage and consider embroidery or a woven patch if wash durability is a selling point of your campaign.
What file type do I need for custom bag branding?
Vector files (.ai, .eps or .svg) with fonts outlined and no embedded rasters. Supply designs at final size with dimensions marked. A PNG or JPG will usually trigger a 20 to 80 USD redraw fee and one to two days of delay.
Does branding affect the minimum order quantity?
The 500 pcs minimum applies per style and per colourway, and in practice per printed or embroidered variant too. Splitting a run across many logo variants pushes each variant below the efficient quantity and raises unit cost.