Print & Embroidery for Custom Bags
Decoration is where a campaign's brand either looks designed or looks applied. Screen print costs roughly USD 40-120 per colour in screen charges and suits canvas; heat transfer handles gradients on coated synthetics; embroidery is digitised at USD 80-250 per logo and reads premium on structured bags. Sampling runs 6-10 working days, production 35-50 days, and the minimum is 500 pcs per style and colourway. This page compares the methods on cost, durability, fabric compatibility and the defects each one generates.
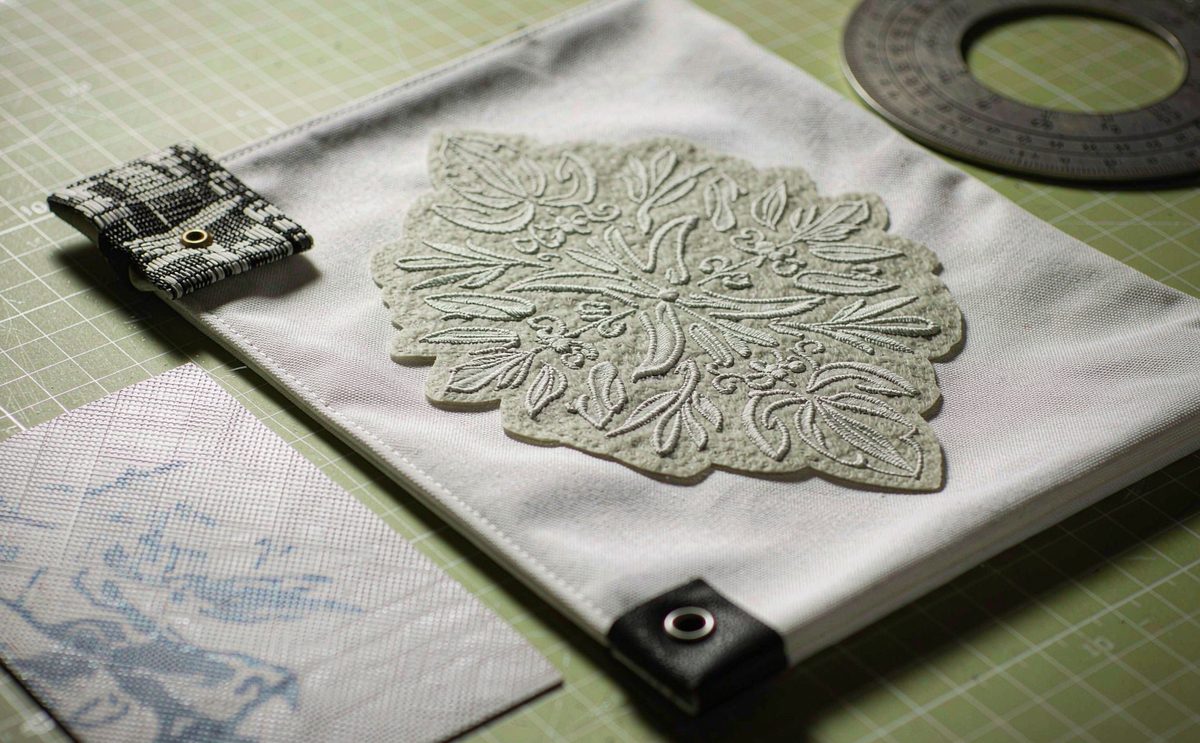
- Decoration is three decisions at once
- Choosing a decoration method
- Screen printing: inks, screens and limits
- Heat transfer and digital methods
- Embroidery: stitch counts, digitising and stabilisers
- Woven labels, patches and hang tags
- Deboss, emboss and hardware branding
- Artwork files and what production needs
- Placement, scale and registration tolerance
- What sampling must prove before bulk
- Decoration defects and how they are inspected
- Cost structure and re-order economics
Decoration is three decisions at once
Creators tend to treat logo application as a finishing detail, chosen after the bag is designed. It is actually three decisions bundled together: a brand decision, because the method sets whether the reward reads as premium or promotional; a cost decision, because method determines both the per-unit price and the one-off charges; and a quality decision, because decoration is one of the largest single sources of defects in a bag shipment.
The three interact with the material in ways that are not obvious until something fails. Canvas absorbs pigment and takes a beautiful print; the same artwork on a coated nylon will sit on the surface and eventually lift. Embroidery looks superb on a structured backpack panel and puckers on a thin lining. Neither problem is visible in a digital mock-up, which is why the method has to be approved on the production fabric at the sampling stage rather than chosen from a portfolio.
- Minimum order quantity
- 500 pcs per style / colourway
- Sampling
- 6-10 working days; 12-15 for complex builds
- Bulk production
- 35-50 days after deposit + approved pre-production sample
- Inspection
- AQL 2.5 to ISO 2859-1
- Screen charges
- USD 40-120 per colour per position
- Embroidery digitising
- USD 80-250 per logo
- Deboss tooling
- USD 120-400 per artwork
- Trade term
- FOB Xiamen; payment T/T 30/70
- Programme contact
- service@junyuanbags.com
Key takeaways on bag decoration
- Choose the method with the fabric, not after it — compatibility is the first constraint.
- One-off charges exist for every method: screens, digitising, plates; most are reusable on re-orders.
- Embroidery cost tracks stitch count, heat transfer cost tracks area, screen print cost tracks colour count.
- Approve every strike-off on the production fabric, on the production panel, at production size.
- Decoration defects are cosmetic and therefore the most likely reason a backer requests a replacement.
Choosing a decoration method
The decision has three inputs and one constraint. The inputs are the fabric, the artwork and the positioning of the reward tier. The constraint is budget, which in practice means both the per-unit cost and the non-recurring charges. The table is the fastest way to narrow five methods down to one or two before a strike-off is commissioned.
| Method | Cost driver | Best fabric | Durability | Reads as |
|---|---|---|---|---|
| Screen print | Colour count and position count | Cotton canvas, uncoated cotton | Very good with correct cure | Clean, graphic, casual |
| Heat transfer | Transfer area | Coated nylon, polyester, rPET | Good; can lift at edges | Technical, photographic |
| Embroidery | Stitch count | Structured panels, canvas, caps | Excellent | Premium, durable, considered |
| Woven label | Label size and weave complexity | Any, sewn into a seam | Excellent | Retail-ready, understated |
| Deboss or emboss | Tooling plus press time | Vegan leather and PU | Excellent | Minimal, luxury |
Two rules of thumb resolve most briefs. If the body fabric is cotton canvas and the artwork is flat colour, screen print is almost always right. If the body is a coated synthetic or the artwork has gradients, heat transfer or a patch is the safe route. Embroidery earns its cost when the reward tier is premium and the audience is durable-goods oriented, which is why it dominates on structured backpacks and technical bags.
Screen printing: inks, screens and limits
Screen printing remains the most economical way to put a logo on a bag at volume. Ink is pushed through a mesh screen onto the fabric, one colour at a time, and each colour requires its own screen and its own registration. That structure explains the cost behaviour: a one-colour logo is cheap, and a six-colour logo costs roughly six times as much in screen charges plus six registration variables in production.
- Water-based ink: the default on canvas. It soaks in, leaves almost no hand feel, and is the most comfortable option on a bag that flexes.
- Plastisol: opaque and reliable on dark grounds, but it sits as a film and will crack across a high-flex area if applied too thickly.
- Discharge: removes the dye rather than covering it, giving a very soft result on reactive-dyed dark cotton; it does not work on every ground colour.
- Puff and speciality inks: add texture and perceived value, but they need a controlled cure and they are unforgiving of temperature variation in bulk.
- Cure control: under-cured ink fails rub testing and washes out, which is the single most common screen print defect in a shipment.
Detail is the practical limit. Below roughly 1 mm of stroke width most canvas weaves lose definition, and small reversed-out text tends to fill in. Simplify artwork before the strike-off rather than after, and resist the temptation to add a colour for the sake of a gradient — halftones achieve the effect with one screen. Screen charges of USD 40-120 per colour are the visible cost; the registration risk is the hidden one.
Heat transfer and digital methods
Heat transfer prints artwork onto a carrier film and presses it onto the fabric under heat and pressure. It handles gradients, photographic detail and small text far better than screen print, and it is the standard answer on coated synthetics where ink will not bond. It is also the method most likely to fail at the edges if press temperature, dwell time or pressure is inconsistent across a production run.
| Variant | Best for | Constraint |
|---|---|---|
| Standard heat transfer | Flat logos on nylon and polyester | Can stiffen the panel; not ideal on high-flex areas |
| Stretch transfer | Pocket faces, straps and panels that flex | Slightly higher cost per unit |
| Sublimation | Polyester and light grounds only | Cannot be used on cotton or dark grounds |
| Reflective transfer | Visibility and safety positioning | Durability depends on the film grade |
| Digital print then transfer | Photographic artwork and gradients | Requires a 300 dpi file at final size |
The practical distinction across those variants is whether the panel moves in use. A standard transfer suits a flat, stable panel; a stretch transfer is formulated with elasticity for pocket faces and straps; sublimation works only on polyester and light grounds but produces a result that cannot peel, because the dye becomes part of the fibre rather than sitting on it. Choose by movement first and by artwork second.
Two cautions are worth stating. Transfers add a slightly plastic hand feel that can undercut a premium positioning, so they are less suitable on a soft canvas where the tactility is the selling point. And a transfer approved at sampling has to be reproduced with the same press parameters in bulk; record temperature, dwell and pressure in the tech pack so the run is repeatable rather than approximated.
Embroidery: stitch counts, digitising and stabilisers
Embroidery is the premium option and the one most likely to be worth its cost on a structured bag. The artwork is converted into a stitch file, a process called digitising that is charged once per logo, typically USD 80-250, and is reusable on re-orders. Per-unit cost then tracks stitch count rather than area, which produces a counter-intuitive pricing behaviour worth understanding before the artwork is finalised.
- A large open logo can cost less than a small dense one, because density drives stitch count and machine time.
- Stitch counts above roughly 8,000-10,000 per logo start to dominate the decoration cost line.
- Small text below about 5 mm in height is unreliable in thread and should be moved to a woven label.
- A stabiliser or backing is required on thin or stretchy fabrics to stop puckering around the motif.
- Padded and curved panels distort embroidery, so the strike-off must be run on the production panel.
- Thread colour should be approved under the lighting the campaign photography will use, not under sample-room light.
Digitising quality is the variable buyers cannot see and absolutely will feel. A poor digitising file produces uneven density, thread breaks during the run and a logo that looks different from unit to unit across 500 pieces. Ask who is digitising, ask for the stitch count before approval, and keep the file: it is a reusable asset that should not be paid for twice on a re-order.
Woven labels, patches and hang tags
Woven labels are the most underrated branding tool in the category. They are cheap, they cannot crack or peel, they survive washing, and they read as retail-ready in a way that print often does not. Sewn into a side seam, an interior facing or a pocket edge, a woven label adds a detail backers notice when they open the bag rather than when they see the campaign page.
- Side seam label: the classic placement, visible when the bag is set down and durable in use.
- Interior label: carries brand, composition and care information in one component.
- Embroidered patch: a way to get an embroidered look on a fabric that will not take direct embroidery cleanly.
- Vegan leather patch with deboss: premium, minimal, and the standard choice for heritage positioning.
- Hang tag and insert card: retail presentation and the natural home for a sustainability or care message.
- Zipper puller branding: extends the mark into hardware at low cost and high visibility.
Composition, care instructions and country-of-origin marking are required in most destination markets. Putting them on a woven interior label removes them from the decoration decision entirely and keeps the exterior artwork clean.
Deboss, emboss and hardware branding
Deboss and emboss press a logo into a vegan leather or PU panel rather than adding material to it. The result is restrained, tactile and unambiguously premium, and it is immune to every failure mode that affects ink and thread. The cost is a tooling charge, typically USD 120-400 per artwork, plus press time; the tooling is reusable, so the second run carries only the per-unit cost.
Hardware branding is the adjacent option and often the better value. A custom zipper puller, an engraved metal plate or a branded buckle puts the mark on the part a backer touches every day, at a tooling cost that is frequently lower than a deboss plate's and with no impact on the fabric at all. Where the budget supports one bespoke element on a premium reward, hardware is usually where it should go.
Artwork files and what production needs
Decoration delays are caused by artwork far more often than by machinery. A logo supplied as a low-resolution raster file, or as a vector with live text that has not been converted to outlines, will send the digitising or screen-making step back to the creator for a re-supply, and that round trip costs days inside a 6-10 working days of sampling window.
- Supply vector artwork: AI, EPS or SVG, with all text converted to outlines and no linked images.
- Provide a raster fallback at 300 dpi or higher at the final print size, for positioning reference.
- State exact dimensions in millimetres for each decoration position, not a percentage of the panel.
- Nominate colour references for each ink or thread, and accept that an exact Pantone match is not always achievable on fabric.
- Mark the placement on a dimensioned drawing or a photograph of the sample bag.
- Confirm which elements are mandatory and which can be simplified if the method cannot hold them.
- Keep the approved digitising file and screen set on record for re-orders.
Placement, scale and registration tolerance
Placement is a specification, not a preference. Without a stated tolerance, every unit is technically correct and some of them look wrong, and there is no basis on which to reject a shipment. Nominate the centre point, the distance from a reference seam, and an allowable deviation in millimetres for each position.
| Method | Typical placement | Recommended tolerance | Common failure |
|---|---|---|---|
| Screen print | Flat front or back panel | +/- 3 mm from the nominated centre | Rotation and inconsistent edge distance |
| Heat transfer | Flat stable panels | +/- 2 mm, with edge lift checked | Edge lifting after washing or flexing |
| Embroidery | Structured front panel, pocket face | +/- 3 mm, plus a rotation limit | Puckering on padded or curved panels |
| Woven label | Side seam, interior facing | +/- 2 mm along the seam line | Label skew or exposed raw edge |
| Deboss | Vegan leather patch or trim | +/- 1 mm within the patch | Inconsistent depth across the run |
Scale deserves equal attention. A logo developed for a screen and applied to a bag at the same proportional size is almost always too small. Nominate the absolute size in millimetres, check it on the physical sample at arm's length rather than on a mock-up, and remember that a pouch and a backpack in the same set should carry the mark at different sizes to look intentional.
What sampling must prove before bulk
Decoration approval is not a matter of looking at a sample and liking it. The strike-off has to demonstrate that the method bonds to the production fabric, that the colour is right under the light the campaign will be photographed in, and that the result survives the handling a backer will give it. The checks below are the ones worth insisting on at the pre-production stage.
- Confirm the strike-off is on the production fabric from the bulk dyelot, not a substitute swatch.
- Check colour under the lighting that will be used for campaign photography.
- Run a dry and damp rub test on printed areas to verify the cure.
- Flex the decorated panel repeatedly and inspect for cracking or edge lift.
- Wash or wet-test the panel where a care claim will be made.
- Verify placement against the stated tolerance with a ruler, not by eye.
- Sign and retain the approved strike-off as the reference for the bulk inspection.
Step four catches most of the failures that matter. A print that looks perfect flat can crack the first time the panel flexes around a packed bag, and a transfer can lift at its edge after a wash cycle. Both are cheap to discover on one sample and expensive to discover in 500 delivered units. The same approval logic is set out from the sampling side on the sample prototyping page.
Decoration defects and how they are inspected
Pre-shipment inspection runs at AQL 2.5 to ISO 2859-1 and covers decoration alongside construction. The problem is that cosmetic defects are judged subjectively unless the standard is written down, so the tech pack should state what is unacceptable: a registration deviation beyond tolerance, any visible cracking, any edge lift, and any shade deviation outside the approved band.
| Defect | Typical cause | How it is caught |
|---|---|---|
| Ink cracking | Over-thick deposit or under-cure on a flex area | Flex test at sampling; visual check at inspection |
| Transfer edge lift | Incorrect press temperature, dwell or pressure | Wash test at sampling; edge inspection in bulk |
| Embroidery puckering | Missing stabiliser on a padded or curved panel | Strike-off on the production panel |
| Registration drift | No stated tolerance or inconsistent jigging | Measured placement check against the tolerance |
| Shade variation | Different dyelot or ink batch between sample and bulk | Comparison against the retained strike-off under a light box |
| Thread breaks and loose ends | Poor digitising or wrong needle and thread pairing | In-line audit and final inspection |
Decoration is disproportionately likely to trigger a backer replacement request, because it is the defect a recipient notices first. It costs the same to inspect it properly as it does to inspect it loosely, so state the standard in the tech pack and hold a signed golden sample at the production site. The full inspection protocol is on the QA and QC page.
Cost structure and re-order economics
Decoration pricing splits into a per-unit cost and a set of one-off charges, and the split matters enormously for a campaign that plans to re-order. Screen charges, digitising files and deboss plates are all reusable; paying them twice on a second run is a negotiation failure rather than an unavoidable cost.
| Method | One-off charge | Per-unit driver | Reusable on re-order |
|---|---|---|---|
| Screen print | USD 40-120 per colour per position | Number of positions and colours | Screens are retained; colours are not re-charged |
| Heat transfer | Film or plate setup, often minimal | Transfer area and quantity | Digital files are reused at no tooling cost |
| Embroidery | USD 80-250 digitising per logo | Stitch count | Digitising file is reused |
| Woven label | Loom setup, often minimal | Label size and quantity | Loom setup is usually reused |
| Deboss or emboss | USD 120-400 tooling per artwork | Press time per unit | Plate is reused |
Ask for the embroidery digitising file, the screen set reference and any deboss plate reference to be held against your programme. On a re-order these are assets you have already paid for, and quoting the second run without them means paying the non-recurring charges a second time.
Send artwork, placement drawings and the body fabric to our sourcing team and we will return a method recommendation with costed options at 500 pcs, or start from the low MOQ production guide if you are still sizing the run. Fabric compatibility is covered in depth on the material customisation page, and the category map shows which methods each bag type usually carries.
Get a decoration recommendation and quotation
Send your artwork, the body fabric and the bag type. As your sourcing partner we will recommend a decoration method, return per-unit pricing at 500 pcs with all one-off charges itemised, and schedule strike-offs inside the 6-10 working days of sampling window. Email service@junyuanbags.com or use the quote form.
- Custom bags for Kickstarter
- Custom backpacks for Kickstarter
- Custom tote bags for Kickstarter
- Custom sports bags for Kickstarter
- Low MOQ bag production for creators
- Crowdfunding rewards fulfilment
- Indiegogo crowdfunding bags
Frequently Asked Questions
Which decoration method is cheapest for 500 custom bags?
A single-colour screen print on canvas is usually the cheapest, because the only one-off charge is USD 40-120 for one screen and the per-unit cost is low. Cost rises with each additional colour. A woven label is competitive where the logo suits it, and carries no per-colour charge at all.
How much does embroidery digitising cost for a bag logo?
Digitising typically runs USD 80-250 per logo and is charged once, not per unit. The per-unit embroidery cost then tracks stitch count, so a large open logo can cost less than a small dense one. Counts above roughly 8,000-10,000 stitches start to dominate the decoration line, and the file is reusable on a re-order.
Can I screen print on waterproof nylon bags?
Generally not with standard inks, because a heavy coating resists adhesion. Use heat transfer, an embroidered patch or a woven label on coated synthetics instead, and approve the strike-off on the production fabric. Confirming compatibility before quoting avoids paying USD 40-120 per screen for a colour that will not hold.
What artwork files does production need for bag printing?
Vector files in AI, EPS or SVG with all text converted to outlines and no linked images. Provide a raster fallback at 300 dpi or higher at final print size, state decoration dimensions in millimetres for each position, and nominate ink or thread colour references. Low-resolution artwork is the most common cause of sampling delay.
How long does it take to approve a decoration sample?
Strike-offs are produced inside the standard 6-10 working days of sampling window, or 12-15 for complex builds. The delay is almost always artwork re-supply rather than production. Supply vector files with the first brief and the window holds; supply them after the sampling slot is booked and it usually slips by several days.
Why does printed artwork crack on some bags?
Cracking comes from an over-thick ink deposit, an under-cured print, or applying a rigid film to a high-flex panel. Specify water-based ink on canvas, keep plastisol deposits thin, avoid printing across fold lines, and flex the decorated panel 20-30 times during sampling before approving the pre-production sample.
What placement tolerance should I specify for a bag logo?
Nominate a centre point, a distance from a reference seam and an allowable deviation: typically +/- 3 mm for print and embroidery, +/- 2 mm for heat transfer and woven labels, and +/- 1 mm for a deboss within a patch. Without a stated tolerance there is no basis to reject a shipment.
Is embroidery or print better for a premium reward tier?
Embroidery, because it reads as durable and considered and survives outdoor use. It suits structured backpack and technical panels, with digitising at USD 80-250 per logo. Print is the better value on flat canvas panels and entry tiers, where a tote reward carries a large printed area at low cost. Many premium campaigns use embroidery on the hero panel and a woven label inside.
Can I reuse my screens and digitising files on a re-order?
Yes. Screens, digitising files and deboss plates are retained and reusable, so a re-order should carry only per-unit decoration cost. Ask for these to be held against your programme by reference, and check the second quote does not repeat the USD 40-120 screen charge or the USD 80-250 digitising fee you already paid.
How is decoration inspected before shipment?
Pre-shipment inspection runs at AQL 2.5 to ISO 2859-1 and covers registration, shade, adhesion and finish alongside construction. State what is unacceptable in the tech pack: registration beyond tolerance, any cracking, any edge lift, and any shade deviation outside the approved band, checked against a signed golden sample.
What is the smallest text size that works in embroidery?
Text below about 5 mm in cap height is unreliable in thread and tends to close up. Move small text to a woven label, which holds fine detail far better, or increase the logo scale. Confirm the size on the production panel during sampling rather than on a digital mock-up.
Should every item in a bundle use the same decoration method?
Yes, one method and one colour reference across the set, with placement and scale varied to suit each item. Mixing methods makes shade and finish consistency difficult and reads as sourced rather than designed. A pouch and a backpack in a 3-item set should differ in logo size, not in logo technique.
People Also Ask
Is embroidery worth the extra cost on a campaign bag?
Usually yes for premium tiers. Digitising is a one-off USD 80-250, per-unit cost tracks stitch count, and the result survives outdoor use and reads as durable. On an entry-tier tote where margin is thin, a well-executed screen print delivers more value per dollar.
Why does my printed logo look different from the mock-up?
Fabric texture, ink absorption and scale. Canvas absorbs pigment and softens edges, coatings repel it, and a logo designed for a screen is usually too small on a bag. Always approve a physical strike-off on the production fabric at production size.
Can I put a photograph on a bag?
Yes, via heat transfer or sublimation. Transfer works on coated synthetics and polyester; sublimation requires polyester and a light ground but produces a result that cannot peel. Both need a high-resolution file, typically 300 dpi at final print size.
How do I stop embroidery puckering on a backpack?
Use a stabiliser or backing behind the motif, reduce stitch density, and run the strike-off on the padded production panel rather than a flat swatch. Padded and curved panels distort embroidery in ways a flat sample will not reveal.
What is a woven label used for on a custom bag?
Branding on a side seam or interior facing, and legally required information such as composition, care and origin. Woven labels cannot crack or peel, survive washing, and read as retail-ready, which makes them the cheapest durability upgrade available.