Custom Cable Organiser Bags for Kickstarter: The Desk-to-Go Reward
A cable organiser is the cheapest physical reward that still feels like a product. It solves a problem every backer already has, it costs a fraction of a bag to produce, and it ships at a volumetric weight low enough to change the fulfilment maths for an entire campaign. At MOQ 500 pcs per style and colourway, sampling 6-10 working days and production 35-50 days, an organiser is the fastest route from a funded campaign to a physical item in a backer's hands.
- Why an organiser earns a place in a tech reward line-up
- Formats: roll, pouch, flat pack and clamshell
- Interior architecture: loops, elastic, mesh and dividers
- Sizing to a real cable kit
- Materials and closures at this price point
- Fulfilment physics: why this reward ships cheap
- Costing a cable organiser at 500 pcs
- Branding and print options on a small panel
- Bundling: organiser plus bag as a single tier
- Sampling and approval for a simple build
- Inspection criteria for a low-unit-cost reward
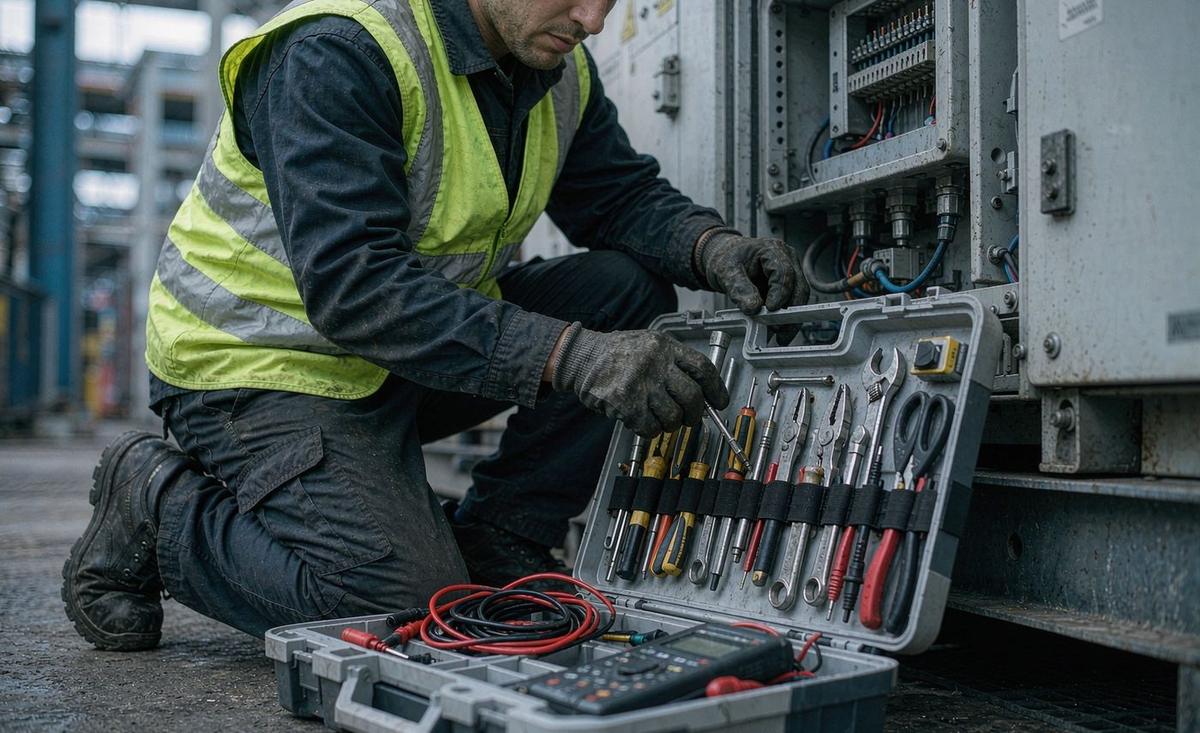
Why an organiser earns a place in a tech reward line-up
Every tech backer owns the same problem in a different form: a drawer, a bag pocket or a desk edge full of cables that tangle, disappear and get replaced. That universality is what makes the organiser the most reliable low-cost reward in the tech catalogue. It does not require the backer to want a new bag, a new colour or a new silhouette; it only requires them to own cables, which they do.
The second reason is that the organiser is additive rather than competitive. A backer who already owns three bags will not pledge for a fourth, but will pledge for something that improves the bags they own. That makes the organiser uniquely good as a companion to a larger reward and unusually safe as a standalone entry tier, because it does not ask the backer to make a choice about a product they already have.
Third, the format is forgiving in production. There is no load-bearing harness, no structured panel and no device compartment with a tolerance measured in millimetres against a specific machine. Fewer things can be wrong, which means sampling converges faster and inspection has fewer functional criteria to fail. On a first campaign where the creator is learning the production process, that forgiveness has real value.
The trade-off is margin perception. A low unit cost rewards a low price, and a low price can make a tier look thin on a campaign page. The answer is not to raise the price but to bundle, which is covered below. As a single-purpose entry reward an organiser is strongest at 19 to 39 USD; as part of a kit it supports a much higher figure without anyone asking why it costs what it costs. If the campaign is choosing between formats, our crowdfunding bag guide compares organisers, pouches and full-size bags on cost and lead time.
Formats: roll, pouch, flat pack and clamshell
Four formats cover the category, and the choice is a decision about how the backer uses the organiser rather than about cost, because all four sit within a narrow band of unit cost. A roll closes with a strap or a tie and packs cables side by side; it is the most compact when full and the most fiddly to pack. A pouch is a single cavity with a zip; it is the cheapest and the least organised. A clamshell opens flat into two panels; it is the easiest to use and the most expensive to build. A flat pack is a sleeve with a fold; it ships flattest and organises least.
| Format | Packing experience | Organisation quality | Unit cost | Packed volume |
|---|---|---|---|---|
| Zip pouch, single cavity | Fastest to pack | Lowest; cables tangle | Lowest | Small; compresses |
| Roll with strap or tie | Slower; cables placed in sequence | High for cables, poor for adapters | Low-moderate | Smallest when rolled |
| Clamshell, two panels | Fastest; both sides visible | Highest; loops plus pockets | Moderate | Fixed; does not compress |
| Flat pack sleeve with fold | Moderate | Moderate; suits flat items | Low-moderate | Flattest in the carton |
| Book-style with a spine | Fast; opens like a notebook | High; suits mixed kits | Moderate-high | Fixed; bulkier per unit |
The clamshell is the recommendation for most campaigns. It is the format that photographs best because both panels are visible when open, it accepts the widest range of interior architecture, and it is the one backers describe as a product rather than a pouch. The additional cost over a simple zip pouch is a second panel, a gusset and a little more labour, which at 500 pcs is a modest increment against a substantial perceived-value gain.
The roll deserves a mention for a specific case: campaigns whose audience is travelling light. A roll packs to a tight cylinder, weighs almost nothing and fits in a pocket of a bag that is already full. If the campaign's positioning is minimalist carry, a roll is more on-message than a clamshell and costs less, even though it offers less organisation.
Interior architecture: loops, elastic, mesh and dividers
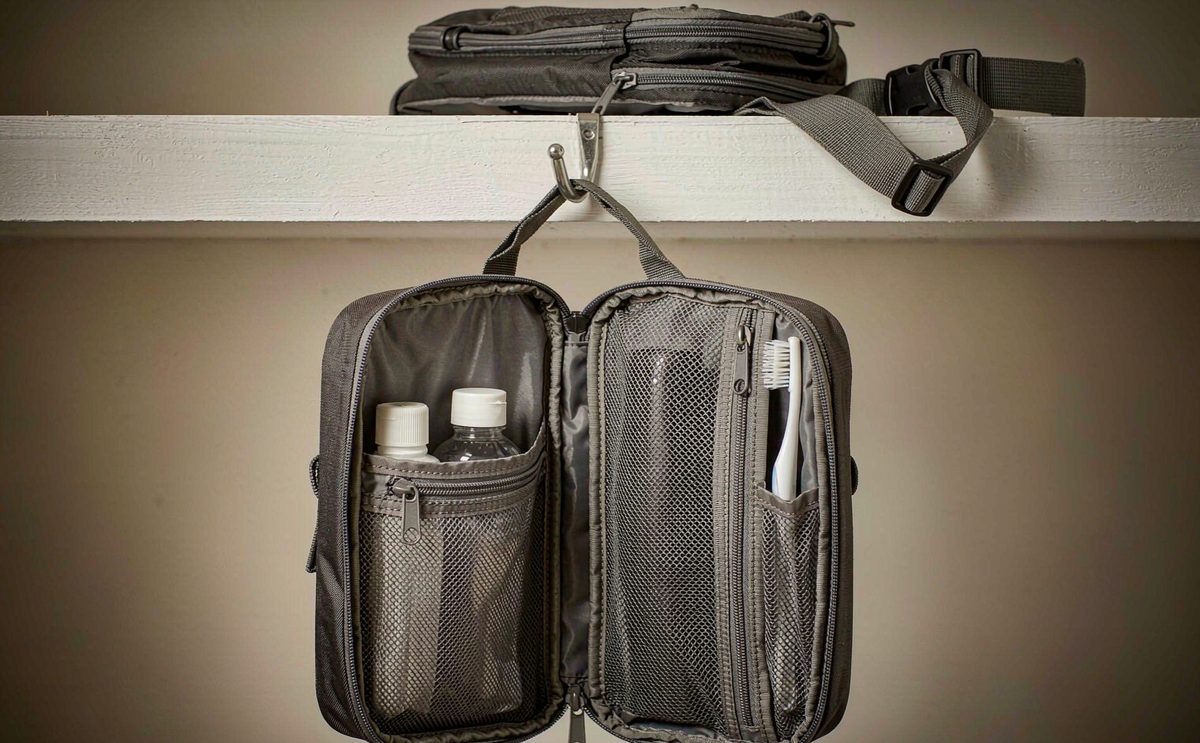
The interior is the entire product. A cable organiser with no interior architecture is a pouch, and a pouch does not solve the problem the backer is pledging to solve. The minimum useful specification is a loop panel that holds each cable separately, plus one pocket for the small items that are not cables: adapters, dongles, a card reader, a SIM tool and the inevitable USB stick.
- Elastic loop panel. Loops in two or three widths, because a USB-C lead, a mains cable and a thin audio cable need different grip.
- Mesh zip pocket. One pocket, sized to the largest adapter in the kit, not to the smallest.
- Slip pockets. Two flat pockets for flat items such as a card wallet, a cable card or a small notebook.
- A pen or tool loop. One narrow loop; it costs nothing and is used constantly.
- Retention across the middle. On a clamshell, a strap or a bridge stops items falling out when it is opened.
Loop count should follow the kit, not a round number. Six to ten loops covers most desk-to-go kits; beyond twelve the organiser becomes a catalogue of loops that the backer cannot fill. Loop width matters more than loop count: a loop sized for a thin cable will not hold a mains lead, and a loop sized for a mains lead will let a thin cable fall out. Specify two widths, typically around 25 to 30 mm and 45 to 55 mm.
Elastic is the component that ages. Cheap elastic loses tension within a year and a loop that no longer grips is a failed organiser. Specify a quality elastic with a stated width and require a stretch and recovery check at sampling. This is one of the few material choices at this price point where spending slightly more is visible to the backer every single time they use the product.
Sizing to a real cable kit
Sizing an organiser means deciding what the backer is expected to put in it, and then building to that list. A desk-to-go kit is not a travel kit: it usually contains a laptop charger with a mains lead, one or two USB-C cables, a phone cable, a pair of earbuds or a small headset, an adapter or dongle, a memory card and possibly a small power bank. That is seven or eight items, of which three are bulky and four are small.
| Item | Bulky or small | Storage element | Notes |
|---|---|---|---|
| Laptop charger with mains lead | Bulky | Wide loop, 45-55 mm | The largest single item; sizes the organiser |
| USB-C cable, 1-2 m | Small when coiled | Narrow loop, 25-30 mm | Two or three of these in a real kit |
| Phone charging cable | Small | Narrow loop, 25-30 mm | Often carried separately; allow for it |
| Wall adapter or power bank | Bulky | Mesh pocket or a deep loop | A 10,000 mAh bank is roughly 140 x 70 x 15 mm |
| USB or HDMI dongle | Small | Slip pocket | Loose dongles are the item most often lost |
| Memory card and card reader | Small | Slip pocket | Flat; a slip pocket is better than a loop |
| Earbuds or a small headset | Bulky | Mesh pocket | Roughly 60 x 45 x 25 mm in a case |
| SIM tool and USB stick | Small | Narrow loop or a small pocket | Easy to lose; give them a home |
Two working sizes cover the market. A small organiser around 240 x 170 x 40 mm suits a phone-and-earbuds kit and fits inside a laptop sleeve pocket. A larger one around 280 x 210 x 55 mm suits a full desk-to-go kit including a charger and a power bank. Publish which one the campaign is offering and what it holds, because the question backers ask is whether their charger fits, not how many litres it is.
Depth is the dimension that decides the answer. A coiled mains lead is 30 to 45 mm thick, and an organiser that closes flat at 25 mm will bulge and strain the zip. Allow depth for the bulkiest item in the published kit, plus a few millimetres, and say plainly whether the published fit assumes cables coiled or folded. That single clarification prevents the most common complaint in this category.
Publish the kit list on the campaign page alongside the dimensions. It converts a size claim into a promise a backer can check against their own drawer, and it pre-empts the question that otherwise dominates the comments section.
Materials and closures at this price point
At organiser price points the material decision is about durability and cleanability rather than about premium feel. A 300D to 600D polyester with a light PU coating is the standard working choice; below 300D the fabric feels thin and above 600D the organiser becomes stiff and heavy relative to its purpose. A recycled PET option is available and is worth considering where the campaign is positioned on sustainability, at a modest material cost increase.
- Shell. 300D to 600D polyester or recycled PET with a light PU coating; a stated denier, not a generic description.
- Lining. A light-coloured lining helps backers find small dark items; a dark lining hides wear. Mid-tone is the compromise.
- Zip. A quality generic slider at a stated gauge, with a pull that can be gripped; this is the component that fails.
- Elastic. A stated width with a stretch and recovery requirement, because cheap elastic loses tension within a year.
- Binding. Bound internal seams on a clamshell; raw edges inside a small organiser look unfinished in photographs.
Closure choice follows the format. A clamshell needs a zip around three sides with an eased tape at the corners, and that is where a cheap organiser shows itself: a zip that binds at the corner radii. Specify the corner radius generously and test the zip on a packed sample, because an empty organiser closes smoothly and a full one does not.
Structured versus unstructured is the last material decision. A light foam lamination between shell and lining gives the organiser enough body to hold its shape when half full, which is how it will usually be. It adds a small material and labour cost and is worth it, because a floppy organiser reads as cheap in a way that no amount of branding can offset.
Fulfilment physics: why this reward ships cheap
Freight is where the organiser's advantage becomes decisive. An organiser packs flat, weighs typically 120 to 260 g and occupies a fraction of a carton. Compare that with a structured backpack at 0.9 to 1.4 kg and a large carton, and the per-unit freight difference across 500 units is often larger than the difference in unit production cost. For a campaign shipping internationally, which most do, that gap is the single strongest argument for including a small item in the reward line-up.
Volumetric weight is the mechanism. Carriers charge on the greater of actual and volumetric weight, and volumetric weight is driven by carton dimensions. A structured bag ships at its own volume whether or not it is full; an organiser ships nearly flat and can be packed several per carton. Reducing carton volume by half does not halve the freight, but it does move it substantially, and on a 500-unit international shipment that is a meaningful line in the campaign budget.
| Reward format | Typical packed weight | Packs flat? | Relative freight per unit |
|---|---|---|---|
| Cable organiser, clamshell | 150-260 g | Yes, compresses | Lowest |
| Small pouch or case | 120-220 g | Semi-rigid: no | Low |
| Flat pack sleeve | 80-150 g | Yes | Lowest |
| Laptop bag, unstructured | 700-1,000 g | Partly | Moderate |
| Structured tech backpack | 1,000-1,500 g | No | Highest |
Damage rate is the second half of the argument. A small, soft, low-value item generates fewer transit claims than a structured one, and if a unit is damaged the replacement cost is small. That reduces the contingency a campaign needs to hold for replacements, which is a real budget line that first-time creators routinely forget to include.
Packaging is worth one decision. A polybag is the cheapest and is adequate for an organiser shipped inside another reward. A printed header card or a belly band costs a little more and makes the item look like a retail product on arrival, which matters when the organiser is a standalone entry tier. Our crowdfunding rewards fulfilment page covers how packaging choice interacts with carton planning and per-unit freight.
Costing a cable organiser at 500 pcs
Costing at this scale is driven by panel count, elastic length and zip quality rather than by fabric. The shell is a small share of the unit cost, which is counter-intuitive for creators coming from bag categories where fabric dominates. The practical consequence is that upgrading the fabric is cheap relative to adding storage elements, so the specification should spend on the interior rather than on the shell.
| Cost element | Typical share | Where the leverage is |
|---|---|---|
| Shell and lining fabric | 18-26% | Upgrading denier is cheap; this is not where cost concentrates |
| Elastic, mesh and trim | 12-20% | Quality elastic is worth funding; it is what ages |
| Zip and pull | 10-16% | The component that fails; never downgrade it |
| Labour and assembly | 28-38% | Driven by loop count and pocket count |
| Branding | 4-10% | Print is cheapest; a woven label costs little more |
| Packaging per unit | 3-7% | Polybag versus a printed header card |
Labour is the largest single line, and it is controlled by one decision: how many storage elements the design carries. Moving from six loops and one pocket to ten loops and three pockets can add 15 to 25 percent to unit cost without adding much perceived value. The specification discipline here is to design the interior against the published kit and stop, rather than adding loops because the space exists.
Volume economics are unusually favourable. Because set-up costs are low and there is no tooling, the unit cost difference between 500 and 1,000 pcs is meaningful but not dramatic, and most of the saving comes from fabric and trim purchasing rather than from labour. That means a campaign can commit to 500 pcs without feeling it has overpaid, which is not true of categories involving tooling. Our low MOQ bag production for creators page sets out how the minimum is applied across formats.
One caveat on the table: it describes a clamshell. A roll or a flat pack shifts the balance towards fabric and away from hardware, because neither needs a zip running around three sides, and a simple pouch shifts it further still.
Branding and print options on a small panel
An organiser offers one good flat branding area, and the choice is usually between a print and a label. Heat transfer or screen print directly onto the outer panel is the cheapest and works well on a flat surface. A woven label set into a seam or onto the panel costs slightly more, lasts longer and reads as more considered. Embroidery is possible on a fabric shell but is often unnecessary at this price point and adds cost without adding much perception.
- Heat transfer print. Cheapest, no tooling, good for a single-colour mark on a flat panel.
- Woven label. Slightly more per unit, no tooling, better durability and a more finished look.
- Rubber or silicone badge. Moderate cost, tactile, works on a curved or a flat panel.
- Debossed patch. Reads as premium; carries a tooling charge for the patch.
- Interior print. A logo or a small pattern on the lining is cheap and is seen every time the organiser opens.
Scale the artwork to the panel. A mark designed for a backpack lid will often be too detailed at organiser scale, so prepare a simplified version with a minimum stroke weight and supply it as vector artwork. Artwork supplied as a low-resolution raster file is one of the most common causes of a delayed first sample in this category, and it is entirely avoidable.
One branding decision is genuinely free: colour. Because MOQ applies per colourway, a single colour run keeps the commitment at 500 pcs, but a contrasting zip tape, pull or binding colour costs nothing extra and makes the item look designed. Specifying a black shell with a coloured zip is the cheapest styling move available and it photographs well.
Bundling: organiser plus bag as a single tier
The organiser is at its strongest inside a bundle. Pairing it with a bag turns a bag tier into a kit, and because the organiser ships cheaply the incremental freight is small. A bundle of a tech bag and an organiser can be presented at a price 30 to 60 USD above the bag alone while the landed cost rises by a fraction of that, which is the clearest margin move in the whole tech reward catalogue.
- Bag plus organiser. The default pairing; the organiser solves the problem the bag creates.
- Organiser plus pouch. Two small items in one carton; a strong entry or mid tier on its own.
- Organiser as a stretch goal. Unlocks for every backer at a funding threshold; cheap per unit and high goodwill.
- Organiser as a survey add-on. Lets backers self-select after funding, sharpening the quantity estimate.
- Organiser plus headphone case. Both small, both cheap to freight, both used daily.
There is a presentation discipline worth following. A bundle is persuasive when the items are shown together doing a job, not when they are listed as separate line items. Photograph the organiser packed and placed inside the bag, and state in the copy what the kit holds. Backers evaluate bundles on whether the combination makes sense, and a photograph answers that question instantly.
For campaigns running a device-carrying tier, keep the two specifications consistent. A laptop bag and an organiser from the same campaign should share fabric, zip finish and branding so the set reads as one family. Our custom laptop bags for Kickstarter page covers how the device compartment is specified, which is the element that differs most from an organiser build. The Kickstarter power bank bags route is the other natural companion in the same kit.
Sampling and approval for a simple build
Sampling runs 6-10 working days for a standard build, and a cable organiser normally sits at the faster end of that band because there is no structure, no tooling and no hardware beyond a zip. That speed is an asset: it means the organiser can be sampled and approved while a larger companion item is still being designed, and it means a late change discovered at sample stage costs days rather than weeks.
- Send the kit list and vector artwork with the RFQ. What the organiser must hold, and the logo in vector form.
- Approve the construction sample. Format, dimensions, loop widths and pocket sizes, before branding.
- Pack the sample with the real kit. Not with substitute cables of similar size; the actual charger and adapters.
- Approve the branded pre-production sample. Logo placement, colour and adhesion checked against the artwork.
- Release bulk after deposit and approval. production 35-50 days from that point.
- Book inspection before cartons close. Functional criteria checked at AQL 2.5 to ISO 2859-1.
The pack test is the step creators skip and should not. An organiser that looks correct empty can be impossible to close when a coiled mains lead and a power bank are inside it, and that failure is only visible with the real kit. Send the actual items to the production team with the RFQ if the sample is being built remotely, or pack the sample yourself and photograph it from two angles.
Revision discipline matters even on a simple item. Write the mark-up as measurements: loop width is 5 mm too narrow for the mains lead, the zip binds at the lower corner, the depth is 8 mm short for the charger. A revision list written that way is actioned in one pass. Our crowdfunding bag sample prototyping programme sets out how the mark-up and approval loop is structured so the second round is the last.
Inspection criteria for a low-unit-cost reward
There is a temptation to inspect a cheap item lightly, and it is the wrong instinct. A low unit cost does not reduce the cost of a complaint: the backer pays shipping either way, and the campaign carries the reputational cost. Inspection runs at AQL 2.5 to ISO 2859-1 and the criteria should be written before the run, weighted towards the two things that actually fail.
| Check | Method | Why it matters |
|---|---|---|
| Loop count and width | Counted and measured against the tech pack | A missing loop is invisible in a carton count and obvious in use |
| Elastic tension and recovery | Stretch and release; check it returns | Cheap elastic loses grip within a year |
| Zip function when packed | Open and close with the kit inside | Catches binding at the corner radii |
| Closes over the published kit | Pack the named items and close | The central claim of the reward |
| Branding placement and adhesion | Checked against artwork and a rub test | A peeling logo on merchandise is a visible failure |
| Interior seam binding | Visual and pull check | Raw edges read as unfinished in photographs |
Agree these with the production team before bulk begins rather than raising them afterwards, and ask for photographs of a packed sample unit in the inspection report. On a small item that is quick to arrange and it lets a campaign confirm fit and finish without unpacking cartons on arrival. Our page on Kickstarter campaign bag QA and QC sets out how functional criteria are documented alongside the standard cosmetic classes.
Weight and dimension checks belong in the criteria too. An organiser produced 10 mm smaller than specified is a fit failure that no cosmetic inspection catches, and a weight check catches a lining or foam substitution quickly and cheaply across a drawn sample.
Finally, ask for the inspection to be booked before cartons close rather than after packing. On a small, cheap item that sequencing is easy to arrange, and it is the difference between correcting a problem and shipping it and then managing the aftermath through the comments section.
Keep one approved unit as the retained sample and refer to it in the inspection criteria. Shade, stitch line and panel shape are judged by comparison, and a physical reference settles a disagreement in seconds where a written description cannot settle it at all.
Scope a cable organiser reward
Send the kit list, preferred format, branding method and target quantity. You get construction options, a unit cost band at three volumes and the sampling window within one business day. Write to service@junyuanbags.com or use the quote form.
- Minimum order quantity
- 500 pcs per style / colourway
- Sampling
- 6-10 working days (12-15 for complex builds)
- Bulk production
- 35-50 days after deposit + approved pre-production sample
- Inspection
- AQL 2.5 to ISO 2859-1
- Trade term
- FOB Xiamen
- Payment
- T/T 30/70
- Team
- 137 staff / 7 production lines / 149 machines
- Capacity
- 200,000 pcs per month
- Campaigns supported
- 20+ crowdfunding campaigns
Frequently Asked Questions
Which cable organiser format works best for a Kickstarter reward?
A clamshell with two panels is the recommendation for most campaigns. It photographs well because both sides are visible when open, it accepts the widest range of interior architecture and backers describe it as a product rather than a pouch. A roll suits a minimalist carry positioning and packs smaller, while a single-cavity pouch is cheapest but organises least.
How many elastic loops should a cable organiser have?
Six to ten covers most desk-to-go kits. Beyond twelve the organiser becomes a set of loops the backer cannot fill. Loop width matters more than count: specify two widths, roughly 25 to 30 mm for phone and USB-C leads and 45 to 55 mm for a mains lead and charger.
What size should a cable organiser be?
Two sizes cover the market. A small one around 240 x 170 x 40 mm suits a phone and earbuds kit. A larger one around 280 x 210 x 55 mm suits a full desk-to-go kit with a laptop charger and a power bank. Allow depth for the bulkiest item, since a coiled mains lead is 30 to 45 mm thick.
What fabric should a cable organiser use?
A 300D to 600D polyester or recycled PET with a light PU coating. Below 300D the fabric feels thin and above 600D the organiser becomes stiff and heavy for its purpose. Add a light foam lamination between shell and lining so the organiser holds its shape when half full, which is how it will usually be.
Why does the zip matter so much on a small organiser?
It is opened constantly and it is the component that fails. On a clamshell the zip runs around three sides and binds at the corner radii if the tape is not eased. Test it on a packed sample, because an empty organiser closes smoothly and a full one does not. Never downgrade the zip to save cost.
How much does a cable organiser cost to produce at 500 pcs?
Labour is the largest line at 28 to 38 percent, driven by loop and pocket count. Shell fabric is only 18 to 26 percent, elastic and trim 12 to 20 percent and the zip 10 to 16 percent. That means upgrading fabric is cheap and adding storage elements is not, so spend the budget on the interior.
Why is a cable organiser cheaper to ship than a bag?
It packs flat, weighs 150 to 260 g and several fit per carton. Carriers charge on the greater of actual and volumetric weight, so carton volume drives the cost. A structured backpack at 1.0 to 1.5 kg ships at its own volume whether or not it is full, which makes per-unit freight far higher.
Should a cable organiser be a standalone reward or part of a bundle?
Both, but it performs best in a bundle. As a standalone entry tier it works at 19 to 39 USD. Paired with a bag it lifts the pledge by 30 to 60 USD while landed cost rises by a fraction of that, because the incremental freight on a small flat item is low.
How long does a cable organiser take from sample to delivery?
Sampling runs 6-10 working days and an organiser usually sits at the faster end because there is no structure, tooling or hardware beyond a zip. production 35-50 days after deposit and approved pre-production sample. The item can often be approved while a larger companion is still in design.
What branding method suits a cable organiser?
Heat transfer print is cheapest and works well on a flat panel; a woven label costs slightly more, lasts longer and reads as more finished. Supply vector artwork scaled to the panel, because a mark designed for a backpack lid is often too detailed at organiser scale.
Which checks belong in a cable organiser inspection?
Loop count and width, elastic tension and recovery, zip function when packed, closure over the published kit, branding placement and adhesion, and interior seam binding. Run at AQL 2.5 to ISO 2859-1 and agree the criteria in writing before the run starts.
Can a second colourway share the 500-pcs minimum?
Not automatically. The minimum applies per style and per colourway. A contrasting zip tape, pull or binding colour is free by comparison and gives the same visual distinction without a second commitment, which is why it is the cheapest styling move available on this format.
People Also Ask
Are cable organisers worth offering as a Kickstarter reward?
Yes. Every tech backer owns the problem, the item is cheap to produce and it ships at a low volumetric weight. It also does not compete with products the backer already owns, which makes it unusually safe as an entry tier.
Clamshell or roll for a cable organiser?
Clamshell for most campaigns, because it photographs well and organises best. Choose a roll if the campaign positioning is minimalist carry, since it packs to a tight cylinder and costs slightly less.
Will a laptop charger fit in a cable organiser?
It depends on depth, not width. A coiled mains lead is 30 to 45 mm thick, so allow depth for the bulkiest item in the kit and state whether the published fit assumes cables coiled or folded.
How do I stop cables tangling inside the organiser?
Separate loops in two widths plus one mesh pocket for adapters. Six to ten loops is the useful range; beyond that the organiser has more loops than the kit can fill.
Is a cable organiser a good stretch goal?
Excellent. It is cheap per unit, unlocks for every backer at a funding threshold and generates goodwill disproportionate to its cost. It also samples quickly, so a late unlock rarely delays the schedule.
Does branding on a small organiser last?
A woven label or a quality heat transfer print lasts well on a flat panel. Avoid very fine artwork below about 20 mm, and supply vector artwork so the first sample is not delayed by artwork reworking.