Custom Duffel Bag Branding: Logo Placement on 360° Surfaces
A duffel has no front, which is the opportunity and the problem at once. The bag is a cylinder with a continuous surface, so a mark is visible from any angle and can be placed in six distinct zones: the end panel, the body band, the top panel, the webbing, the zip pullers and the lining. Each zone suits a different method, and each method has a different cost, typically from 0.15 to 1.20 dollars per placement depending on technique and stitch or print area. Minimum 500 pcs per style and colourway, sampling 6 to 10 working days, bulk 35 to 50 days.
- A duffel has no front: mapping the 360 degree surface
- The six branding zones on a duffel bag
- Choosing a mark method by surface and fabric
- Embroidery on a duffel: size, backing and pucker
- Heat transfer, silicone and rubber patches
- Woven labels, zip pullers and lining marks
- Placement coordinates and the tech pack drawing
- What logos cost: per placement and per method
- Durability testing of the brand mark
- Branding across colourways and size variants
- Sampling the branding programme
- RFQ for a branded duffel programme
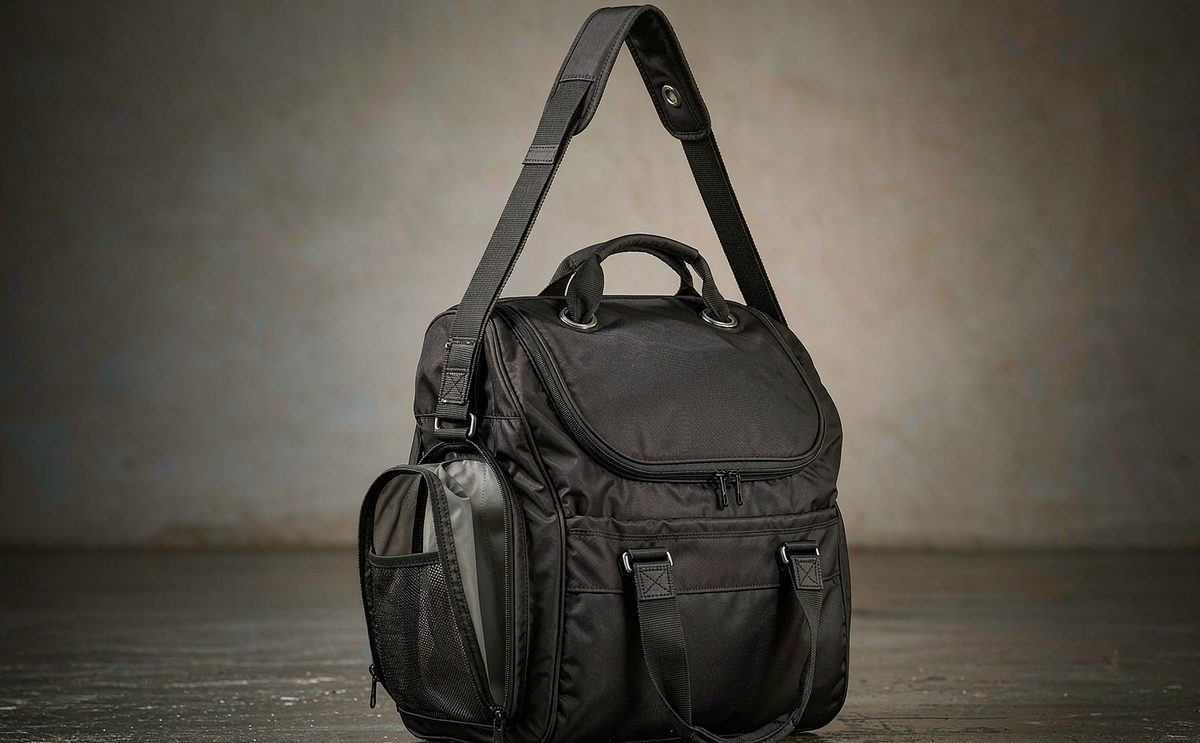
A duffel has no front: mapping the 360 degree surface
Every bag format has one surface that a designer instinctively treats as the front, and on a duffel that surface does not exist. A duffel is a cylinder: it sits on its base, it is carried by a strap at one end or by handles at the top, and whichever way it is set down, a different part of the body faces the viewer. Designers who send a single logo file and ask for it on the front are asking for something the product cannot provide.
That is genuinely good news once it is understood. A continuous surface means a mark placed on the body is visible from any viewing angle, which is a branding advantage a backpack or a structured case cannot offer. It also means the mark can be sized generously without overwhelming a small panel, and it can be repeated at intervals around the body so the bag is branded whichever way it lands. The constraint is not space, it is deciding where the space should be used.
The practical response is to treat branding as a placement plan rather than as a logo. A placement plan names each zone, the method used in that zone, the size of the mark in millimetres, and its coordinates measured from a stated datum on the bag. That plan goes into the tech pack with a drawing, and it converts branding from a conversation into a specification that can be quoted, sampled and inspected. Our custom duffle bags for Kickstarter pillar page covers the format context for creators still settling the body design.
Key takeaways on duffel branding
- A duffel is a cylinder with continuous surface; plan six zones rather than one front logo.
- Match the method to the surface: embroidery suits flat panels, patches suit curved body areas, jacquard webbing suits straps.
- Specify placement by coordinates from a stated datum, not by a description, so the mark can be inspected.
- Budget 0.15 to 1.20 dollars per placement depending on method and area, and count the placements per bag.
- Test the mark for abrasion, crocking and wash fastness before the campaign claims any durability.
- Minimum order quantity
- 500 pcs per style and per colourway
- Sampling
- 6-10 working days (12-15 for complex builds)
- Bulk production
- 35-50 days after deposit and approved pre-production sample
- Inspection
- AQL 2.5 to ISO 2859-1
- Trade term
- FOB Xiamen
- Payment
- T/T 30/70
- Typical mark height, end panel
- 40-70 mm
- Typical mark height, body band
- 25-45 mm
- Embroidery stitch count band
- 3,000-12,000 stitches typical
- Production floor
- 4,950 m² SGS-verified, 137 staff, 7 lines, 149 machines
The six branding zones on a duffel bag
Six zones are available on a standard duffel and each behaves differently in use and in photography. Mapping them before the method is chosen avoids the most common branding error in this category, which is putting an embroidery on a curved, load-bearing area where it will pucker and abrade.
| Zone | Visibility | Suited method | Note |
|---|---|---|---|
| End panel | Highest; faces the viewer when carried and when standing | Embroidery, silicone or rubber patch | Flat and stable; the primary mark |
| Body band | High; visible from any angle | Heat transfer, woven label, repeated print | Curved; avoid large embroidery |
| Top panel | Medium; seen from above | Embroidery or heat transfer | Interacts with the zip; check clearance |
| Webbing strap | High in use, low in product shots | Jacquard or printed webbing | Cheapest repeat branding available |
| Zip pullers | Low cost, high touch frequency | Moulded or wrapped pull with a mark | Among the cheapest signatures |
| Lining | Interior only | Woven label or printed lining | Repeat mark; brand reinforcement |
The end panel is the primary zone and it should carry the primary mark. It is flat, it is stable because it is usually reinforced, and it is the surface that faces the viewer when the bag is carried by its shoulder strap and when it stands on end. A mark of 40 to 70 mm in height reads well at that scale, and the panel will take an embroidery or a patch without distortion.
The body band is the zone most campaigns underuse. Because the surface is continuous, a mark can be placed at two or three points around the body, so the bag is branded whichever way it is set down. Heat transfer and woven labels suit this zone better than embroidery, because the surface curves and a large embroidery on a curve tends to pucker. A repeated small mark at intervals is more effective here than one large one.
The webbing strap is the cheapest branding available and it is worth specifying deliberately. Jacquard webbing carries a woven mark along its length, costs a modest premium over plain webbing, and repeats the brand across the surface the backer touches most. Printed webbing is cheaper still and less durable. Either is a far better value than a second embroidery, and it reads as a considered detail rather than as an addition.
Choosing a mark method by surface and fabric
Five methods cover nearly all duffel branding, and the choice between them is decided by three things: the surface the mark sits on, the fabric it sits on, and the quantity. Embroidery is the most durable and the most expensive per placement; heat transfer is the most flexible and the cheapest; a silicone or rubber patch gives a premium three-dimensional mark; a woven label is cheap and traditional; and jacquard webbing is the cheapest way to repeat a mark.
- Embroidery: best on flat, stable panels. Durable, premium, sized by stitch count. Avoid on curved or stretchy areas.
- Heat transfer: best on flat or gently curved panels and on coated fabrics. Cheap, full colour, less durable under abrasion.
- Silicone or rubber patch: best on the end panel and the body. Three-dimensional, premium, sewn or heat applied.
- Woven label: best on seams, pockets and the body band. Cheap, traditional, limited to woven colour counts.
- Jacquard webbing: best on straps and handles. Repeats the mark along the length; the cheapest per impression.
Fabric compatibility is the constraint most often discovered late. Heat transfer needs a compatible coating: a silicone-finished or heavily water-repellent fabric resists adhesion and the transfer lifts. Embroidery needs a fabric that can take a needle without damage: a very light ripstop will pucker around a dense mark unless the backing is specified. A patch needs a flat area large enough for its shape, and it needs an attachment method that suits the fabric weight.
Quantity decides the setup economics. Embroidery requires a digitised tape and a machine setup, heat transfer requires a film and a press setup, and a patch requires tooling. Each is a fixed cost amortised across the run, so at 500 pcs the setup is a visible share of the placement cost and at 2,000 pcs it is small. That is the argument for consolidating placements: three placements of the same artwork cost far less than three different artworks with three setups.
Embroidery on a duffel: size, backing and pucker
Embroidery is the method most campaigns want and the one most often specified badly. Three variables decide the outcome: the size of the mark relative to the panel, the backing used behind it, and the density of the stitch pattern. All three belong in the tech pack with figures, because a sample embroidered without them will look different from the production run and the campaign will not know why.
- State the mark dimensions in millimetres, height and width, not in proportion to the bag.
- State the stitch count band or ask for it; a typical duffel logo runs 3,000 to 12,000 stitches.
- Specify the backing: a cutaway backing for dense marks on light fabric, a tearaway for lighter marks.
- Specify the thread: polyester for colour fastness, with the shade reference from a stated colour system.
- Keep the mark away from seams, zip lines and strap attachments by a stated clearance, typically 15 mm minimum.
- Ask for a photo of the embroidered sample at close range before approving, since pucker is invisible at arm's length.
Pucker is the failure mode and it has a known cause. A dense stitch pattern pulls the fabric inward around the mark, and on a light or a coated fabric that pull is visible as a ring of distortion. The fix is backing, which stabilises the fabric during sewing, and stitch density, which reduces the pull. A mark that puckers on a sample will pucker on every unit, and it is the kind of defect that reads as cheapness without the backer being able to name why.
Size deserves a note because campaigns consistently ask for marks that are too small. A logo at 25 mm on a 60 litre duffel reads as a label rather than as a brand; the same mark at 55 mm on the end panel reads as intended. The rule of thumb is that the primary mark should be visible in a full-bag photograph taken from three metres, which on most duffels means 40 to 70 mm in height on the end panel and 25 to 45 mm on the body band.
Heat transfer, silicone and rubber patches
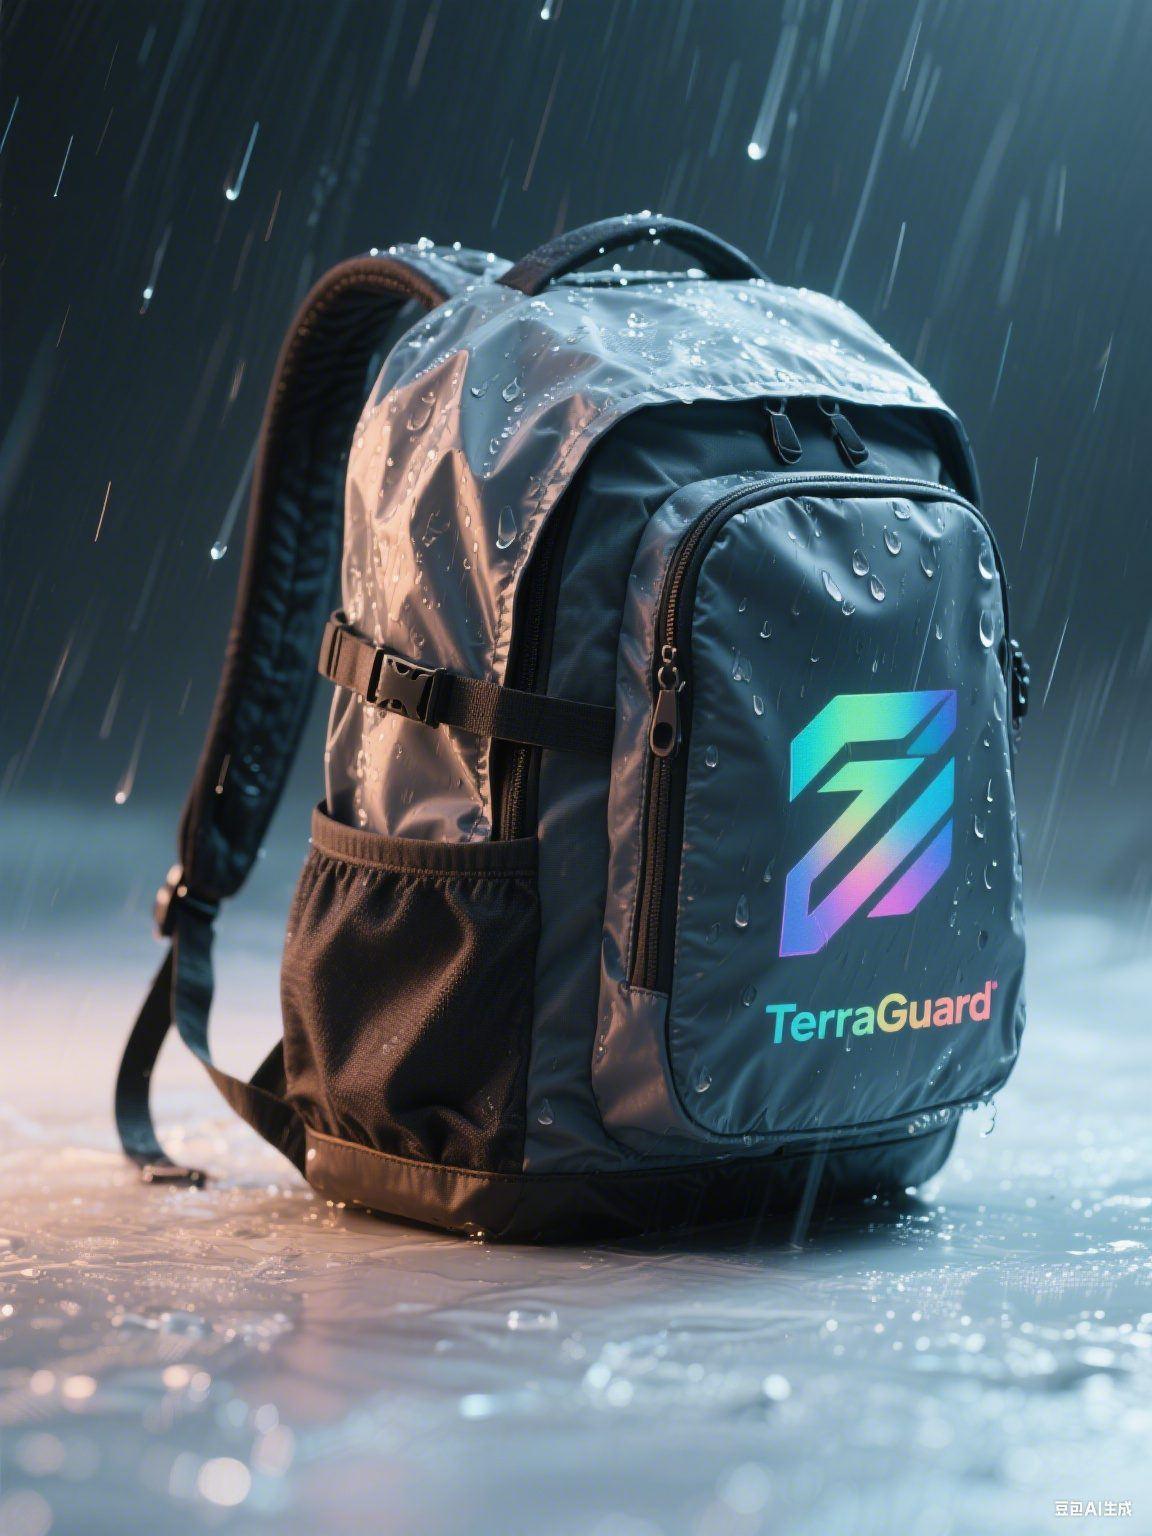
Heat transfer is the most flexible method available: full colour, photographic detail, gradients and small text all reproduce, and the unit cost is low. It applies a printed film to the fabric under heat and pressure, and its weakness is abrasion. On a bag that will be dragged, a transfer on a high-wear area will degrade; on a panel that sees little contact it will last the life of the product.
| Method | Appearance | Durability | Cost position |
|---|---|---|---|
| Heat transfer, film | Flat, full colour, fine detail | Moderate; abrades on high-wear areas | Lowest |
| Silicone patch | Three-dimensional, soft, premium | High; flexible and washable | Highest |
| Rubber or TPU patch | Three-dimensional, defined edge | High | High |
| PU or leather-look patch | Debossed or printed, traditional | Moderate-high | Moderate |
| Woven label | Flat, woven, limited colours | High | Low |
Silicone patches have become the default premium mark on travel bags for good reasons. They are flexible, they take a crisp three-dimensional logo, they do not crack at low temperature the way a rubber patch can, and they can be sewn or heat applied depending on the fabric. They cost more than a transfer and less than a large embroidery at typical sizes, and they photograph very well, which matters on a campaign page.
Two specification points decide whether a patch survives. The first is attachment: a sewn patch is more durable than a heat-applied one, and a heat-applied patch on a coated or water-repellent fabric needs a compatible adhesive and a stated application temperature and pressure. The second is edge finish: a patch with a defined, sealed edge resists lifting at the corners, and lifting at one corner is the most common patch defect in the field.
Woven labels, zip pullers and lining marks
The secondary marks are where a branding programme reads as considered rather than as applied, and they cost very little. A woven label on a side seam, a branded zip puller on the main opening, and a printed or labelled lining each reinforce the brand at a point the backer touches, and together they cost less than one additional embroidery.
- Side seam woven label: the traditional placement; cheap, durable, and it reads as product rather than as advertising.
- Branded zip puller: moulded or webbing-wrapped with the mark. Pulled on every single use, which is the highest touch frequency of any surface on the bag.
- Jacquard webbing on the strap: repeats the mark along the length; the cheapest repeat branding available.
- Printed or labelled lining: visible every time the bag is opened; a strong reinforcement at low cost.
- Interior brand label: carries the care information and the compliance identification in one placement.
The interior label deserves a specific note because it carries two jobs. It is the branding surface the backer sees every time the bag is opened, and it is where the compliance identification lives, including fibre content, care instructions and any required market marking. Specifying those two together avoids a second label and avoids the common problem of a compliance label added late in a position that looks like an afterthought.
One caution on secondary marks: restraint. A bag with an embroidery, a patch, a printed webbing mark, a branded puller and a printed lining can read as over-branded, and travel audiences are unusually sensitive to that. Two or three marks placed deliberately outperform five placed opportunistically, and the cost saving is real.
Placement coordinates and the tech pack drawing
Placement is where branding programmes go wrong in production, and the reason is almost always that it was described rather than dimensioned. A pack that says logo on the end panel, centred produces a mark that is approximately centred on every unit and exactly centred on none, and the inspector has nothing to check against. A pack with coordinates produces the same mark in the same place on every unit.
- Choose a datum on the bag: a seam, the base or the zip line, stated once and used for every placement.
- Give each placement coordinates in millimetres from that datum, horizontally and vertically.
- State the mark dimensions in millimetres and the orientation relative to the bag's upright.
- State the clearance to seams, zips and attachments, typically 15 mm minimum.
- Provide a drawing with the placements marked, even a simple one; it resolves ambiguity faster than any description.
- State the artwork file format and the colour references from a stated colour system.
- Repeat the placement block for every colourway, since a mark that works on a dark body may need a light variant.
The drawing does not need to be a technical illustration. A photograph of the sample with measurements annotated, or a simple flat sketch with arrows and figures, is enough, and it is the single artefact that most reduces branding disputes. Where a campaign has artwork but no drawing, our production team will produce one from the sample photograph and ask for written confirmation before the pre-production sample is made.
Consistency between the artwork and the method matters as much as placement. An artwork designed for print, with fine gradients and thin strokes, will not embroider cleanly and will not mould into a silicone patch at small scale. Where a campaign intends to use several methods, ask for the artwork to be adapted per method rather than rescaled, and approve each adaptation separately at sampling stage. More on the approval discipline is on our crowdfunding bag sample prototyping page.
What logos cost: per placement and per method
Branding cost has two components: a setup cost, which is fixed, and a per-unit cost, which scales. Understanding the split is what makes a branding programme affordable at 500 pcs, because the setup is the larger share at that volume and consolidating artwork is the fastest way to reduce it.
| Method | Setup | Per unit | Best at |
|---|---|---|---|
| Heat transfer | Low | 0.15-0.45 USD | Full colour, flat panels, low volume |
| Woven label | Low | 0.10-0.35 USD | Seams, pockets, interior |
| Embroidery, small mark | Moderate | 0.35-0.90 USD | End panel, premium feel |
| Embroidery, large or dense | Moderate | 0.90-1.80 USD | Primary mark on a flagship bag |
| Silicone patch | Moderate-high | 0.60-1.60 USD | Premium three-dimensional mark |
| Rubber or TPU patch | Moderate-high | 0.50-1.40 USD | Defined edge, durable |
| Jacquard webbing | Low-moderate | 0.05-0.25 USD per metre | Straps and handles |
The figures are ranges rather than prices because they move with size, stitch or print area, colour count and quantity. The useful observation is the shape of the table: a woven label and a heat transfer cost a fraction of an embroidery, and a jacquard webbing mark costs almost nothing per impression. A programme that uses one embroidery, one transfer and one jacquard webbing gets three branded surfaces for roughly the cost of two embroideries.
Two costs are routinely missed. The first is artwork adaptation: a logo designed for screen needs redrawing for embroidery and remodelling for a patch, and each is a small fixed cost that should be quoted rather than assumed. The second is the sample cost of the branding itself: a branded sample costs more than a plain one, and a campaign that changes artwork after the first sample pays the branding setup twice.
Durability testing of the brand mark
A mark that degrades damages the brand more than no mark at all, because it draws attention to itself at exactly the moment the product is aging. Three failure modes matter and all three are testable at sampling stage with equipment no more elaborate than a washing machine, a cloth and a thumb.
- Abrasion: rub the mark 50 times with a dry cloth under firm pressure. A transfer that lifts at the edge or an embroidery that fuzzes fails.
- Crocking and colour transfer: rub the mark with a light damp cloth and check for colour onto the cloth. Relevant for dark embroidery thread on a light body.
- Wash or wet fastness: where the bag is washable, wash a sample once and inspect the mark. A patch that lifts at a corner in one wash will lift in the field.
- Edge lift on patches: run a fingernail around the patch edge and check for any lift, however small.
- Thread pull on embroidery: tug lightly at the stitch field; a loose or snagged thread predicts unravelling.
The placement decision interacts with durability more than the method does. The same heat transfer that lasts indefinitely on the top panel will abrade on the base corner within a season, and the same embroidery that survives on the end panel will pucker on a curved body area. Choose the method for the surface and choose the surface for the wear it will see, and the mark will outlast the campaign.
For campaigns that will make a durability claim about the bag generally, the mark should be tested alongside it. A bag sold on abrasion resistance with a mark that abrades is an obvious inconsistency, and it is the kind of detail a hostile review will find. Our article on durable adventure bag specification covers the wider test regime including abrasion bands and load testing.
Branding across colourways and size variants
A branding plan written for one colourway does not transfer automatically to another. A mark that reads well on a black body may disappear on a grey one and may need an outline on a light one. Each colourway needs its own thread shade or film colour, and each is a small specification decision that is much cheaper to make at sampling than at production.
Size variants raise a second question: does the mark scale? A logo at 60 mm on a 60 litre duffel is correct; the same 60 mm mark on a 30 litre version of the same bag is too large, and a proportionally scaled 40 mm mark is correct. Scaling proportionally by bag dimension is the right default, and it should be stated in the pack so the smaller size is not branded from the larger one's artwork by default.
There is a cost argument for restraint here too. Each additional colourway is a separate 500 pcs style, and each additional branding variant is a setup. A campaign with two colourways and one mark colour that works on both spends far less than one with two colourways and four mark colours. Where a single thread or film shade can serve both bodies, use it, and confirm the decision on physical samples under the same light rather than on a screen.
Sampling the branding programme
Sampling runs 6 to 10 working days for a standard build and 12 to 15 for a complex one, and a branded sample should be treated as a separate approval from the bag itself. The reason is practical: the bag and the mark are reviewed differently. The bag is reviewed by measuring and loading it; the mark is reviewed by photographing it at close range and testing it. Doing both in one pass means one of them is done casually.
- Supply the artwork in vector form, with colour references from a stated colour system, before the sample is booked.
- Ask for artwork adaptation per method rather than a single rescaled file.
- Approve the placement drawing with coordinates before the branded sample is made.
- Review the mark in close-range photographs under consistent light, not only in a full-bag shot.
- Run the abrasion, crocking and edge-lift checks on the sample itself.
- Approve each colourway's mark separately on a physical sample.
- Confirm the branded sample in writing as the inspection reference for placement and shade.
The last instruction is the one that protects the production run. Inspection at AQL 2.5 to ISO 2859-1 checks placement and shade against the approved sample, and without a branded reference unit there is nothing to compare against. Keep one sealed branded sample, state in the inspection instruction that it is the reference, and require placement to be checked on the units drawn rather than assumed from the artwork.
RFQ for a branded duffel programme
A branded duffel is quoted accurately in one exchange when the placement plan exists, and in three exchanges when it does not. The plan is short: a zone list, a method per zone, a size per zone, coordinates, artwork, and the colourway list. Everything else about the bag is quoted in the usual way.
- Zone list with the method chosen for each zone: embroidery, heat transfer, patch, woven label or jacquard webbing.
- Mark dimensions in millimetres per zone, and the artwork in vector form with colour references.
- Placement coordinates from a stated datum, with clearance to seams, zips and attachments.
- Colourway list, with the mark colour specified for each body colour.
- Quantity per style and colourway, with the 500 pcs per style and colourway minimum understood.
- Size variants and whether the mark scales proportionally with each size.
- Durability expectation for the mark: abrasion, wash or wet fastness, and any test the campaign will cite.
- Target delivery month and destination market, so freight, duty and compliance are quoted correctly.
- Inspection standard: AQL 2.5 to ISO 2859-1, with placement and shade checked against the approved branded sample.
- Re-order terms: unit price, lead time and validity period, agreed while the RFQ is still live.
Send that pack to request a quotation with your target delivery month and you will receive a unit cost with the branding lines itemised, a sampling estimate and a booked 35 to 50 day production window. Payment runs T/T 30/70, with the 30 per cent deposit released on written approval of the pre-production sample and the 70 per cent balance due after a passed inspection and before cargo release at FOB Xiamen. Our production team works from 4,950 m² of SGS-verified floor with 137 staff across 7 lines and 149 machines, running 200,000 pcs per month, and has supported 20+ crowdfunding campaigns since 2014.
Turn a logo file into a placement plan
Send us the artwork and the bag design. As your campaign bag specialist we will produce a placement drawing with coordinates, itemise each branding line and return a unit cost with a booked production window.
Frequently Asked Questions
Where should a logo go on a duffel bag?
Plan six zones rather than one front. The end panel carries the primary mark at 40 to 70 mm, the body band carries a secondary mark at 25 to 45 mm, and the webbing, zip pullers, top panel and lining carry reinforcement marks at low cost.
Why can I not put a logo on the front of a duffel?
A duffel is a cylinder with no defined front face. Whichever way it is set down, a different part of the body faces the viewer, so branding has to be planned around the surface rather than onto a panel that does not exist.
Which is better for a duffel, embroidery or a patch?
Embroidery on a flat end panel, a patch where a three-dimensional premium mark is wanted. Avoid large embroidery on the curved body band, where it tends to pucker. A silicone patch is flexible, washable and does not crack at low temperature.
How much does a logo add to a bag unit cost?
Indicatively 0.15 to 0.45 dollars for a heat transfer, 0.10 to 0.35 for a woven label, 0.35 to 1.80 for embroidery depending on size and density, and 0.60 to 1.60 for a silicone patch, each plus a setup cost amortised across the run.
How should logo placement be specified?
With coordinates. Choose a datum such as a seam or the base, give each placement coordinates in millimetres from it, state the mark dimensions and the clearance to seams and zips, and supply a drawing. A described placement is not inspectable.
How big should a logo be on a duffel bag?
40 to 70 mm in height on the end panel and 25 to 45 mm on the body band. The test is visibility in a full-bag photograph taken from three metres. Campaigns consistently specify marks that are too small to read at that distance.
What causes embroidery to pucker on a bag?
Stitch density pulling the fabric inward, and missing or inadequate backing. Specify a cutaway backing for dense marks on light fabric and keep the stitch count within a stated band. Pucker is only visible in a close-range photograph, so ask for one.
Will a heat transfer last on a travel bag?
On a low-wear panel, yes, for the life of the product. On a high-wear area such as a base corner it will abrade. Match the method to the wear the surface will see, and specify a compatible adhesive on coated or water-repellent fabrics.
What is the cheapest way to brand a duffel?
Jacquard webbing on the strap, at roughly 0.05 to 0.25 dollars per metre, and a woven label on a seam at 0.10 to 0.35. Both repeat the mark at a fraction of the cost of a second embroidery and both read as considered detail.
Do I need a different logo colour for each colourway?
Usually yes. A mark that reads on a black body can disappear on a grey one and need an outline on a light one. Approve each colourway on a physical sample under consistent light rather than on a screen, and use one mark colour across bodies where possible.
How is branding checked at inspection?
Against the approved branded sample. Inspection runs at AQL 2.5 to ISO 2859-1 and should include placement measured from the stated datum, shade match, and an edge-lift check on patches. Keep one sealed branded unit as the reference.
When are payments due on a branded duffel order?
Payment is T/T 30/70. The 30 per cent deposit falls due on written approval of the pre-production sample, including the branded sample, and releases materials and the production slot. The 70 per cent balance falls due after a passed inspection and before cargo release at FOB Xiamen.
People Also Ask
Where do you put a logo on a duffel bag?
On the end panel as the primary mark, at 40 to 70 mm. Add a secondary mark on the body band at 25 to 45 mm, and use jacquard webbing, a woven label or a branded zip puller for low-cost reinforcement.
Is embroidery or heat transfer better for a bag logo?
Embroidery is more durable and more premium and suits flat panels. Heat transfer is cheaper, handles full colour and fine detail, and suits low-wear panels. Choose by surface wear rather than by budget alone.
How do I stop a bag logo peeling off?
Match the method to the surface. Use a sewn patch rather than a heat-applied one where possible, specify a compatible adhesive for coated fabrics, and seal the patch edge so it cannot lift at a corner.
What size should an embroidered logo be?
40 to 70 mm tall on the end panel of a full-size duffel. Below 25 mm it reads as a label rather than a brand. Scale proportionally on smaller sizes rather than reusing the larger artwork.
Can I use the same artwork for embroidery and a patch?
Not without adaptation. Artwork designed for print has fine gradients and thin strokes that do not embroider cleanly or mould at small scale. Ask for a version per method and approve each at sampling.
How much does branding add to a 500 pcs bag order?
Perhaps 0.50 to 3.00 dollars per unit for a two or three mark programme, plus setup costs amortised across the run. Consolidating artwork across placements is the fastest way to reduce the setup share at 500 pcs.
Should the logo appear inside the bag too?
Yes, at low cost. A woven label on the lining is seen every time the bag is opened and can also carry the care information and compliance identification, which avoids a second label added late.