Custom Zipper Pouches for Kickstarter: Sizes, Linings, and Branding
How do you spec a custom zipper pouch that feels premium and still packs cheaply? Start with three sizes — 18 x 12 cm, 24 x 16 cm and 30 x 20 cm — then choose one lining grade and one branding method for the whole run. Our production team builds pouches at 500 pcs per style and colourway, sampling in 6-10 working days and running production 35-50 days. This guide covers the three decisions that set unit cost.
- Matching pouch size to pledge tier, not to guesswork
- Zip specification: gauge, tape, slider and puller
- Linings and what each grade buys you
- Structure: flat, gusseted and boxed-base builds
- Branding methods ranked for zipper pouches
- Colourway strategy and shade matching across a run
- QC checkpoints on a zipper pouch run
- Unit cost breakdown and volume pricing
- Sampling, approval and the production window
- Compliance and labelling for pouches
- The zipper pouch RFQ checklist
Matching pouch size to pledge tier, not to guesswork
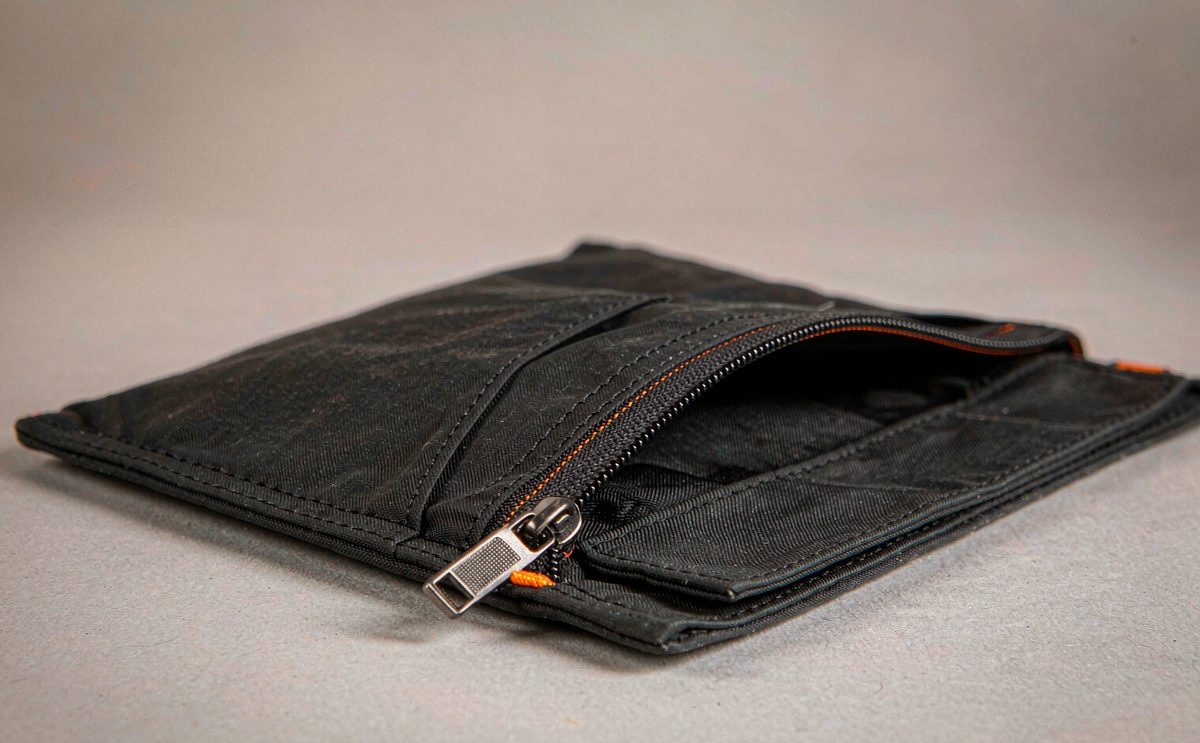
Pouch sizes drift upwards during design. A medium pouch that started life at 22 x 14 cm ends up at 28 x 20 cm after three rounds of “it needs to fit a bit more”, and nobody notices that the carton count has fallen by a third. The fix is to choose sizes from the contents backwards and then treat the numbers as fixed, because pouch dimensions are the cheapest specification to control and the most expensive to change once packing is planned.
Three sizes cover almost every reward use case. A small pouch around 18 x 12 cm handles cables, cards, coins and small accessories. A medium around 24 x 16 cm covers toiletries, cosmetics and small tools. A large around 30 x 20 cm works as a tech organiser or a travel document wallet. Each step up is roughly a 60-80% increase in panel area, which is why the jump matters more than it looks on screen.
The commercial point is that sizes map to tiers. A small pouch sits naturally in a low add-on band, a medium in a mid tier, and a large in a premium band or as part of a bundle. Where a pouch is one of several formats in the reward range, the custom bag categories page shows how pouch SKUs sit alongside totes, cosmetic bags and organisers in a single programme.
- Minimum order quantity
- 500 pcs per style / colourway
- Sampling
- 6-10 working days (12-15 for complex builds)
- Bulk production
- 35-50 days after deposit + approved pre-production sample
- Inspection
- AQL 2.5 to ISO 2859-1
- Trade term
- FOB Xiamen
- Payment
- T/T 30/70
- Production floor
- 4,950 m² SGS-verified, 137 staff, 7 lines, 149 machines
- Monthly capacity
- 200,000 pcs per month
- Programme contact
- service@junyuanbags.com
Key takeaways before you spec a zipper pouch
- Three sizes — 18 x 12, 24 x 16 and 30 x 20 cm — cover almost every reward use case.
- Zip gauge drives both cost and feel: #3 for small pouches, #5 for medium and large.
- Lining grade is the cheapest way to lift perceived value, typically 10-35 g and 15-40% on unit cost.
- One branding method per run keeps setup charges, QC burden and lead time predictable.
- Bar-tack both zip ends; it is the single highest-value reinforcement you can specify.
Zip specification: gauge, tape, slider and puller
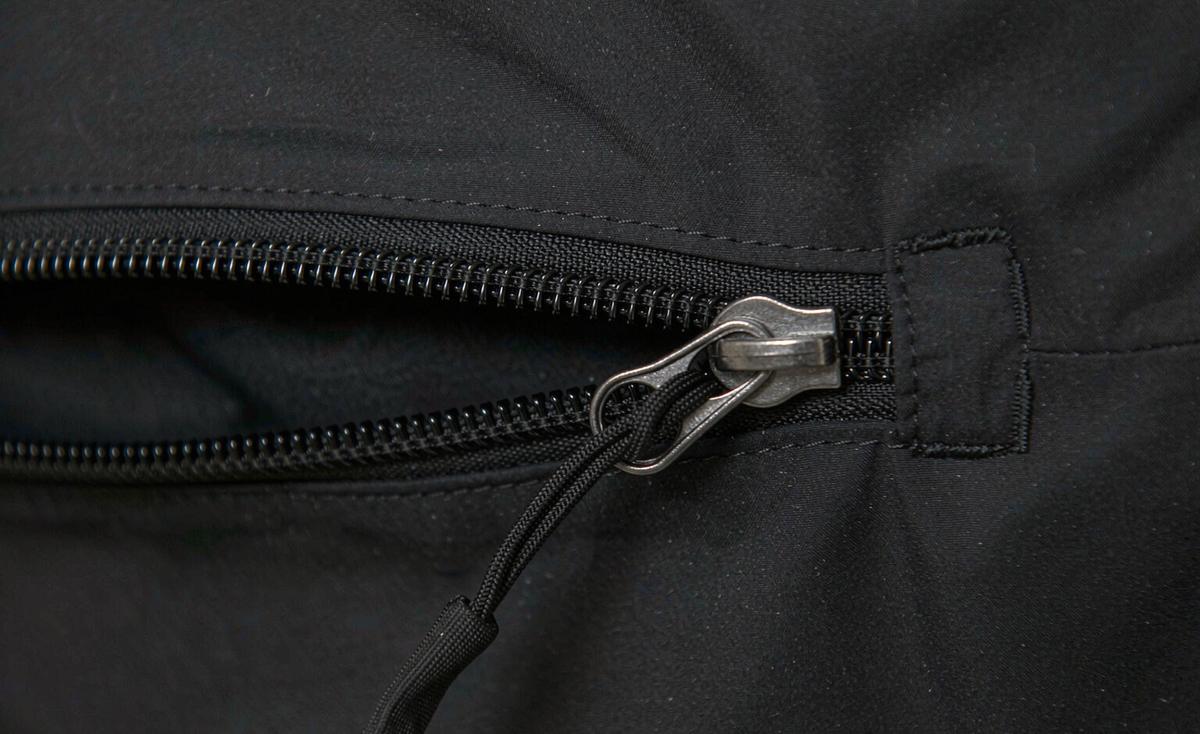
The zip is the component that carries both the cost and the failure risk on this format, and it is the one most often left as a generic line item on a tech pack. Four attributes need naming: gauge, tape material, slider type and puller. Gauge is the coil width in millimetres — #3 is roughly 3 mm of coil for a light pouch, #5 roughly 5 mm for something that will be opened and closed daily.
Tape material matters more than most creators expect because it is what the shell is sewn to. Polyester tape on a polyester shell behaves predictably through washing and abrasion; mixing tape and shell fibres invites differential shrinkage. The slider should be specified as auto-lock or non-lock, with the stop type named, and the puller chosen from catalogue hardware unless the volume justifies tooling.
Zip length and opening geometry
Zip length determines how far the pouch opens, and therefore what can realistically be put inside it. A pouch that is 24 cm wide with a zip running the full width opens almost flat, which is what a tech organiser needs. The same pouch with a zip that stops 4 cm short of each end becomes a top-access pouch with a restricted mouth, which is fine for cosmetics and frustrating for anything rigid. Specify zip length in centimetres, state where it starts and stops relative to the side seams, and check the opening against the largest intended contents at sampling.
Two failure modes follow from geometry. The first is the zip tape twisting at the end where the slider parks, which is prevented by a straight tape run and a securely set stop. The second is the pouch body straining at the corners when the mouth is pulled wide, which is a seam allowance and reinforcement issue rather than a zip issue. Both are visible on a loaded sample and both are cheap to fix before bulk, which is the argument for testing the sample with contents rather than approving it flat.
| Pouch size | Recommended gauge | Tape | Cost index | Typical cycle life |
|---|---|---|---|---|
| Small, 18 x 12 cm | #3 coil | Polyester | 1.00 | 3,000 - 5,000 cycles |
| Medium, 24 x 16 cm | #5 coil | Polyester | 1.20 | 5,000 - 8,000 cycles |
| Large, 30 x 20 cm | #5 coil | Polyester | 1.30 | 5,000 - 8,000 cycles |
| Boot or gusseted format | #8 coil | Polyester | 1.60 | 8,000 - 10,000 cycles |
| Premium retail tier | #5 metal | Polyester | 1.85 | 8,000 - 10,000 cycles |
| Value promotional tier | #3 coil, non-lock | Nylon | 0.85 | 1,500 - 3,000 cycles |
- Name the gauge, tape material, slider type and puller in the pack rather than writing “zip” alone.
- Specify metal stops at both ends; a plastic stop on a daily-use pouch is the top failure point.
- Require bar-tack reinforcement at both zip ends — under 0.02 USD per unit for most of the risk removed.
- Match tape fibre to shell fibre to avoid differential shrinkage in the wash.
- Ask for a slider pull-test figure and make it an inspection criterion, not a verbal promise.
Linings and what each grade buys you
Lining is the highest-leverage decision on a pouch. It is invisible in most product photography and it is the first thing a backer notices on opening the bag. An unlined pouch with overlocked internal seams reads as a giveaway. The same pouch with a 210D lining in a toning shade reads as a product. The difference is roughly 10-15 g of weight and around 15% on unit cost, which is a better return than almost any other upgrade available.
Four grades cover the range. Unlined, with overlocked or bound internal seams, is the cheapest and lightest and suits a pure accessory pouch. A 210D polyester lining is the default and the best value. A heavier 420D or a brushed tricot lining suits a tech organiser where scratch protection matters. A wipe-clean TPU or PEVA lining is the right call for cosmetic and toiletry pouches where leaks are expected, and it is the grade most likely to prevent a complaint.
| Lining grade | Added weight | Cost index | Best for |
|---|---|---|---|
| Unlined, overlocked seams | 0 g | 1.00 | Lightest accessory pouch |
| Unlined, bound internal seams | 5 - 10 g | 1.10 | Premium-feel unlined pouch |
| 210D polyester lining | 10 - 15 g | 1.15 | Default for most reward pouches |
| Brushed tricot lining | 20 - 30 g | 1.30 | Tech organisers, screen protection |
| Wipe-clean TPU or PEVA | 20 - 35 g | 1.40 | Cosmetic and toiletry pouches |
| Recycled rPET lining | 10 - 18 g | 1.25 | Sustainability-led campaigns |
One construction note applies across all grades: the lining must be anchored at both ends. A lining that floats inside the shell bunches at the corners after a few uses, and that is the single most common cosmetic complaint on this format. Specify the anchoring points in the tech pack and check them at inspection. Material selection for both shell and lining sits on our material customisation page.
Structure: flat, gusseted and boxed-base builds
Structure is the cost driver that most closely tracks panel count. A flat pouch is two panels and a zip: cheapest to cut, fastest to sew, and the easiest to inspect. A gusseted pouch adds a strip of material around three sides, which allows it to stand and to hold depth. A boxed-base pouch adds corner work that gives a flat bottom and the most retail-ready appearance, at the highest cost and the highest defect concentration.
| Structure | Panels | Cost index | Defect concentration | Ships flat? |
|---|---|---|---|---|
| Flat, zip at top | 2 | 1.00 | Zip ends only | Yes, fully flat |
| Flat with bound seams | 3 | 1.20 | Binding joins | Yes, fully flat |
| Gusseted, 3 sides | 3-4 | 1.35 | Gusset corners | Partial |
| Boxed base | 4-5 | 1.55 | Boxed corners | Partial |
| Structured with interlining | 6-8 | 1.90 | Frame and base | No |
| Two-compartment build | 6-9 | 1.75 | Divider seams | Partial |
Seam finishes that survive compression
Internal seam finish does more for perceived quality on a pouch than almost any other detail. An overlocked raw edge is cheap and quick, and it reads as cheap. A bound internal seam, using a tape cut from the lining or a contrast binding, adds one operation and roughly 5-10 g, and it is the difference between a pouch that looks finished inside and one that does not. Where the pouch is lined, the lining itself conceals the internal seams, which is another argument for lining rather than an argument against binding.
Compression is the stress test that separates them. A pouch packed flat in a carton for six weeks and then handled by a backer will show every unfinished edge. Specify the seam finish in the tech pack, confirm it on the pre-production sample, and include it in the inspection criteria, because it is a specification item that inspectors will not check unless it is written down.
On a boxed-base pouch, the corner join carries load from three directions at once. Specify the seam allowance, typically 10 mm, and the stitch density separately for that seam. Most bulk pouch defects found at inspection are corner failures on boxed bases, not panel or zip failures.
Branding methods ranked for zipper pouches
Panel area on a pouch is small, so branding method is constrained by legibility before it is constrained by budget. Embroidery needs roughly 5 mm of letter height and a stable panel; below that the logo loses definition. Screen print handles fine detail on a flat panel and is durable on polyester at one to three colours. Heat transfer handles gradients and photographic detail but adds a film layer that changes the hand feel.
A woven label is underrated on this format. Because the design is woven rather than applied, it survives abrasion at a seam, it does not crack, and it reads as a considered detail in unboxing photography. Combined with a single controlled print block, it usually delivers a better result than a large print alone. The full method comparison is on our print and embroidery options page.
Placement constraints deserve their own line in the pack. On a flat pouch the print block has to clear the zip tape by a measurable distance and stay clear of the side seams by enough margin that a small registration shift does not push the design into a seam. Specify the coordinate from a stated seam in centimetres, give a tolerance, and require the inspector to measure it. A design that is centred by eye on the sample will drift across a 500 pcs run.
| Method | Minimum size | Setup cost | Durability | Best for |
|---|---|---|---|---|
| Woven label, sewn in | 20 x 40 mm | Low tooling | Highest | All formats, always worth it |
| Screen print, 1 colour | 40 x 40 mm | Film per colour | High | Bold simple marks |
| Screen print, 3 colours | 50 x 60 mm | Film per colour | High | Multi-colour logos |
| Heat transfer print | 50 x 50 mm | Sheet per unit | Medium | Gradients and fine detail |
| Embroidery, flat | 30 x 60 mm | Digitising tape | Highest | Premium and heritage marks |
| Debossed patch | 35 x 35 mm | Tooling 15-20 days | High | Retail-facing premium tiers |
Colourway strategy and shade matching across a run
Colourway count is the fastest way to destroy an otherwise good unit cost. Each colourway is a separate 500 pcs commitment, and each one brings its own dye lot, its own shade approval and its own trim matching problem. The discipline that works is one hero colourway at launch, with a second priced in the original RFQ so a stretch-goal release is a confirmation rather than a new negotiation.
Shade matching is the hidden cost inside colourways. Shell, lining, webbing, zip tape and thread all have to agree, and each is supplied from a different dye lot. Specify a tolerance — a Delta E figure against an approved standard, typically 1.0 to 1.5 for adjacent materials — and require the approval photographs to show the components side by side under the same light. This is also where a sample approval round earns its cost.
A practical method is to nominate a single reference standard per colourway and require every component to be matched against it. The shell swatch is usually the reference, and lining, webbing, zip tape and thread are matched to that swatch rather than to each other. This avoids the circular problem in which each component is within tolerance of the standard but the assembled pouch shows visible disagreement between adjacent materials. Photograph the matched set under neutral light at sampling, and keep that photograph with the approved sample as the inspection reference.
- Launch one colourway; price the second in the original RFQ for a stretch-goal release.
- Specify a shade tolerance as a Delta E figure, not as a subjective description.
- Require approval photographs showing shell, lining, webbing, zip tape and thread together.
- Confirm trim and thread references are stock items in the chosen colourway.
- Allow 15-25 extra days if a shell colour has to be custom dyed to match a brand standard.
QC checkpoints on a zipper pouch run
Pre-shipment inspection runs at AQL 2.5 to ISO 2859-1, general inspection level II, single sampling plan. For pouches the defect classes worth defining before the inspector arrives are: critical — a zip that does not close or a puller that detaches; major — a print defect on the logo, seam slippage at the zip join, or a dimension outside tolerance; minor — a loose thread, slight shade variation between panels, or a fold crease that relaxes out.
- Confirm carton count and packing list match before any carton is opened.
- Measure external flat dimensions on three units per drawn carton against the stated tolerance.
- Cycle every zip a minimum of 20 times and check both stops hold.
- Inspect the print block or embroidery for registration, coverage and edge definition.
- Verify the lining is anchored at both ends and lies flat at the corners.
- Check branding placement against the pack coordinate, measured from a stated seam.
Because the dominant defects — zip-end separation and puller detachment — are both reinforcement problems, an in-line check during the sewing window is worth more than a heavier final gate. They are visible and correctable at the station. A failed final inspection costs roughly 10-15 days in rework and re-presentation, a meaningful share of a 35-50 day programme. Our defect taxonomy is on the QA and QC process page.
Unit cost breakdown and volume pricing
A standard lined zipper pouch on a 500 pcs run typically quotes in the 1.75 to 3.10 USD ex-works band, with the position inside the band set by size, lining grade, zip gauge and branding method. The useful exercise for a creator is not negotiating the base price but understanding which specification changes move it, because the spread from the cheapest to the most expensive version of the same pouch is usually wider than any volume discount available at 500 pcs.
| Quantity | Ex-works unit cost (USD) | What changes |
|---|---|---|
| 500 pcs | 1.75 - 3.10 | Baseline: setup charges spread over the minimum |
| 1,000 pcs | 1.60 - 2.80 | Better marker yield, setup spread across 2x units |
| 3,000 pcs | 1.45 - 2.55 | Dedicated line, material bought in full rolls |
| 5,000 pcs | 1.35 - 2.40 | Material purchased at roll-lot pricing |
| 10,000 pcs | 1.25 - 2.25 | Full-line booking, tooling amortised to near zero |
If a second colourway or a pocket upgrade is on your stretch-goal roadmap, price it inside the original RFQ. A priced variant converts a later re-order into a confirmation and keeps the original production window available. An unpriced variant restarts the quotation cycle and usually loses the slot.
Sampling, approval and the production window
Sampling runs 6-10 working days per round from a released specification, extending to 12-15 working days for complex builds such as a structured or multi-compartment pouch. Two rounds is the plan, not the fallback: round one confirms the format and the closure, round two confirms corrections and becomes the reference unit the inspector measures bulk against.
production 35-50 days after the deposit and the approved pre-production sample, and both conditions must be met together. Under T/T 30/70 the 30% deposit is triggered by written approval of that sample; the 70% balance falls due after a passed pre-shipment inspection and before cargo is released from FOB Xiamen. Model the deposit against your pledge collection schedule, because it falls due weeks before all funds have settled. Our low minimum production page covers how the 500 pcs floor interacts with that gate.
Compliance and labelling for pouches
A pouch is a textile article, and obligations follow the destination market. US shipments fall under CPSIA where a product is intended for children, and California Prop 65 where a listed substance is present above a threshold. EU shipments fall under REACH Annex XVII and the EU GPSR for general product safety. Where a recycled claim is made, GRS documentation supports it; where a chemical-safety claim is made, OEKO-TEX Standard 100 is the reference.
- State the destination market in the RFQ so the right material can be quoted from the outset.
- Request test reports dated and traceable to the material lot used in your production window.
- Confirm country-of-origin marking requirements before carton marking is printed.
- Keep fibre content labelling consistent between the sewn-in label, the hang tag and the campaign page.
- Retain the compliance file alongside the approved sample and the inspection report.
Getting this wrong is expensive in a specific way: it is discovered after production, at clearance or on a marketplace listing, when the only remedy is re-labelling or withdrawal. Requesting the file at quotation stage costs nothing and turns a downstream risk into an upfront checklist item. It also shortens the quotation cycle, because a supplier shortlist can price the correct material immediately rather than pricing a default and issuing a caveat that must be resolved later. Where a pouch carries a sustainability claim, our crowdfunding bag guide sets out wording that survives scrutiny and the wording that does not.
The zipper pouch RFQ checklist
A pouch quotation returns a usable cost breakdown and production window when seven items are present. Send a partial pack and you will receive three rounds of questions instead of one quotation, which on a 35-50 day programme is the most expensive delay available.
- External flat dimensions in centimetres with a stated tolerance, plus gusset depth if applicable.
- Shell fabric by denier, weave and coating, and lining by denier and finish.
- Zip gauge, tape material, slider type, stop type and puller reference.
- Reinforcement specification: bar-tack points at zip ends and any load-bearing seam.
- Branding method, maximum print block or embroidery size, and a measured placement coordinate.
- Packing specification: pieces per polybag, per inner and per carton, with carton dimensions.
- Quantity per size and colourway against the 500 pcs minimum, plus target delivery month and destination market.
- Custom bags for Kickstarter campaigns
- Custom cosmetic bags for Kickstarter
- Custom tote bags for Kickstarter
- Material customisation for Kickstarter bags
- Print and embroidery options for custom bags
- Sample prototyping for crowdfunding bags
- Low minimum bag production for creators
- Request a quotation
Lock a pouch spec before you publish a price
Send us your pouch sizes, lining grade, branding method and quantity per colourway. As your production partner we will return a unit cost, a sampling estimate and a production window. Write to service@junyuanbags.com or use the quotation form.
Frequently Asked Questions
What is the MOQ for custom zipper pouches?
The minimum is 500 pcs per style and per colourway. A three-size range counts as three separate 500 pcs commitments unless the sizes are booked as a single production run with a shared material and hardware family. Most creators launch the medium size at 500 pcs and add small and large on re-order.
What sizes should a zipper pouch range cover?
Three sizes cover almost every use case: 18 x 12 cm for cables and cards, 24 x 16 cm for toiletries and cosmetics, and 30 x 20 cm for tech organisers and travel documents. Each step up adds roughly 60-80% in panel area, so the jump costs more than it looks on screen.
Which zip gauge should I specify for a pouch?
Use #3 coil for a small pouch up to 18 x 12 cm, and #5 coil for medium and large sizes that will be opened daily. A #5 metal slider reads as premium and adds modest cost, typically a 1.85 cost index versus 1.00 for a #3 coil with a non-lock slider.
Should a zipper pouch be lined?
Yes for any reward tier intended to feel like a product rather than a giveaway. A 210D polyester lining adds 10-15 g and roughly 15% to unit cost, and it is the cheapest perceived-value upgrade available. Use a wipe-clean TPU or PEVA lining for cosmetic and toiletry pouches.
How much does a custom zipper pouch cost per unit?
A lined zipper pouch on a 500 pcs run typically quotes between 1.75 and 3.10 USD ex-works. Position within the band depends on size, lining grade, zip gauge and branding method. At 3,000 pcs the same specification usually falls to 1.45 - 2.55 USD as setup charges spread and material is bought in full rolls.
How long does sampling take for a zipper pouch?
Sampling runs 6-10 working days per round from a released tech pack, extending to 12-15 working days for structured or multi-compartment builds. Budget two rounds, so 12-20 working days of calendar, and write the revision list as a numbered document tied to pack clauses.
What inspection standard applies to a pouch order?
AQL 2.5 to ISO 2859-1 at general inspection level II, single sampling plan. Define critical defects as a non-functioning zip or detached puller, major as print flaws or out-of-tolerance seams, and minor as loose threads or slight shade variation. State the standard in the purchase order.
How do I stop a zip failing on a bulk pouch run?
Specify metal stops at both ends, bar-tack reinforcement at both zip ends, and a slider pull-test figure in the pack. Then inspect the reinforcement in-line during the sewing window, when a defect trend is still correctable at the station rather than only sortable at the end. Two bar-tacks at roughly 8 mm each cost under 0.02 USD per unit on a 500 pcs run and remove most of the risk.
Can I offer more than one colourway of the same pouch?
Yes, but each colourway is a separate 500 pcs commitment. Price the second colourway inside the original RFQ so a stretch-goal release is a confirmation rather than a new negotiation. Allow 15-25 additional days if the shell colour must be custom dyed.
What lining is best for a cosmetic pouch reward?
A wipe-clean TPU or PEVA lining. It adds 20-35 g and roughly 40% to unit cost versus unlined, but it prevents the staining and leak complaints that generate replacement requests. For a tech organiser instead, a brushed tricot lining gives scratch protection at 20-30 g.
What compliance applies to pouches shipped into the US and EU?
United States shipments fall under CPSIA for children's products and California Prop 65 for listed substances above threshold. European Union shipments fall under REACH Annex XVII and the EU GPSR. GRS supports recycled content claims and OEKO-TEX Standard 100 supports chemical-safety claims.
How heavy is a lined zipper pouch for shipping estimates?
A medium 24 x 16 cm pouch in 300D polyester with a 210D lining typically weighs 55-75 g. The same pouch unlined drops to 45-60 g, while a wipe-clean TPU lining lifts it to 75-105 g. Multiply the unit figure by 500 for the actual-weight line on your freight estimate.
What is the best branding method for a small pouch panel?
A woven label sewn into a seam is the most robust choice because the design is woven rather than applied and it survives abrasion. Embroidery needs roughly 5 mm of letter height and a 30 x 60 mm stable panel. Screen print handles fine detail on a flat panel at one to three colours.
When does bulk production start on a pouch order?
production 35-50 days after two conditions are met together: the 30% deposit under T/T 30/70 has landed and the pre-production sample has been approved in writing. Neither condition alone starts the clock. Get the start date, completion date and inspection date confirmed in writing.
People Also Ask
How do I choose a zipper pouch size for a reward tier?
Work backwards from the contents. Cables and cards fit an 18 x 12 cm pouch, toiletries fit 24 x 16 cm, and tech organisers need 30 x 20 cm. Lock the numbers early, because each size step changes panel area by roughly 60-80% and moves the carton count.
Is a lined pouch worth the extra cost?
Usually yes. A 210D lining adds 10-15 g and around 15% to unit cost, and it is the cheapest upgrade that changes how the reward feels on opening. Unlined pouches read as promotional giveaways even when the shell is good.
What zip should I use on a pouch that opens every day?
A #5 coil zip with metal stops and bar-tack reinforcement at both ends. It tolerates thousands of cycles, whereas a #3 coil with a non-lock slider typically rates around 1,500-3,000 cycles and is better suited to occasional-use pouches.
Can I print a detailed logo on a pouch?
Yes, but choose the method for the detail level. Heat transfer handles gradients and photographic detail; screen print is more durable on polyester at one to three colours. Keep the print block under roughly 30% of a soft panel to avoid cracking at fold lines.
Do different pouch sizes count separately toward MOQ?
Yes. Each style and colourway is counted separately against the 500 pcs minimum, so a three-size range normally means three commitments. They can still be produced together in one booked window if they share a material and hardware family.