Logo Placement Guide: Where Your Logo Works Best on Bags
Where should a logo sit on a custom bag reward? It depends on the panel geometry, not the artwork. A backpack reads best on the front pocket at 40-70 mm wide, a tote at 100-180 mm, a pouch at 40-60 mm. Specify placement as measured coordinates from a stated seam, with a tolerance band. Sampling runs 6-10 working days, production 35-50 days, inspection at AQL 2.5.
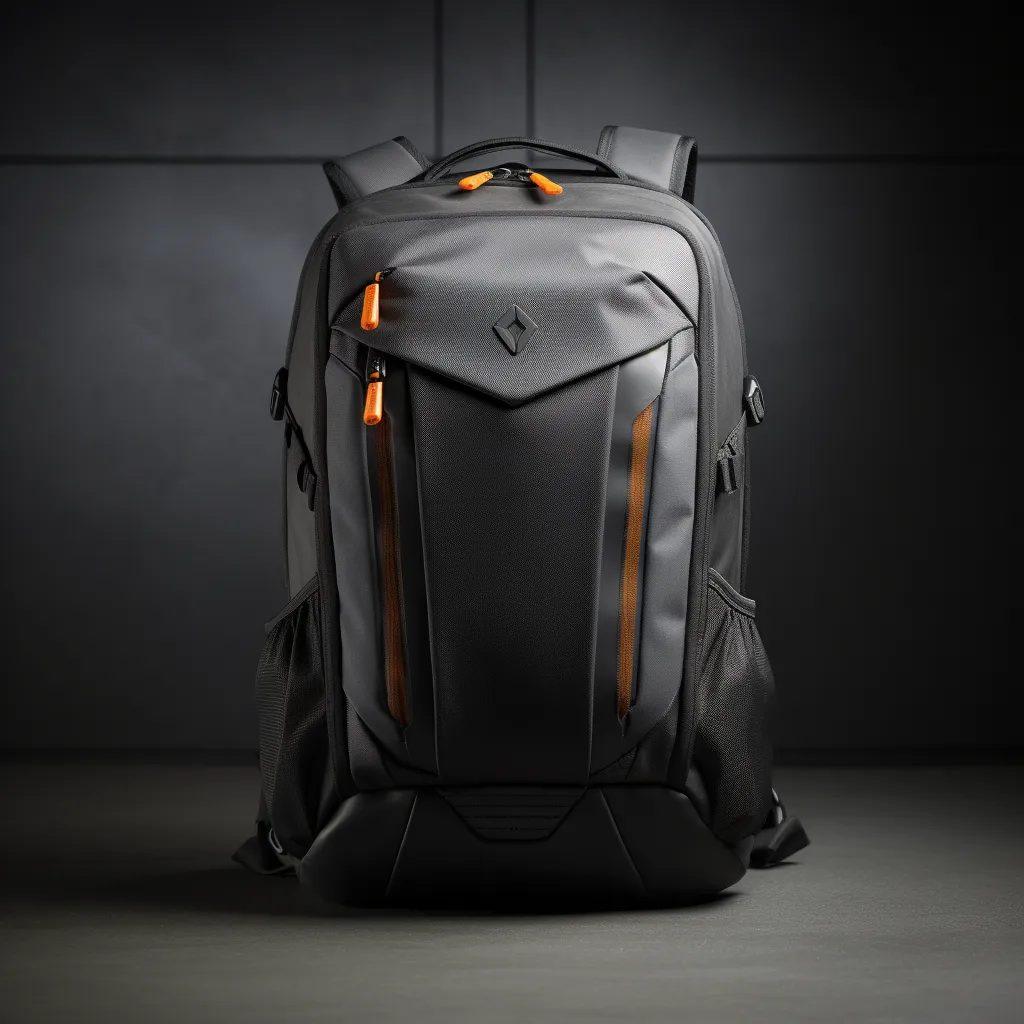
- Why logo placement is a specification, not a preference
- Readability: size, contrast and viewing distance
- Placement zones on a backpack
- Placement zones on a tote
- Placement zones on a duffle and a travel bag
- Placement zones on a drawstring and a gym bag
- Placement zones on pouches and cosmetic bags
- Placement zones on a laptop bag and a sleeve
- Print method versus placement surface
- Writing placement into the tech pack
- Tolerance, registration and what counts as a misprint
- Approving placement on the pre-production sample
Why logo placement is a specification, not a preference
Most logo placement decisions on a campaign bag are taken from a photograph. The creator sends a render, somebody marks roughly where the logo should sit, and the sampling team interprets it. That works until the first physical unit arrives and the logo is 12 mm lower than expected, or sits across a seam, or disappears into a gusset shadow. At that point there is no agreed measurement to argue from, only two opinions.
Placement controls three things that matter commercially. Readability: whether the mark is legible at the distance a backer actually sees it. Perceived value: a logo placed on a clean flat panel reads as a designed product, while the same mark crowded into a corner reads as an afterthought. And QC pass rate: a loosely specified placement generates rejections at inspection that are disputes rather than defects, which is the most expensive kind of failure.
The fix costs nothing. Placement belongs in the tech pack as a measured coordinate from a named seam, with the logo stated at final size in millimetres, plus a tolerance band. Our print and embroidery page sets out how the placement coordinate travels into the decoration file and onto the line.
It is worth being explicit about what a coordinate is measured from. Centre of the panel is not a coordinate, because panels move with tolerance and a seam is a fixed reference. Measure from a stated seam or edge, on a stated panel, at a stated stage of assembly, and the placement becomes verifiable with a ruler at inspection rather than a matter of interpretation between parties.
The commercial case is straightforward. A placement dispute at inspection is not resolved by measuring; it is resolved by delaying, because there is nothing agreed to measure against. That delay lands on the 70% balance payment, the cargo release and the published delivery month. Writing six short lines of coordinates into the pack at specification stage removes an entire category of downstream argument at no cost.
- Minimum order quantity
- 500 pcs per style / colourway
- Sampling
- 6-10 working days (12-15 for complex builds)
- Bulk production
- 35-50 days after deposit + approved pre-production sample
- Inspection
- AQL 2.5 to ISO 2859-1
- Trade term
- FOB Xiamen
- Payment
- T/T 30/70
- Production floor
- 4,950 m² SGS-verified, 137 staff, 7 lines, 149 machines
- Monthly capacity
- 200,000 pcs per month
- Programme contact
- service@junyuanbags.com
Key takeaways on logo placement
- Specify placement as a measured coordinate from a named seam, not as a description.
- Set the logo at final size in millimetres and confirm the method suits the panel surface.
- Match placement to panel geometry: flat panels carry detail, gussets and curves do not.
- Agree a tolerance band in writing before sampling rather than negotiating it at inspection.
- Approve placement on the pre-production sample, photographed against a scale reference.
Readability: size, contrast and viewing distance
A logo that is legible on a screen can be illegible on fabric. Two things change: the substrate scatters light and breaks up fine edges, and the viewing distance is usually much greater than the distance at which the artwork was designed. Sizing a logo for a bag is therefore a distance problem before it is a design problem, and the working rule is that minimum character height scales with how far away the bag will be read.
| Typical viewing distance | Minimum logo height | Minimum cap height | Typical application |
|---|---|---|---|
| 0.5 m, held in the hand | 15-20 mm | 4-5 mm | Pouch, cosmetic bag, interior label |
| 2 m, carried past | 30-40 mm | 8-10 mm | Backpack front pocket, tote panel |
| 5 m, across a room | 60-80 mm | 20-25 mm | Duffle end panel, gym bag |
| 10 m, across a street | 120-150 mm | 45-50 mm | Tote main panel, event bag |
Contrast does as much work as size. A mid-tone logo on a mid-tone fabric loses definition at distance even at generous dimensions, and the effect is worse on textured weaves where the surface breaks up the edge. Where the palette allows it, hold a clear light-dark step between mark and ground, and test the combination on the actual production fabric rather than on a flat paper proof.
Panel curvature and seam interruptions are the other readability constraint. A mark sized to the full width of a curved duffle body will distort at the edges, and anything crossing a seam allowance will break in use. As a working rule, keep the artwork clear of any seam, zip tape or binding by at least 8-10 mm, and reduce the intended size by roughly 15-20% where the panel is curved rather than flat.
- Size the logo to the panel first, then to the artwork; oversized artwork crowds the seam allowance.
- Test contrast on the production fabric, in the production colourway, under the lighting it will be photographed in.
- Keep the mark clear of seam lines, zip tapes, binding and gusset folds.
- Confirm the method can hold the smallest element in the mark at final size.
- Photograph the decorated unit flat and worn, because placement that reads flat can vanish on the body.
Placement zones on a backpack
A backpack gives you more usable surface than any other reward format, which is exactly why placement goes wrong on it. The front panel is rarely flat once it is loaded, the shoulder straps curve away from the viewer, and the top handle disappears under a hand. The reliable zones are the front pocket panel, the top of the lid, and a woven label on a strap or a side seam. Each carries a different maximum size and a different method.
| Zone | Recommended size | Suitable method | Note |
|---|---|---|---|
| Front pocket panel, centred | 40-70 mm wide | Embroidery, heat transfer, print | Most legible zone; keep clear of the zip line |
| Lid or top panel | 30-50 mm wide | Embroidery, woven badge | Reads well from behind and above |
| Shoulder strap, lower section | 12-20 mm wide | Woven label, print | High visibility when worn |
| Side gusset or pocket | 25-40 mm wide | Print, woven badge | Often in shadow; test on the real unit |
| Interior lining | 40-80 mm wide | Good for a story or care mark |
Embroidery on a backpack front pocket usually reads as the most premium option, but it has a legibility floor. Fine serif detail and very small text fill in below roughly 5-6 mm of cap height, and dense fill on a light fabric can pucker without the right backing. Where the mark depends on fine detail or gradients, a heat transfer on the same panel will hold it better at a lower unit cost. Our custom backpacks page covers panel geometry by format.
Placement zones on a tote
A tote is the simplest placement problem and the most forgiving, because the main panel is flat, large, and presented face-on. That also makes it the format where a poorly scaled logo is most obvious. The main panel will comfortably carry a mark at 100-180 mm wide, and a gusseted tote gives you a second, narrower zone on the side. Interior print is cheap here and works well for a story panel or care information.
| Zone | Recommended size | Suitable method | Note |
|---|---|---|---|
| Main front panel, centred | 100-180 mm wide | Screen print, heat transfer | Largest clean area; scale the mark up |
| Main panel, lower corner | 50-80 mm wide | Screen print, embroidery | Understated option; keep 30 mm from seams |
| Side gusset | 40-70 mm wide | Screen print | Visible when the bag is loaded |
| Handle or webbing | 10-18 mm wide | Woven label, print | Reinforce the attachment point |
| Interior lining | 100-150 mm wide | Screen print | Cheap narrative space |
Screen print is the default on a tote because the panel is flat and the fabric is stable, and it holds large areas of solid colour at a low unit cost. The limitation is registration across multiple colours and the hand feel of heavy ink coverage on a light canvas. Where the artwork has photographic detail or gradients, a heat transfer on the same panel is the better route despite a higher unit cost. See custom tote bags for standard panel sizes.
Placement zones on a duffle and a travel bag
Duffles and travel bags present curved or semi-structured surfaces, which rules out some methods and constrains size. The end panel is usually the flattest area and the most reliable placement zone. The main body is better suited to a smaller repeat or a badge than to a large single mark, because the curve distorts anything scaled to the full panel width.
| Zone | Recommended size | Suitable method | Note |
|---|---|---|---|
| End panel, centred | 60-100 mm wide | Embroidery, woven badge | Flattest zone; best for a single mark |
| Main body panel | 80-140 mm wide | Print, heat transfer | Curved surface; keep the mark compact |
| Front zip pocket | 40-70 mm wide | Embroidery, print | Check pocket depth before sizing |
| Detachable strap | 12-20 mm wide | Woven label | Placement survives strap removal |
| Trolley sleeve | 50-90 mm wide | Visible only when in transit |
For a custom travel bag reward, confirm whether the trolley sleeve or an outer pocket is part of the panel you are decorating. Printing across a pocket opening is a frequent and avoidable error, because the pocket looks like part of the shell in a flat render but opens in use. Ask for a photograph of the decorated panel on a finished unit, not on a cut panel.
Placement zones on a drawstring and a gym bag
Drawstring and gym bags are usually made from a single or double panel of lightweight fabric, which changes the method options. The fabric is often too light to carry dense embroidery without puckering, so print or heat transfer is the safer choice. The usable area is large but unstructured, so the mark needs a clear horizontal reference to sit straight, which is normally the top hem.
| Zone | Recommended size | Suitable method | Note |
|---|---|---|---|
| Main panel, centred | 90-140 mm wide | Screen print, heat transfer | Use the top hem as the horizontal reference |
| Main panel, lower third | 60-100 mm wide | Screen print | Sits better when the bag is carried |
| Side or base panel | 50-90 mm wide | Screen print | Visible when set down |
| Drawcord channel | 30-60 mm wide | Keep clear of the cord channel stitching |
- Use a lightweight print method on lightweight fabric; dense embroidery will pucker it.
- Reference placement to the top hem, not to the printed area, so the mark sits level.
- Test wash fastness on the exact fabric, because lightweight synthetics can bleed.
- Confirm the cord channel stitching line and keep the mark clear of it.
- Consider a woven label on a corner seam as a low-risk secondary mark.
Drawstring bags are also the format where the cord itself interferes with placement. The channel stitching line, the eyelet and the cord knot all sit near the top of the panel, so a mark placed high will collide with them once the bag is closed. Placing the artwork in the lower two thirds of the panel avoids most of this and leaves room for the cord to sit naturally when the bag is worn.
Placement zones on pouches and cosmetic bags
Pouches and cosmetic bags are the most common add-on reward and the easiest to get wrong, because the usable panel is small and often interrupted by a zip. Placement has to sit within the flat area between the zip line and the base seam, which typically leaves 40-60 mm of height on a standard pouch. Anything larger has to move to the back panel or to a woven label.
| Zone | Recommended size | Suitable method | Note |
|---|---|---|---|
| Front panel, centred | 40-60 mm wide | Print, heat transfer, embroidery | Keep 8-10 mm clear of the zip line |
| Back panel, centred | 40-60 mm wide | Cleaner area on many styles | |
| Woven label on side seam | 10-18 mm wide | Woven label | Cheapest option at volume |
| Zip puller badge | 8-14 mm | Moulded or woven badge | Small tooling, reusable |
| Interior lining | 40-70 mm wide | Good for care or story text |
Where a pouch is used as a companion piece alongside a hero bag, the safest approach is to mirror the hero bag's branding coordinates rather than designing a second placement. It keeps the decoration stage simple, reduces the number of approval gates, and makes the two items read as one family. Our custom bag categories page shows which pouch formats share panels with common hero bags.
Placement zones on a laptop bag and a sleeve
A laptop bag or sleeve has the least forgiving geometry of any reward format, because the panel is usually narrow, structured, and interrupted by closures. Sleeves in particular leave a small flat area once the corner radius and the closure are accounted for. The reliable zones are the top flap panel, a woven label near a side seam, and, on a messenger format, the front flap panel.
| Zone | Recommended size | Suitable method | Note |
|---|---|---|---|
| Flap panel, centred | 50-90 mm wide | Embroidery, woven badge | Best zone on a messenger format |
| Front body panel | 60-100 mm wide | Print, heat transfer | Check for pocket interruptions |
| Side seam label | 10-18 mm wide | Woven label | Low-risk secondary placement |
| Interior lining | 50-90 mm wide | Care or specification text | |
| Handle or webbing loop | 10-16 mm wide | Woven label | Reinforce before attaching |
Structured panels limit method choice more than size. A padded laptop compartment cover is usually too thick and too uneven for fine print, and embroidery through padding can distort the panel. A flat woven badge applied to the same area behaves predictably, which is why badge placement is the default recommendation on this format. See material customisation for how padding and laminate layers affect decoration.
The other constraint on a sleeve is the closure. A flap, a zip or a magnetic catch sits near the top edge and limits the clean area beneath it. Confirm the closure geometry on a finished unit and set the logo coordinate from the finished top edge rather than from the panel edge as cut, because the two differ by the seam allowance and the difference is visible on a small item.
Print method versus placement surface
Method and surface have to be decided together, because most placement complaints are really method complaints. A mark that cracks on a coated fabric, bleeds on a lightweight synthetic, or puckers under dense embroidery will be read as a placement error by the backer even though the coordinates were correct. The table below is the working selection guide used on campaign programmes.
| Method | Suitable surfaces | Detail limit | Note |
|---|---|---|---|
| Screen print | Flat cotton canvas, non-woven, polyester | Line width about 0.3-0.5 mm | Low unit cost; cost rises per colour |
| Heat transfer | Flat panels, coated and light synthetics | Fine gradients and small text | Higher unit cost; check stretch and wash |
| Embroidery | Medium to heavy woven panels | Cap height about 5-6 mm minimum | Premium hand; puckering risk on light fabric |
| Woven badge or label | Seams, corners, flat panels | Fine for small marks only | Cheapest at volume; needs attachment method |
| Moulded rubber or PVC badge | Flat external panels | Bold shapes, limited fine text | Tooling cost; reusable across re-orders |
Method choice also carries a compliance dimension in some markets. Heavy ink coverage, plastisol prints and certain coatings can affect restricted substance testing under CPSIA, REACH or Prop 65, and some retail channels require OEKO-TEX Standard 100 certification on printed panels. Raise the destination market and any retail intention during the quotation cycle so the method can be confirmed against the compliance requirement rather than discovered at inspection.
Insist on a decoration proof applied to the exact production fabric in the production colourway, at final size. A paper proof will not show bleed on a lightweight synthetic, cracking on a coating, or puckering under dense embroidery. This single approval step prevents most misprint disputes.
Writing placement into the tech pack
A placement instruction has to be unambiguous enough that two different people measuring the finished unit reach the same conclusion. That means naming the panel, naming the reference seam, giving two coordinates, stating the size, and agreeing a tolerance. Written as prose, this is five short lines in the pack. Written as a photograph, it is an argument waiting to happen.
- Name the panel precisely: front pocket panel, lid panel, left side gusset.
- Name the reference seam or edge the measurement is taken from.
- Give the horizontal and vertical coordinates in millimetres from that reference.
- State the logo size at final output: width and height in millimetres.
- Agree the tolerance band, typically plus or minus 3-5 mm on a flat panel.
- Attach a photograph of the reference unit with the coordinate drawn on it.
Coordinates should also state which stage of assembly they apply to. A measurement taken before the lining is inserted differs from one taken on the finished bag, because seams pull the panel. Specify that placement is verified on the finished unit, which is what the inspector will measure at inspection to AQL 2.5 to ISO 2859-1. A coordinate that only works on a flat cut panel is not a usable specification.
Tolerance, registration and what counts as a misprint
Every printed or embroidered mark moves a little. What separates a professional programme from a disputed one is that the acceptable movement is agreed before sampling rather than argued about after. A typical working band is plus or minus 3-5 mm of placement on a flat panel and plus or minus 1-2 mm on logo height, with tighter bands on small items where the margin is visually obvious.
| Defect | Class | Typical band | Action |
|---|---|---|---|
| Logo off-centre on a flat panel | Minor | Up to 3-5 mm | Accept within band, log the rate |
| Logo height variance | Minor | Up to 1-2 mm | Accept within band |
| Ink bleed beyond the edge | Major | Not acceptable if visible at 1 m | Rework or reject |
| Cracking on a coated fabric | Major | Not acceptable | Rework or reject |
| Embroidery puckering | Major | Not acceptable if visible flat | Rework or reject |
| Missing or incorrect logo | Critical | Not acceptable | Reject the lot |
Agree in writing what counts as critical, major and minor for your specific decoration before the run starts, and make sure the inspector measures against the approved pre-production sample. Without that, an inspection result becomes a negotiation rather than a measurement, and negotiations at the inspection gate cost days you do not have.
Registration is a separate question from placement. Registration describes whether the colours within a multi-colour mark align with each other; placement describes where the whole mark sits on the panel. A unit can be perfectly placed and badly registered, or perfectly registered and badly placed. Specify both, with a tolerance for each, and the inspection report can be read without interpretation by either side.
Approving placement on the pre-production sample
The pre-production sample is where placement is approved, not the prototype. A prototype is usually built with substitute materials and hand-finished panels, so the decoration sits differently than it will in bulk. The pre-production sample is built from the exact production fabric, hardware and branding method, which makes it the only unit an inspector can fairly measure the finished run against.
- Photograph the decorated panel flat, with a ruler or scale reference in frame.
- Photograph the bag worn or loaded, because placement that reads flat can vanish in use.
- Measure the coordinates against the pack and record the actual figures, not just pass or fail.
- Check the mark is clear of seams, zips, binding and gusset folds at final size.
- Confirm colour against the approved shade standard under consistent lighting.
- Keep the approved pre-production sample sealed as the inspection reference unit.
Once approved, that sample becomes the reference for inspection and the benchmark for any re-order. Pricing for a placement change after approval is not a small adjustment: it means new screens or tapes, a new first-off approval, and additional days in a window that is already booked. If you are weighing placement options, do it during sample prototyping, and request a quotation with every variant listed up front.
The same reference unit is also what makes a re-order cheap. When the pattern, the decoration file and the approved sample all exist, a second run is a confirmation of an engineered product rather than a fresh development, and the sampling estimate is normally shorter than the original 6-10 working days. Our QA and QC page sets out how the reference unit is used at inspection.
- Print and embroidery for custom bags
- Custom backpacks for Kickstarter
- Custom tote bags for Kickstarter
- Custom laptop bags for Kickstarter
- Custom bag categories
- Request a quotation
Lock placement before you launch
Send us your artwork, bag format, panel measurements and target quantity. As your production partner we will confirm the placement coordinate, the method that suits the panel, and a proofed unit you can approve. Write to service@junyuanbags.com or use the quotation form.
Frequently Asked Questions
Where should a logo go on a custom backpack reward?
The front pocket panel, centred, at roughly 40-70 mm wide, is the most legible zone. Secondary options are the lid panel at 30-50 mm and a woven label on a shoulder strap at 12-20 mm. Keep the mark clear of the zip line and specify the coordinate from a named seam.
How large should a logo be on a tote bag?
A tote's main front panel comfortably carries a mark at 100-180 mm wide, which is larger than most creators first specify. Smaller placements of 50-80 mm work in a lower corner but should sit at least 30 mm clear of the side seams to avoid looking crowded when the bag is loaded.
What placement tolerance should I agree with my production partner?
A common working band is plus or minus 3-5 mm for placement on a flat panel and plus or minus 1-2 mm for logo height. Tighten it on small items where a shift is visually obvious. Agree the band in writing before sampling, so inspection is a measurement rather than a debate.
Can I embroider a logo on a lightweight drawstring bag?
Usually not well. Lightweight synthetics below about 210D pucker under dense embroidery, and the stitch weight can distort the panel. Use screen print or heat transfer instead, and test wash fastness at 30 degrees on the exact fabric, because lightweight synthetics can bleed under heat.
How much space does a logo need on a standard pouch?
On a standard flat pouch the clean area between the zip line and the base seam usually gives 40-60 mm of height. Plan the mark at 40-60 mm wide within that, keeping 8-10 mm clear of the zip. Anything larger should move to the back panel or become a woven label.
Should print placement be measured from a seam or the panel centre?
From a named seam or edge. Panel centre is not a coordinate, because panels move within tolerance and seams are fixed references. Give two coordinates in millimetres, state the panel, and confirm the measurement is verified on the finished unit within a 3-5 mm band.
Why does my logo look different on fabric than on screen?
Fabric scatters light and breaks up fine edges, and texture interrupts thin lines. Small text and fine serif detail fill in, particularly in embroidery below about 5-6 mm cap height. Always proof on the production fabric in the production colourway, at final size, before approving.
Can I change logo placement after the pre-production sample is approved?
Yes, but it is not a free adjustment. A placement change means new screens, tapes or dies, a fresh first-off approval, and typically 5-10 added days in an already-booked window. It may also reset the 35-50 day production schedule where decoration sits early in the sequence.
How is logo placement checked during inspection?
At AQL 2.5 to ISO 2859-1 the inspector draws a sample from the lot and measures decorated units against the approved pre-production sample using the coordinates in the tech pack. Results are logged as critical, major or minor, so the classes must be defined before inspection day.
What logo method suits a coated or laminated fabric?
Heat transfer generally performs better than heavy screen coverage on coated fabrics, because it sits on the surface without the ink build that can crack when the coating flexes. Always flex-test the decorated panel and check wash fastness at 30 degrees before approving bulk.
Do I need a secondary logo placement on a backpack?
A small woven label on a strap or side seam is a low-cost addition, often under 0.20 USD per unit, that raises perceived value and gives a second recognition point when the bag is worn. Budget it as a separate line, because it adds an attachment operation and its own 500 pcs minimum.
How do I write placement coordinates into a tech pack?
Name the panel, name the reference seam, give horizontal and vertical coordinates in millimetres, state logo width and height at final size, and add a tolerance band, typically plus or minus 3-5 mm. Attach a photograph of the reference unit with the coordinate drawn on it.
People Also Ask
What is the best spot for a logo on a duffle bag?
The end panel, centred. It is usually the flattest and most visible surface, and it holds between 60 and 100 mm comfortably. The curved main body panel is better kept for a compact mark, since curvature distorts anything scaled to full panel width.
Can the same logo file be used on every bag type?
Rarely. Each panel has a different size ceiling and surface, so most programmes prepare two or three size variants of the same mark plus a simplified version for embroidery and small labels. Plan the variants during artwork preparation, not after sampling starts.
How do I stop a logo printing across a seam?
Specify placement as a measured coordinate from a named seam and keep a stated clearance, typically 8-10 mm, between the artwork edge and any seam, zip tape or binding. Confirm the clearance on the pre-production sample with a ruler in frame.
Is embroidery more expensive than printing on bags?
Usually yes per unit, because cost scales with stitch count and each new colour or placement adds a tape. It also carries a higher perceived value, so the trade is often worth it on a premium tier and less so on a value tier.
Should the logo be applied before or after the bag is assembled?
Wherever the panel is flattest, which usually means before assembly, since decorating flat panels improves registration and line speed. The placement coordinates in the pack should still state that verification happens on the finished unit.