Custom Zipper Pouches for Kickstarter
On a zipper pouch the zip is 15-30% of the bill of materials and the source of most defects. A #3 coil suits runs up to 24 cm, a #5 above, and both need bar-tacked ends and a garage. Our production team runs zipper pouches at 500 pcs per style / colourway, sampling in 6-10 working days and production 35-50 days at AQL 2.5 (ISO 2859-1).
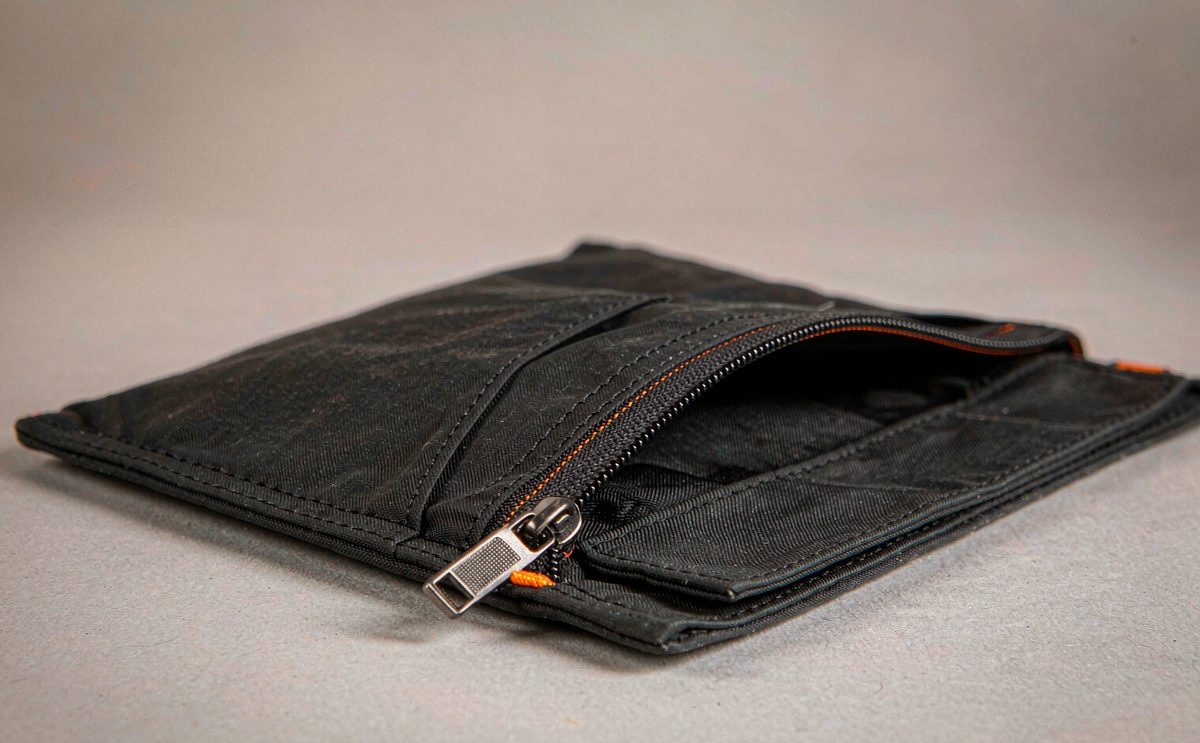
- Minimum order quantity
- 500 pcs per style / colourway
- Sampling
- 6-10 working days (12-15 for complex builds)
- Bulk production
- 35-50 days after deposit + approved pre-production sample
- Inspection
- AQL 2.5 to ISO 2859-1
- Trade term
- FOB Xiamen
- Payment
- T/T 30/70
- Production floor
- 4,950 m² SGS-verified, 137 staff, 7 lines, 149 machines
- Monthly capacity
- 200,000 pcs per month
- Programme contact
- service@junyuanbags.com
Key takeaways before you spec a zipper pouch
- Name the zip in the RFQ: gauge, coil direction, slider type, stop type, puller and tape colour.
- MOQ is 500 pcs per style and colourway, so a three-size pouch range is three commitments.
- A #3 coil suits openings up to 24 cm; a #5 above that, or the tape bows and the slider catches.
- Bar-tacks at both zip ends and a garage at the top stop remove the largest defect class.
- Bind the panel edge before the zip goes in; an unbound edge stretches and the tape will wave.
Specify the zip before you specify the panel
Most pouch specifications start with a drawing of the panel and treat the zip as a line on the edge. That is backwards. On a small soft good the zip is typically 15-30% of the bill of materials, it is the only moving part, and it is the component the backer touches every time they use the product. Naming it properly in the RFQ is the single highest-leverage thing you can do to protect a delivery window.
The alternative is a quotation built on assumptions. A line on a drawing does not say what gauge the coil is, whether the slider locks, what the puller is made of, or whether the ends are bar-tacked. Those assumptions get resolved on the line, in the wrong direction more often than not, and surface later as a defect class rather than as a cost line. Our custom bags for Kickstarter page shows how a named component list feeds a quotation.
Zip anatomy: the six things to name
A coil zip has six specification points and all six belong in the tech pack. Gauge, which is the width of the closed coil: #3 is around 4.5 mm and #5 around 6 mm. Coil direction, either standard or reverse, where the teeth sit inside and the tape shows on the face. Slider type, either auto-locking, non-locking or reverse-mount. Stop type, either a top and bottom stop or an open-end separating construction. Puller material. Tape colour.
Three of those six are where defects concentrate. The slider is the first: a non-locking slider on a pouch will creep open in a bag, which is a complaint that arrives within a week of delivery. The stops are the second: a bottom stop that is not properly crimped separates under the first real load. The puller is the third: a bare metal puller scratches surfaces and rattles, and it is the cheapest of the three to fix at specification stage.
| Gauge | Coil width | Suits opening | Cost index | Best for |
|---|---|---|---|---|
| #3 nylon coil | 4.5 mm | Up to 24 cm | 1.00 | Small flat pouches |
| #5 nylon coil | 6.0 mm | 24 - 45 cm | 1.12 | Standard and large pouches |
| #8 nylon coil | 8.0 mm | 45 cm and above | 1.35 | Kit bags and tool rolls |
| #5 reverse coil | 6.0 mm | 24 - 45 cm | 1.25 | Clean-faced premium pouches |
| #5 water-resistant | 6.0 mm | 24 - 45 cm | 1.40 | Wash kits and outdoor kits |
| #5 open-end separating | 6.0 mm | Full-width runs | 1.30 | Clamshell and fold-out builds |
- Name all six zip specification points in the RFQ, not just the gauge.
- Use an auto-locking slider on any pouch that travels inside a bag.
- Choose a fabric or moulded puller over bare metal where scratch risk exists.
- Match the tape colour to the shell or to the lining and say which.
- Confirm the zip length against the opening, allowing for the binding and the stops.
Opening geometry: straight, curved, L-shaped and three-sided
The geometry of the run determines which gauge works and how the tape behaves. A straight run across the top of a flat pouch is the easiest and the most forgiving; the tape lies flat and the slider has an easy path. An L-shaped run wrapping two sides is the next hardest, because the tape has to turn a corner. A three-sided horseshoe, which lets a pouch open almost fully, is the hardest and the most useful.
On a corner or a curve the specification detail that matters is the radius. A tight corner forces the coil to compress on the inside of the turn, the slider binds, and the tape puckers permanently. Keep the radius as generous as the design allows, and go up a gauge rather than down when the run has more than one turn. A #5 coil turning two corners will outlast a #3 coil turning the same corners by a wide margin.
A raw fabric edge stretches as the zip is fed through the machine, and a stretched edge produces a wavy tape and a puckered seam that no amount of pressing will remove. Binding the panel edge first stabilises it, keeps the tape flat and removes one of the most common visual defects on a sewn pouch.
Shell, lining and interlining behind the tape
What the zip is sewn into matters as much as the zip. A shell that is too light lets the tape pull away from the seam over time, so a 300D polyester with a PU coating is the sensible floor for a pouch carrying a #5 coil, and a 600D or a 420D nylon is the choice where the pouch will be opened many times a day. The lining should be a 210D polyester at minimum, because it is what the slider runs against.
Interlining does two jobs behind a zip. It stiffens the panel so the tape stays flat, and it gives print a stable surface on the panel face. Two to three millimetres of foam is enough, costs roughly 8-12% on unit cost and adds 10-25 g. Take the shell, the lining and the binding from one material customisation shortlist, so one shade approval covers the whole construction rather than three separate ones.
| Specification | Unit weight | Cost index | Best for |
|---|---|---|---|
| 300D polyester, 210D lining | 45 - 95 g | 1.00 | Default everyday pouch |
| 300D plus 2 mm interlining | 55 - 110 g | 1.10 | Structured, print-ready |
| 600D polyester, ripstop lining | 70 - 135 g | 1.20 | Tool and utility pouches |
| 420D nylon, brushed tricot | 75 - 140 g | 1.32 | Device-safe premium pouches |
| rPET shell with rPET lining | 50 - 100 g | 1.25 | Sustainability-led campaigns |
| PU leather, microfibre lining | 85 - 155 g | 1.55 | Executive retail tiers |
Interior finishing and the seam the backer sees
A pouch is opened and looked into constantly, which makes interior finishing more visible here than on almost any other format. The two options are a turned-and-stitched lining, where the lining is sewn in and the raw edge is turned, and a fully bound interior, where every internal seam is covered with binding tape. The second is cleaner, more durable and adds roughly 12-18% to the sewing time.
Where the pouch is a secondary reward that ships inside a hero bag, a turned lining is sufficient. Where it is claimed on its own or is retail-facing, a bound interior is worth the cost, because the backer will run a hand along the inside seam within seconds of opening it. The same logic applies to the tape ends: bound and tucked rather than cut and left raw. That is one operation and it is the difference between a finished product and a sample.
Branding around a zip line
A zip line is the hardest thing to place branding around and the easiest thing to get wrong. The tape and its binding create a raised band along the panel edge, and any print that crosses it will break up. Keep the print block at least 10-12 mm clear of the zip line, and pin the coordinate to a measured distance from the tape rather than from the panel edge, because the panel edge moves with the seam allowance.
Scale is the second issue. On a pouch of 20 x 14 cm the usable panel below the zip is smaller than the artwork file suggests, so cap the mark at 20-25% of the panel face. A woven label sewn into a side seam is the cheapest durable mark and the one that survives abrasion best, and a debossed PU patch is the premium alternative. The method comparison sits on our print and embroidery page.
A moulded or debossed puller carrying the mark costs roughly 0.15-0.35 USD per unit and is touched every single time the pouch is opened. Against a second print application of similar cost, it delivers more brand impressions and adds no inspection surface to the panel.
Packing, freight and QC gates
Zipper pouches pack well when they are flat and less well when they are gusseted. A flat 20 x 14 cm pouch weighs 45-70 g and nests almost flat, so 100-150 units fill a standard export carton. A carton of 120 flat pouches measures around 0.030 m3 and weighs roughly 6 kg gross, which is 5.0 kg of volumetric weight at the 6,000 divisor. Actual weight governs, which is the outcome you want on every freight quote.
- Bulk pack flat at 100-150 pieces per carton; gusseted builds drop to 60-90.
- Band in stacks of 10 rather than individually bagging every unit.
- Confirm carton dimensions on the packing list so volumetric weight can be quoted accurately.
- Nest pouch sizes small-inside-large where a set is pledged together.
- Our rewards fulfilment page covers the packing specification format we ask for.
Pre-shipment inspection runs at AQL 2.5 to ISO 2859-1, general inspection level II, single sampling plan. Critical is a zip that does not close, a slider that will not lock or a puller that detaches. Major is a print defect, a missing bar-tack, an out-of-tolerance dimension or a wavy tape. Minor is a loose thread, slight shade variation or a fold crease that relaxes out. Define all three before production starts.
- Confirm carton count, packing list and size split before any carton is opened.
- Measure external dimensions on three units per drawn carton against the stated tolerance.
- Cycle every zip a minimum of 20 times and record any catch, skip or slider failure.
- Check both zip ends for a bar-tack and confirm the bottom stop holds under load.
- Confirm the slider locks and does not creep open when the pouch is compressed.
- Verify the branding coordinate against the pack, measured from the zip tape.
The zip cycle is the highest-value check on this format, because the component is the only moving part and the failure is binary. Ask for a cycle figure from your production partner at quotation stage and hold the run to it. The defect taxonomy we log is set out on the QA and QC page, and the approval gate is covered on our sample prototyping page.
Cost, sampling and the zipper pouch RFQ checklist
On a 500 pcs run a flat 300D polyester zipper pouch with a 210D lining, a #3 coil zip and a one-colour print typically quotes in the 1.30 to 3.80 USD ex-works band. Within that band the zip line is usually 0.35-0.95 USD: a #3 coil at the bottom, a #5 reverse coil with a moulded puller and water-resistant tape at the top. Moving from #3 to #5 adds roughly 10-15% to the hardware line.
| Quantity | Ex-works unit cost (USD) | What changes |
|---|---|---|
| 500 pcs | 1.30 - 3.80 | Baseline, setup spread over the minimum |
| 1,000 pcs | 1.18 - 3.45 | Better marker yield, setup across 2x |
| 3,000 pcs | 1.08 - 3.15 | Dedicated line, material in rolls |
| 5,000 pcs | 1.02 - 2.98 | Material at roll-lot pricing |
| 10,000 pcs | 0.95 - 2.80 | Full-line booking, tooling amortised |
Sampling runs 6-10 working days per round from a released tech pack, extending to 12-15 working days where a custom puller, a water-resistant tape or a PU leather shell is involved. Budget two rounds. production 35-50 days after the 30% deposit under T/T 30/70 has landed and the pre-production sample has been approved in writing. Where a zipper pouch is one of several SKUs, quote the set together so the whole programme lands in one container.
Open and close the sample zip fifty times, loaded, and listen. A slider that is stiff at cycle forty will be failing by the time the backer has used the pouch for a month. This takes two minutes at the approval stage and removes the defect class most likely to generate support tickets after delivery.
- External dimensions in centimetres with a tolerance, plus gusset width where there is one.
- Zip specification: gauge, coil direction, slider type, stop type, puller material, tape colour.
- Opening geometry: straight, L-shaped or three-sided, with the corner radius stated.
- Shell by denier, weave and coating; lining by denier; interlining by thickness; binding tape.
- Interior finishing: turned and stitched or fully bound, and the treatment of the tape ends.
- Packing specification: pieces per bundle, per inner and per carton, with carton dimensions.
- Quantity per size and colourway against the 500 pcs minimum, and the target delivery month.
- Custom cosmetic bags for Kickstarter
- Custom cosmetic bags for Kickstarter
- Custom tote bags for Kickstarter
- Material customisation for Kickstarter bags
- Print and embroidery options for custom bags
- Crowdfunding bag sample prototyping
- QA, QC and inspection on campaign bag runs
- Request a quotation
Spec a zipper pouch that still works in year two
Send us the opening geometry, the zip specification and the quantity per colourway. As your production partner we will return a unit cost, a sampling estimate and a carton specification. Write to service@junyuanbags.com.
Frequently Asked Questions
What is the MOQ for custom zipper pouches on a Kickstarter campaign?
The minimum is 500 pcs per style and per colourway. A three-size pouch range is normally three separate 500 pcs commitments, unless the sizes are only ever pledged as a bundled set, in which case the set can be treated as the style. Confirm the split before quoting.
How much does a custom zipper pouch cost to produce?
On a 500 pcs run a flat 300D polyester pouch with a 210D lining, a #3 coil zip and a one-colour print typically quotes between 1.30 and 3.80 USD ex-works. The zip line itself is usually 0.35-0.95 USD of that. At 3,000 pcs the build drops to 1.08 - 3.15 USD.
Which zip gauge should a zipper pouch use?
A #3 nylon coil suits openings up to 24 cm and is the cheapest at a cost index of 1.00. Move to a #5 above 24 cm, or where the run turns a corner, because a #3 tape bows and the slider catches. An #8 suits runs above 45 cm.
What are the six zip specification points to name?
Gauge, coil direction, slider type, stop type, puller material and tape colour. Three of the six concentrate defects: a non-locking slider creeps open, a badly crimped bottom stop separates under load, and a bare metal puller scratches and rattles. Name the gauge as #3, #5 or #8 in the RFQ.
Should the slider be auto-locking on a pouch?
Yes, on any pouch that travels inside a bag. A non-locking slider creeps open under compression and the contents come out. An auto-locking slider adds roughly 0.02-0.05 USD to the hardware line and removes a complaint that typically arrives within a week of delivery.
Why does the tape on my sample pouch look wavy?
Almost always because the panel edge was not bound before the zip was fed in. A raw fabric edge stretches by 2-3% under the machine feed, and that stretched edge produces a puckered seam that pressing will not remove. Bind the edge first and the tape lies flat.
How long does sampling take for a custom zipper pouch?
Sampling runs 6-10 working days per round from a released tech pack, extending to 12-15 working days where a custom puller, a water-resistant tape or a PU leather shell is involved. Budget two rounds and cycle the sample zip 50 times before approval.
Can a zip run around three sides of a pouch?
Yes, and it is the most useful geometry because the pouch opens almost fully. It is also the hardest to build, because the tape turns two corners. Keep the corner radius generous and move up a gauge; a #5 turning two corners outlasts a #3 comfortably.
What inspection standard applies to a zipper pouch order?
AQL 2.5 to ISO 2859-1 at general inspection level II, single sampling plan. Critical is a zip that does not close, a slider that will not lock or a puller that detaches. Major is a print defect, a missing bar-tack or a wavy tape.
Is a branded zip puller worth the extra cost?
Usually yes. A moulded or debossed puller costs roughly 0.15-0.35 USD per unit and is touched every time the pouch opens. Against a second print application at similar cost it delivers more brand impressions and adds no inspection surface to the panel.
What compliance applies to zipper pouches shipped into the US and EU?
United States shipments fall under California Prop 65 where a listed substance is present above threshold, and CPSIA where the product is intended for children. European Union shipments fall under REACH Annex XVII and the EU GPSR. OEKO-TEX Standard 100 covers textile components.
When does bulk production actually start on a zipper pouch order?
production 35-50 days after two conditions are met together: the 30% deposit under T/T 30/70 has landed, and the pre-production sample has been approved in writing. Neither condition alone starts the clock. Confirm the slot with a start, completion and inspection date.
People Also Ask
Are zipper pouches a good reward for a first campaign?
They are the safest starting point. Low unit cost, few components, fast sampling and a short defect list, which means a first-time creator can learn the process without risking the delivery window on a complex build.
What is the difference between a #3 and a #5 zip?
The gauge is the width of the closed coil: about 4.5 mm for a #3 and 6 mm for a #5. The #5 is stronger, lies flatter on a long run and costs roughly 10-15% more on the hardware line. Choose by opening length and corner count.
Should the pouch interior be bound or turned and stitched?
Turned and stitched is sufficient for a secondary reward that ships inside a hero bag. A fully bound interior costs 12-18% more in sewing time and is worth it where the pouch is claimed on its own, because the backer runs a hand along the inside seam immediately.
How do I stop a print breaking up along the zip line?
Keep the print block at least 10-12 mm clear of the zip tape, and pin the coordinate to a measured distance from the tape rather than from the panel edge, because the panel edge moves with the seam allowance.
Do zipper pouch sizes count as their own MOQ?
Yes. Each size and colourway is counted separately against the 500 pcs minimum, so a three-size range is normally three commitments. Where sizes are only pledged as a set, the set can be treated as the style.