Bag Hardware Guide: Buckles, D-Rings, Sliders and Logo Parts
Hardware is the one bag component that fails structurally rather than cosmetically, so it deserves specification attention out of proportion to its cost. Specify acetyl for function and metal for visible low-load parts, size every part to the measured width and thickness of the approved webbing rather than a nominal label, and treat custom logo hardware as a tooling decision that sits in front of sampling. Require a static pull test on the assembled bag, a cycle test in the hundreds to thousands of operations, and a neutral salt spray figure stated in hours. MOQ is 500 pcs per style and colourway, sampling 6 to 10 working days and bulk 35 to 50 days.
- Hardware as Load Path: Where Bag Hardware Fails
- Choosing Hardware Material: Acetyl, Nylon and Metal
- Buckles and Quick-Release: Matching Mechanism to Use
- D-Rings, O-Rings and Anchor Hardware
- Sliders, Tri-Glides and Adjusters: Grip and Slip
- Custom Logo Hardware: Moulding, Casting and Engraving
- Finishes, Plating and Corrosion Resistance
- Sizing Hardware to Webbing: Width, Thickness and Tolerance
- Testing Hardware: Pull, Cycle, Salt Spray and Drop
- Cost, Lead Time and the Sampling Gate
- Writing the Hardware Schedule So Nothing Gets Substituted
Hardware is the only category in a bag specification where a failure is structural rather than cosmetic. Fabric wears, print fades and lining frays, and backers tolerate those. A buckle that releases under load, a D-ring that tears out of its anchor, or a slider that creeps millimetre by millimetre through a day is a usability and safety failure, and those generate the longest and most damaging reviews a campaign receives. This guide sets out the hardware families our production team specifies most often for crowdfunding rewards, the material and finish choices behind them, the sizing rules that stop fit problems, the tests that catch failure before bulk, and what custom logo hardware actually costs in tooling and lead time.
Spend the upgrade money on the load path before you spend it on the surface finish. A plated zamak ring that looks expensive and corrodes in a humid container is worse than a plain acetyl part that simply works.
Hardware as Load Path: Where Bag Hardware Fails
It helps to think of hardware as the joints in a structure rather than as decoration. A bag under load is a set of tension paths: webbing pulls on a slider, the slider grips the webbing, the webbing pulls on its anchor, the anchor pulls on the shell panel, and the shell panel pulls on its own stitching and on the reinforcement behind it. Weakness anywhere in that chain becomes the failure point, and it is almost always the cheapest-looking part in the path.
Four failure patterns account for most of what we see. Anchor failure is when the hardware survives but the webbing loop or the panel around it tears out, usually because the stitch pattern was too small or the reinforcement too thin. Deformation is when a moulded polymer part flexes under sustained load and releases unintentionally. Wear-through is webbing abrading against a sharp hardware edge over months of adjustment. Finish breakdown is plating dulling, chipping or corroding so a premium bag photographs as cheap.
All four are specification decisions, not bad luck, and all four are cheap to prevent at sample stage and expensive to fix after delivery. The reason hardware deserves attention disproportionate to its share of unit cost is that the consequence is asymmetric: a hardware failure on a bag that carries a laptop, a child's belongings or a camera is an incident, not a defect. Our custom bags for Kickstarter campaigns overview places this component layer in the wider sequence of decisions a creator makes before quoting.
- Anchor failure: the part survives, the fabric around it tears out first.
- Deformation: a polymer part flexes and releases under sustained load.
- Wear-through: webbing abrades against a sharp edge over repeated adjustment.
- Finish breakdown: plating dulls, chips or corrodes and drags down perceived quality.
Choosing Hardware Material: Acetyl, Nylon and Metal
The material decision maps directly onto cost, weight and how the part fails. Acetyl, formally polyoxymethylene and often abbreviated POM, is the standard for moulded buckles and many sliders. It has good dimensional stability, low friction against webbing, reasonable strength, and it is quiet. It moulds cleanly, so it accepts crisp shapes and moulded-in branding, and it does not chip the way a plated part can.
Nylon, usually PA6 or PA66 and sometimes glass-filled, is tougher and more impact resistant than acetyl, and it is our usual recommendation where hardware sees temperature extremes or repeated impact, such as sports bags and travel duffles thrown into overhead lockers. It absorbs more moisture than acetyl and some grades creep more under sustained tension, so for a part that will sit loaded for hours we ask which grade is being offered rather than assuming the family is enough.
Metal, typically zinc alloy for moulded shapes and steel or brass for wire forms, carries the highest perceived value and the highest strength, and also the most weight and cost. Thin plating over a reactive alloy behaves poorly in humid environments, which matters for anything shipped by sea in a sealed container. Our usual guidance mirrors what we advise on closures: use polymer where function dominates and metal where the part is visible, low-load and part of the visual language of the design.
There is a fourth option that is often overlooked: stainless or anodised aluminium for specific low-profile parts. These cost more than zamak but they do not corrode and they do not need plating, which removes an entire failure mode. For a campaign shipping to humid climates or selling a lifetime promise, that trade is frequently worth making.
| Material | Strength band | Weight | Cost | Typical use | Watch for |
|---|---|---|---|---|---|
| Acetyl (POM) | Good | Light | Low | Side-release buckles, sliders | Creep under sustained load |
| Nylon (PA6/PA66) | Better impact | Light | Low to mid | Sports and travel hardware | Moisture absorption, grade variance |
| Zinc alloy | High | Heavy | Mid | Logo plates, decorative rings | Plating corrosion in humidity |
| Steel wire | Highest | Heavy | Mid | D-rings, O-rings, hooks | Burring at cut ends, rust if unplated |
| Aluminium | High | Light | Higher | Low-profile adjusters, hooks | Anodising wear at contact points |
Buckles and Quick-Release: Matching Mechanism to Use
The word buckle covers several distinct mechanisms and picking the wrong one is a common source of a disappointing sample. A side-release buckle is the familiar two-part design with a male bar that snaps into a female socket, released by squeezing the socket sides. It is the default for waist belts, sternum straps and compression straps, and it is specified by webbing width, so a 25 mm buckle takes 25 mm webbing.
A ladderlock or tri-glide is not a buckle at all, it is an adjuster, and confusing the two is how straps end up impossible to tighten. A cam buckle grips webbing with a spring loaded toothed cam and is the right choice where the strap must be tensioned hard and released quickly, such as on compression panels. A magnetic closure gives a premium unboxing moment and one-handed operation, but it holds far less load than a mechanical buckle and should never be the only closure on a load-bearing opening.
Two specification details decide whether a buckle feels good. The first is release force, the force needed to open the buckle; too high and backers struggle, too low and the bag opens itself in transit. The second is engagement force, the force needed to close it; too high and the buckle feels stiff and cheap. Both are measurable and both should be stated as a range rather than left to chance.
Also decide on single versus dual adjust. A single-adjust buckle has webbing sewn in on one side, which is cheaper and cleaner. A dual-adjust version lets the user shorten the strap from both ends, which is what you want on a shoulder strap. That is a design decision that affects the webbing run and the pattern, so it belongs in the drawings, not in a note.
D-Rings, O-Rings and Anchor Hardware
Rings look simple and cause more specification errors than any other hardware family, mostly because the three variables are rarely all stated. Those variables are wire or strap thickness, internal diameter, and material and finish. A ring specified only by outer size can arrive with a wire too thin for the load or an internal diameter too small to pass the webbing through twice.
Functionally, rings do three different jobs. Anchor rings take a strap or a clip and transfer load into the panel; these need a reinforced webbing anchor behind them and often a bar-tack. Lash or utility rings are grab points and attachment points for carabiners and pouches; these see unpredictable loads, including people using them as handles, so they should be specified as if they were structural. Decorative rings carry a zipper pull or a brand tab and can be specified purely on appearance.
The failure mode to design against is wear at the contact point. If a ring sits directly against webbing that is adjusted regularly, the webbing will abrade, and if the ring has any burr from the cut end of the wire it will abrade quickly. Specifying deburred or welded rings, and adding a small webbing keeper where adjustment happens, removes a failure that otherwise shows up in month six.
Rings are also the parts most often dragged into safety and compliance discussions, particularly on children's products where small parts, sharp edges and protrusions are regulated. If your campaign includes a kids' bag, settle the hardware geometry against the relevant standard early; our guide to bag safety standards for straps and children's bags covers the territory.
Sliders, Tri-Glides and Adjusters: Grip and Slip
An adjuster has one job: hold webbing at a set position under load and let it move when the user wants it to. It fails in two opposite ways. It can slip, creeping under vibration and load so a strap slowly lengthens, which is the complaint behind most shoulder-strap reviews. Or it can grip too hard, making adjustment unpleasant and risking damage to the webbing when someone forces it.
The geometry that governs this is the webbing path through the slider. A standard tri-glide threads webbing under one bar, over the middle bar and under the other, and the middle bar is what creates friction. Some designs add teeth or a cam to increase grip. The practical specification is a slip test: set the adjuster, apply a defined load for a defined time, and measure movement in millimetres. It is a cheap test and it is the only way to compare two parts honestly.
Fit matters as much as geometry. The slider must be sized to the webbing width and thickness, not just the nominal width, because webbing thickness varies between weaves and between suppliers. A slider that is too loose will let thick webbing twist; one that is too tight will not thread at all or will score the webbing. We size hardware against the actual webbing sample rather than a catalogue number, and our webbing and straps guide gives the width and thickness bands to work from.
One design note that pays off: where a strap end is adjustable, finish it. A heat-cut or folded-and-stitched end stops the webbing unravelling and stops it pulling back through the slider. It costs seconds per unit and it removes a defect that backers photograph immediately.
Custom Logo Hardware: Moulding, Casting and Engraving
Custom logo hardware is the highest-perceived-value upgrade in this category, and it is the one with the most misunderstood economics. The cost is not the part, it is the tooling. A moulded acetyl buckle with a logo requires a tool cut for that shape, a die-cast zinc plate requires a casting tool, and both carry a one-off charge plus a lead time before the first parts exist.
The practical consequences are three. First, tooling cost has to be amortised across the order, so custom hardware makes sense at a campaign volume and rarely makes sense on a small test run. Second, tooling lead time sits in front of sampling, so a custom part can add weeks before a sample can be built. Third, tooling is design-specific, so changing the artwork late often means a new tool and a second charge.
The lower-cost alternatives are worth knowing. Laser engraving on a stock metal part gives a permanent mark with no tooling. Moulded-in branding on a polymer part is a tooling cost but no recurring process cost. A printed or etched logo plate riveted to the bag gives the visual effect at the lowest entry cost, at the expense of a slightly less integrated look. A silicone or rubber patch avoids metal entirely and is popular on soft-shell products.
Whichever route you take, specify the logo depth and position tolerance. A logo that sits one millimetre off centre on a buckle is visible to every backer, and a logo that is raised too far will wear at the contact points. Ask for a physical approval part before the tool is hardened if the schedule allows, because changes after hardening are expensive.
Note that custom hardware interacts with the MOQ of 500 pcs per style and per colourway. A custom tool for a single colourway of a small style can be hard to justify, so we usually advise creators to design custom hardware that can be reused across more than one product in the range.
Finishes, Plating and Corrosion Resistance
Finish is where perceived quality lives, and it is also where the most avoidable disappointment happens. Common finishes include nickel, gunmetal, black nickel, antique brass, gold and matte paint or anodising. The visual differences are obvious; the durability differences are not, and they are what backers discover after three months.
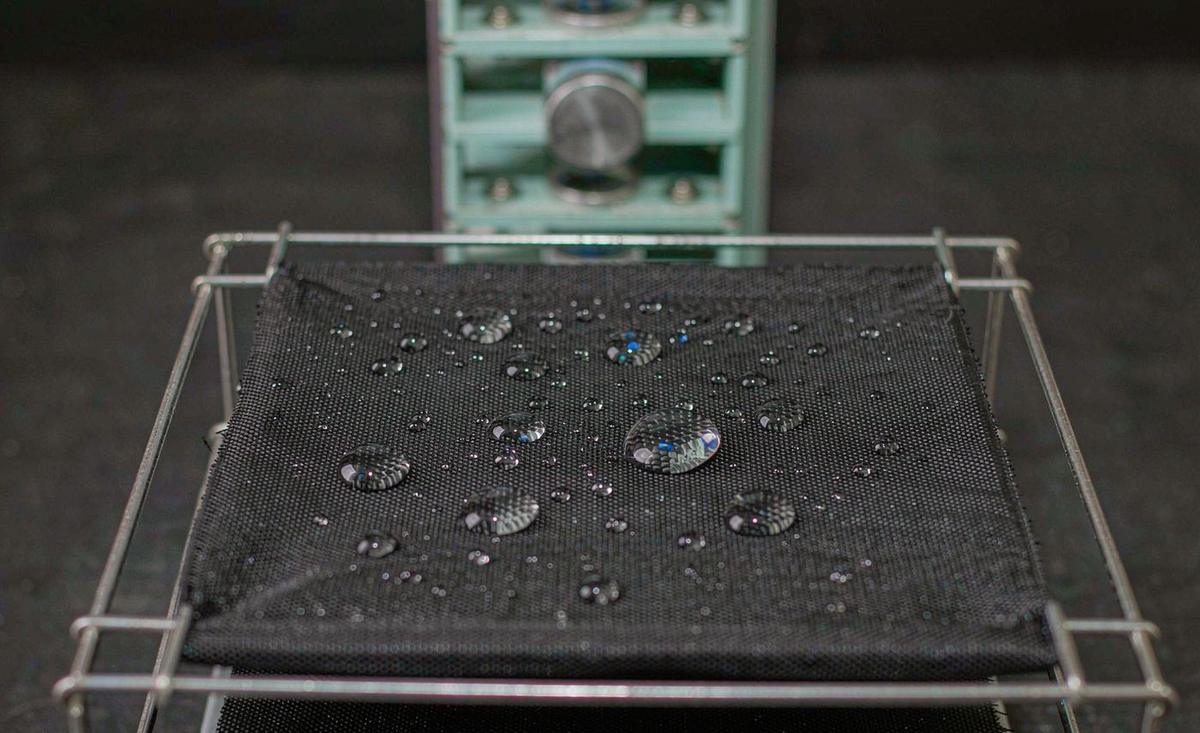
Durability is governed by plating thickness and the base alloy, and it is verified by corrosion testing. The standard method is a neutral salt spray test, run for a defined number of hours and assessed for the appearance of corrosion products. Decorative finishes on hardware commonly hold up through the low tens of hours of salt spray exposure, with better specifications going further; the number you should require depends on where the bags will be sold and shipped. State the hours and the acceptance criterion, not just the finish name.
There is also a rubbing and wear dimension. Plating on a part that rubs against webbing or against a bag body will wear through to the base metal, and on a zamak part that means a dull grey patch appearing on a black fitting. If a part sits at a contact point, choose a finish that wears gracefully, such as anodising or a solid-colour polymer, rather than a bright plating.
Finally, finishes have a compliance dimension. Nickel release and certain surface treatments are regulated in some markets, and dark finishes on children's products attract additional scrutiny. If you are selling into the EU or UK, confirm the finish chemistry with your sourcing partner before bulk, and check our custom bag compliance checklist for US, EU and UK rules for the wider picture.
Sizing Hardware to Webbing: Width, Thickness and Tolerance
Hardware and webbing are sold by width, and the nominal numbers match, but the tolerances do not always. Webbing is woven and it compresses, so a 25 mm webbing can measure slightly over or under depending on weave and finish. Hardware is moulded or formed, and its slot has its own tolerance. When the two meet at the edge of the tolerance band, you get a strap that will not thread or one that twists in use.
The practical fix is to specify both parts against the same physical reference. Approve a webbing sample, then approve hardware that fits that sample, and record the measured width and thickness on the tech pack. Common width bands for bag hardware are around 15 mm and 20 mm for light straps and accessory attachment, 25 mm for shoulder straps and compression straps, and 38 mm to 50 mm for heavier load-bearing webbing on travel and sports bags.
Thickness is the dimension most often ignored. Hardware designed for a thin, flat webbing can fail to grip a thicker, softer one, and hardware designed for thick webbing can let thin webbing rotate. If you switch webbing supplier between sample and bulk, re-fit the hardware. This is one of the most common causes of a bulk order that behaves differently from an approved sample.
For metal rings and hooks, add the wire diameter to the specification alongside the internal diameter. Two rings with the same outer size and different wire gauges have very different strength and very different weight, and the wire gauge is what a supplier can most easily reduce without changing the look of the part.
Testing Hardware: Pull, Cycle, Salt Spray and Drop
Four tests cover most hardware risk. A static pull test holds a loaded assembly at a multiple of its intended working load for a defined time and checks for failure or permanent deformation. This is the test that catches a buckle that releases or an anchor that tears out, and it should be run on the assembled bag, not on the component alone, because the anchor is usually the weak element.
A cycle test opens and closes a buckle or runs an adjuster repeatedly and then re-tests function. Typical specifications call for hundreds to a few thousand cycles, depending on how often the part will be used in service. This is the test that separates a buckle that feels solid on day one from one that still feels solid in year two, and it is cheap to run at sample stage.
Corrosion testing by neutral salt spray covers plating, and it should be run on the finished part, not on a plated panel, because edges and recesses are where corrosion starts. Results are expressed as hours to a defined level of corrosion, so always state the hours and the acceptance criterion in the specification.
Finally, a drop and swing test on the finished bag catches the failure that component tests miss, which is the combination of impact, load and anchor geometry. Our hardware sampling walkthrough at bag hardware sampling for zippers, buckles and D-rings shows how we sequence these, and our bag material testing guide explains how to read a report once you have one.
Cost, Lead Time and the Sampling Gate
Hardware cost has three layers. The unit price of the part is usually modest and falls with quantity. The tooling charge for custom parts is a one-off and can dominate the economics on a small run. The process cost of fitting the part, which is labour minutes at the machine, is often underestimated and rises with the number of hardware operations in the pattern.
Lead time follows the same shape. Stock hardware is available quickly; custom hardware needs tooling before sampling, and that tooling time sits in front of the 6 to 10 working day sampling window rather than inside it. Complex builds with hardware, padding and moulded panels run 12 to 15 working days for sampling, and bulk then runs 35 to 50 days after approval. If custom hardware is part of the design, that tooling decision is the first thing to make, not the last.
The sampling gate is where hardware problems are cheapest to fix. At approval you should hold the part specification with dimensions, the finish with a salt spray requirement, a signed physical sample of the part, and, for custom parts, an approved tool sample. If a supplier substitutes an equivalent part between sample and bulk, the substitution should be re-approved, because equivalence in a catalogue is not equivalence in a load path.
Finished goods are inspected to AQL 2.5 to ISO 2859-1, and the hardware defects worth naming explicitly are plating blemishes, sharp edges or burrs, buckles that do not engage cleanly, and misaligned logo placement on custom parts. Naming them with limits makes an inspection result actionable. Commercials are standard across our programme: FOB Xiamen with T/T 30/70.
Writing the Hardware Schedule So Nothing Gets Substituted
Every hardware item on a bag should appear on a schedule with its own line: location, type, size, material, finish, colour, quantity per bag and supplier reference. That schedule is what the purchasing team works from and what the QC team checks against, and it is what stops a part being swapped for a cheaper equivalent without anyone noticing.
- Location and function: so the load path is understood, not just the part number.
- Type and mechanism: side-release, cam, tri-glide, D-ring, and whether it adjusts.
- Size in millimetres: matched to the approved webbing width and thickness, not to a nominal label.
- Material and finish: polymer grade or alloy, finish name, and a corrosion test requirement.
- Colour reference: matched to a physical standard, because hardware colour rarely matches fabric exactly.
- Quantity per bag and reference: the supplier code plus how many of each part the pattern needs.
Two closing practicalities. First, order spare parts. Hardware is the category where a small percentage of spares lets you resolve a backer issue cheaply months later, and it costs very little to add to the bulk order. Second, keep a sealed reference set of the approved parts with the tech pack, because a dispute about finish or strength is settled by comparing physical samples. Our programme coordinator can review a hardware schedule before you send it out; send us a brief through the contact page.
Specifying hardware for a reward bag? Send us your drawings, strap widths and quantity and we will come back with a costed hardware schedule.
Frequently Asked Questions
What material is best for bag buckles?
Acetyl, or POM, is the standard choice for moulded buckles because it is dimensionally stable, low friction against webbing and quiet. Move to nylon, usually PA6 or PA66, where the part sees impact or temperature extremes. Use metal where the part is visible and low-load rather than structural, because metal adds weight and cost and thin plating can corrode in humid shipping conditions.
How do I choose the right size of hardware for my webbing?
Match the hardware to the measured width and thickness of the approved webbing sample rather than to a nominal label, because woven webbing tolerances vary by weave and supplier. Common bands are about 15 to 20 mm for light straps, 25 mm for shoulder and compression straps, and 38 to 50 mm for load-bearing webbing. Re-fit hardware if the webbing supplier changes.
Why does my bag strap keep slipping through the adjuster?
Slip usually means the adjuster geometry, the webbing thickness and the load are mismatched, or that the webbing path over the centre bar is not generating enough friction. Specify a slip test that sets the adjuster, applies a defined load for a defined time and measures movement in millimetres. Also finish the strap end so it cannot pull back through the slider.
What is the difference between a buckle and a tri-glide slider?
A buckle connects and disconnects two webbing ends, while a tri-glide or ladderlock adjusts the effective length of a continuous webbing run by friction over a centre bar. They are not interchangeable. Specifying a slider where a buckle is needed is a common cause of a sample that cannot be opened or tightened the way the designer intended. Put both part types on the hardware schedule so the distinction is explicit.
How much does custom logo hardware cost?
The dominant cost is tooling rather than the unit part. A moulded or die-cast tool is a one-off charge plus a lead time before first parts, and changing artwork after the tool is hardened usually means a second charge. Laser engraving on a stock part, moulded-in branding or a riveted logo plate give the visual effect with little or no tooling.
Does custom logo hardware delay sampling?
Yes. Tooling lead time sits in front of the sampling window rather than inside it, so a custom part can add weeks before a sample can be built. Standard sampling runs 6 to 10 working days and complex builds 12 to 15 working days once parts are available, with bulk at 35 to 50 days after approval. Decide tooling first if custom hardware matters to the design.
What plating finish lasts longest on bag hardware?
Durability depends on plating thickness and the base alloy rather than the colour name. Verify with a neutral salt spray test, stating the hours and the acceptance criterion rather than just the finish. Note that any bright plating will wear through at contact points where hardware rubs webbing, so use anodising or a solid-colour polymer at those positions. Confirm the finish chemistry before bulk, because some surface treatments are restricted in specific markets.
How is bag hardware tested before bulk production?
Four tests cover most risk: a static pull test on the assembled bag at a multiple of working load, a cycle test that opens and closes the part hundreds to a few thousand times, a neutral salt spray test for plating corrosion, and a drop or swing test on the finished bag. The assembled tests matter most because the anchor usually fails before the part.
Can hardware cause a safety or compliance problem?
Yes, particularly on children's products, where small parts, sharp edges and protrusions are regulated. Burrs from cut wire ends, detachable decorative parts and nickel release from plating are the recurring issues. Settle the hardware geometry and finish chemistry against the relevant standard early, and confirm what documentation your sourcing partner can provide for the market you sell into. Detachable decorative parts are the most common cause of a late redesign.
What is the MOQ when I want custom hardware on a bag?
The bag MOQ stays at 500 pcs per style and per colourway. The separate constraint is the tooling charge, which has to be amortised across the order, plus any mill or foundry minimum on the custom part itself. Design custom hardware so it can be reused across more than one product in the range to spread that cost, and confirm the foundry minimum before you commit to artwork.
Should I order spare hardware with my bulk order?
Yes. Hardware is the category where a small percentage of spare parts lets you resolve a backer issue months later at minimal cost, and the marginal cost of adding them to a bulk order is small. Keep a sealed reference set of approved parts with the tech pack as well, because finish and strength disputes are settled by comparing physical samples.
What inspection standard covers hardware defects?
Finished goods are inspected to AQL 2.5 to ISO 2859-1. Name hardware defects as their own classes with acceptable limits: plating blemishes, sharp edges or burrs, buckles that do not engage cleanly, and misaligned logo placement on custom parts. Require re-approval if a supplier substitutes an equivalent part between sample and bulk production, because catalogue equivalence is not equivalence in a load path.
People Also Ask
What is the strongest material for bag buckles?
Metal is strongest by raw capacity, but acetyl or nylon is usually the better engineering choice because they are lighter, quieter and do not corrode. Use metal for visible low-load parts.
How do I size hardware to webbing?
Measure the approved webbing sample and match hardware to it. Common bands are 15 to 20 mm for light straps, 25 mm for shoulder straps and 38 to 50 mm for load-bearing webbing.
Why does my strap slip through the slider?
Usually a mismatch between slider geometry, webbing thickness and load. Run a slip test that measures movement in millimetres under a defined load, and finish the strap end.
Is custom logo hardware worth the tooling cost?
At campaign volumes and where the part can be reused across the range, usually yes. On a small single-colourway run, laser engraving or a logo plate is usually the better value.
How long does hardware sampling take?
Stock hardware fits the standard 6 to 10 working day sampling window. Custom hardware adds tooling lead time in front of that, so plan the tooling decision first.
How do I stop hardware corroding?
Specify plating thickness and require a neutral salt spray test with stated hours. Avoid bright plating at contact points, where it wears through to the base alloy.
Do I need spare parts in my order?
Yes. A small percentage of spare hardware costs little in bulk and lets you resolve backer issues months later without a new production run.