Custom Bag Zippers: Choosing Size, Chain Type and YKK Options
Use a #5 chain as the default for a backpack main compartment, step up to #8 for long curved openings or anything regularly overfilled, and reserve #3 for internal pockets. Chain construction matters as much as gauge: coil is smoothest, lightest and most forgiving on curves, moulded tolerates grit best, and metal carries the strongest premium signal at the most weight. Coated water-resistant closures resist water through the chain but are not waterproof alone, and an overlapping storm flap usually delivers more protection per unit of cost. Recognised brands such as YKK earn their premium through run-to-run consistency and code availability at reorder. All of it still runs on a MOQ of 500 pcs per style and per colourway.
- Why Zip Failure Is the Most Expensive Cheap Decision
- Reading a Zip Specification: Gauge, Chain Type and Slider Code
- Choosing Between #3, #5, #8 and #10 Chains
- Coil, Moulded and Metal Chains Compared
- Branded Versus Generic Chain: Cost, Consistency and Lead Time
- Water-Resistant Zips: What Actually Keeps Water Out
- Sliders, Pullers, End Stops and Where They Actually Fail
- Zip Testing: What We Check Before Approval and Before Bulk
- What Zip Upgrades Cost Against Your MOQ and Timeline
- Writing the Zip Line Into Your Specification
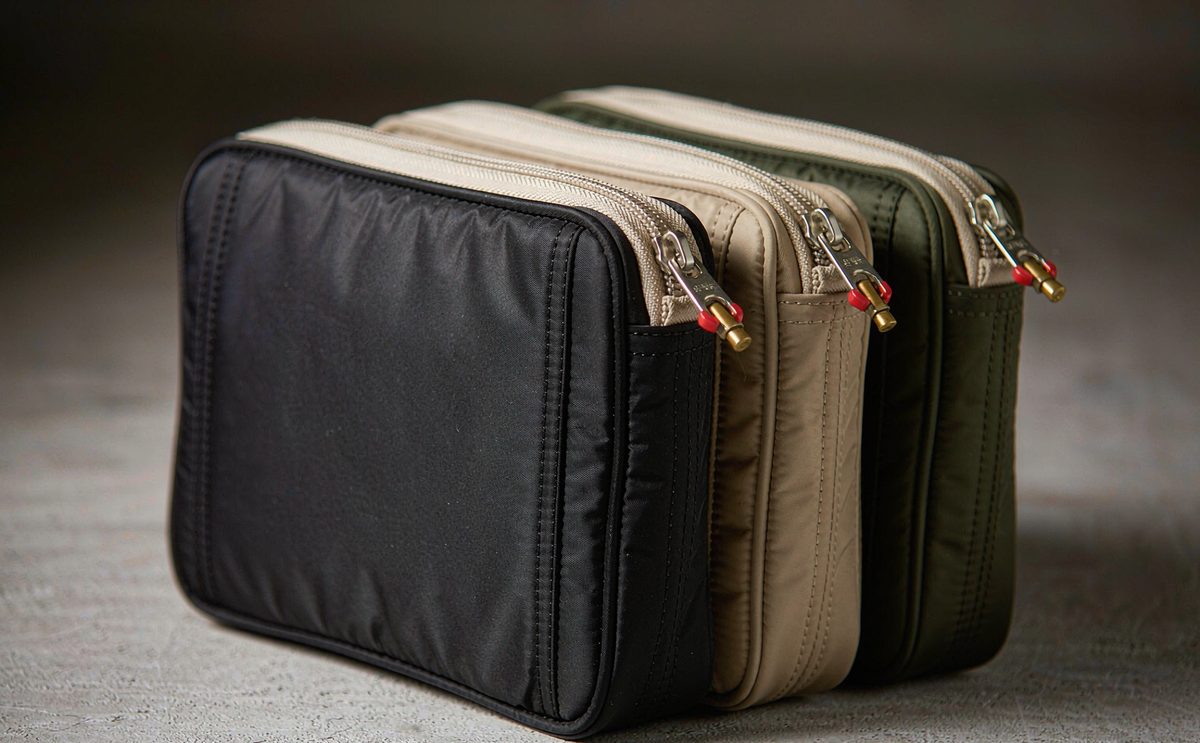
A zip does more work per square centimetre than any other component on a reward bag. It is opened and closed dozens of times a day, it carries lateral load when a bag is overstuffed, and it is the part a backer looks at first when something feels cheap. Yet in most creator briefs it appears as one word, usually the word nylon or metal, with no gauge, no chain type and no slider code. This guide sets out how our production team reads a zip specification, how gauge, chain construction and slider choice interact, what branded versus generic chains cost you in both money and lead time, and where water-resistant closures genuinely help versus where they are marketing.
Specify three things about every zip on your bag: the gauge, the chain type and the slider. Anything less and you are not specifying a zip, you are specifying a hope.
Why Zip Failure Is the Most Expensive Cheap Decision
There is a reason bag returns cluster around closures. A worn lining is annoying, a scuffed print is cosmetic, but a zip that splits open or jams mid-travel makes the bag unusable, and unusable means refund territory. If you ship 3,000 units and even 2 percent come back because of closure problems, that is roughly 60 replacements, and at a landed reward cost that often exceeds the entire amount you saved by choosing the cheaper chain in the first place.
The failure modes are predictable and nearly all of them are specification choices rather than bad luck. Splitting under load comes from too light a gauge or from insufficient stitching holding the tape into the shell. Slider wear comes from a low-quality slider body on a chain that would otherwise have lasted. Corrosion or dulling comes from an unplated or poorly plated finish chosen for cost. Jamming at the start usually traces to the insertion pin and box, not to the teeth, and it is often solved by a better bottom stop detail rather than a better chain.
There is also a perceived quality dimension that is disproportionately large. Backers run a zip with their fingers and form an opinion about the whole product within about two seconds of doing it. A smooth, quiet, well-weighted slider communicates quality in a way that no amount of storytelling in your campaign video can. That is why we typically recommend spending the incremental money here before spending it on almost any other component, and our overview of custom bags for Kickstarter campaigns puts that decision in the wider context of building a reward tier that survives contact with real life.
- Gauge too light for the opening length is the most common cause of splitting under load.
- Slider quality decides smooth feel more than the chain does, and it is usually the cheapest thing to upgrade.
- Stitch anchoring at the tape ends decides whether a good chain stays attached to the bag.
- Finish choice decides corrosion behaviour, especially for hardware shipped by sea freight.
Reading a Zip Specification: Gauge, Chain Type and Slider Code
A complete zip line needs four pieces of information. The gauge describes the thickness class of the chain and is normally written as a number such as 3, 5, 8 or 10, sometimes prefixed with a hash. The number refers to the approximate width in millimetres of the closed elements, so a larger number means bigger teeth and a heavier-duty closure. The chain type describes how the elements are made: coil, moulded or metal. The tape describes the fabric strip the elements are attached to, its material and width. The slider describes the moving part, its locking behaviour, whether it is single or double, and the puller attached to it.
Most creator briefs specify only the first two, if that, and leave tape and slider to be guessed. That is where disputes start. A #5 coil chain with an auto-lock slider behaves completely differently in use from the same chain with a non-lock slider, and the second version on a backpack main compartment will creep open as the bag moves, which backers interpret as a broken zip. Always state whether you want auto-lock, which uses a small pin in the slider body to resist movement, or non-lock, which is smoother and is normally used where the slider sits against another surface or where two sliders meet.
Two more details are worth specifying explicitly because they cost almost nothing and prevent real problems. The first is tape colour, because a mismatched tape against a carefully matched shell fabric is surprisingly visible at the zip line. The second is slider direction and configuration, meaning whether you want one slider, two opposing sliders on a suitcase-style opening, or two sliders meeting at the top of a main compartment. Changing that decision after the sample is built means rebuilding the panel, so decide it while the tech pack is still editable rather than during approval.
Finally, say what you want at the top stop and bottom stop. Options include an open-end box and pin for separating zips, a closed-end metal or moulded stop for non-separating ones, and reinforced fabric stops at the top. These small parts are where starting problems originate, and they are also the parts most often omitted from a creator's component list entirely, which means they get selected on your behalf by whoever assembles the first sample.
Choosing Between #3, #5, #8 and #10 Chains
Gauge selection is mostly a function of opening length, expected load and how the closure sits visually. A larger gauge is not automatically better, because heavier chain adds weight, bulk and visual aggression, all of which can work against a slim everyday design. What you are buying with gauge is resistance to the lateral forces that try to peel the two halves of the chain apart when the bag is stuffed.
- #3 chain: internal pockets, pencil cases, small pouches, garment-adjacent bags. Light, discreet, comfortable to run.
- #5 chain: the default for backpack and duffle main compartments, external pockets and everyday carry.
- #8 chain: heavy duty main openings, sports bags, tool bags, anything routinely overfilled.
- #10 chain: large travel bags, equipment cases and designs where the zip is deliberately part of the visual language.
Two rules of thumb help when you are undecided. First, the longer the opening, the more leverage the contents apply, so a long curved opening around a duffle lid generally wants one step heavier than a short straight opening doing the same job. Second, if the zip sits against something rigid such as a laptop panel or a structured frame, the chain is doing more work than it looks like it is doing, because there is no fabric give to absorb the load. In those positions stepping up one gauge is cheap insurance.
It is also worth understanding that gauge interacts with how the closure looks. A #8 metallic chain running down the front of a commuter backpack reads as a design feature; the same #8 chain on a slim sling reads like a costume. When you look at your own reference products, measure the chain before you assume it is a #5, because visual impression and actual gauge drift apart more than most creators expect, and copying a look with the wrong gauge produces a bag that behaves differently from the reference.
Coil, Moulded and Metal Chains Compared
Chain construction changes how the closure feels, how it fails and how much it costs. Coil chain is made from a continuous spiral of monofilament sewn onto the tape. It is the smoothest to operate, it flexes well around curves, and it is generally the lightest and quietest option. It is also the easiest to repair in the field, because a split coil can sometimes be re-set by running the slider back through it, which is genuinely useful for a backer travelling with your bag.
Moulded chain uses discrete plastic elements injection-moulded directly onto the tape, often described simply as moulded-tooth. It is stiffer and slightly louder than coil, it holds its shape better on a straight run, and it tolerates dirt and grit more forgivingly, which is why it is common on outdoor and kids' products. Metal chain uses discrete metal elements crimped onto the tape, available in brass, nickel, antique finishes and black oxide. It has the strongest premium signal and the highest cost, and it adds real weight, typically measurably more than the equivalent coil chain over a long opening.
There is one practical caution about metal worth stating plainly: metal elements are less forgiving if the opening curves sharply, and they can be the noisiest option when a bag brushes against clothing or a seat back. If your reward tier is a quiet everyday bag, coil is usually the better engineering answer even when metal is the better marketing answer. Where we see creators get it right is by using metal as an accent on a single visible front pocket and coil everywhere function matters, which delivers the premium impression without the daily irritation.
| Chain type | How it is built | Feels and sounds like | Strength profile | Typical application |
|---|---|---|---|---|
| Coil | Continuous monofilament spiral sewn to tape | Smoothest and quietest, flexible on curves | Good lateral strength, field-repairable when split | Backpacks, commuter bags, garment pockets |
| Moulded | Discrete polymer elements moulded to tape | Firmer, slightly louder, holds its line | Good dirt tolerance, resists grit jamming | Outdoor bags, kids ranges, straight-run openings |
| Metal | Discrete metal elements crimped to tape | Heaviest, most tactile, can rattle | Strong elements, less forgiving on tight curves | Premium front pockets, heritage styling |
| Reverse coil | Coil inverted so the face shows the tape edge | Smooth, minimal visual hardware | Same as coil but with a cleaner face | Minimalist designs and wet pockets |
| Two-way coil | Two sliders meeting or opposing on one chain | Versatile, adjustable opening access | Same as base chain | Suitcase-style openings, long duffle lids |
Branded Versus Generic Chain: Cost, Consistency and Lead Time
The branded-versus-generic question comes up on nearly every first quote, and it deserves a financial answer rather than a reflexive one. A recognised brand such as YKK carries a price premium over a generic equivalent chain, and the honest reasons to pay it are consistency across runs, documented test data, and availability of matching component codes years later when you reorder. All three of those matter more in year two of a product's life than they do in month one.
The case for a generic chain is that at reward volumes it can be appreciably cheaper, sometimes meaningfully so when several zips per unit are involved, and it may run on shorter procurement time. The case against is that a second production run may not have the identical chain available, and small differences in slider tolerance are exactly the kind of change that backers notice as negative reviews even though nobody can name what altered. If you plan a reorder or a second colourway, consistency is worth real money.
Our practical recommendation is a tiered approach. Use a branded chain on the main opening and any closure that carries structural load or that backers operate constantly, and consider generic options on secondary internal pockets where a substitution later would be low risk. If you do specify a brand, say so explicitly on the tech pack with the product code, because otherwise it will not be quoted. For reference on how those choices interact with the sample stage, our article on zipper, buckle and D-ring hardware sampling walks through the approval sequence.
Water-Resistant Zips: What Actually Keeps Water Out
Water-resistant closures are one of the most oversold features in bag marketing, so it is worth being precise about terminology. A water-repellent zip has tape treated so water beads rather than soaking in, and often a coated face on the elements. A water-resistant zip adds a flexible polymer layer over the chain, usually on a reverse-coil construction, so there is no open channel for water to pass through. Neither makes the opening waterproof on its own, because the closure is only one part of an assembly that includes seams, panels and geometry.
The single largest contributor to real-world water entry at a zip is not the chain at all, it is the storm flap or garage detail behind it. A coated chain with no flap will still pass water under sustained rain, particularly where the opening curves. A standard coil chain behind a well-cut flap with adequate coverage will usually outperform an expensive coated chain with nothing behind it. If you can only afford one of the two, choose the flap.
Cost-wise, expect a coated water-resistant chain to add a noticeable premium over the standard equivalent, and note that it behaves differently in manufacturing: the polymer face does not sew exactly like fabric tape and it is less tolerant of being bent sharply or pressed hot, so allow for slightly more careful handling and slightly higher rejection rates at inspection. Our companion article on seam sealing and spray rating practice explains how whole assemblies are rated rather than individual components, which is the honest way to set backer expectations.
- Water-repellent tape: cheapest step, beads light spray, no meaningful change to assembly.
- Coated reverse-coil chain: genuine resistance to water passing through the closure itself.
- Overlapping storm flap: the highest value addition per unit of cost in almost every design.
- Sealed slider and garage: protects the highest-risk point, which is where two sliders meet.
Sliders, Pullers, End Stops and Where They Actually Fail
If you want one upgrade that improves perceived quality per unit of spend, upgrade the slider and puller rather than the chain. This is the part a backer touches every time, and it is usually a small fraction of total zip cost. A well-finished metal slider body with a shaped puller reads as premium immediately; a boxy zamak part with rough edges and a noisy rattle undermines everything else you specified.
Puller geometry matters functionally, not just aesthetically. A long puller is easier to operate with gloves or a full hand, which is why outdoor brands use them. A flat webbing puller is quieter and more comfortable against the body on a commuter bag. A garage or tucked park for the slider stops it flapping and stopping metal-on-metal noise. Consider also whether the puller needs to be lockable with a small travel lock, which is a genuine value addition on a travel tier and costs almost nothing.
The failure points to specify against are specific and testable. Puller attachment strength decides whether the pull tears off the slider body under load. Slider body fatigue decides whether the slider opens up after months of use and stops gripping the chain. Top stop retention decides whether the slider simply runs off the end of the chain one day and disappears. Each of these has a straightforward check, and each is much cheaper to specify up front than to argue about after your third production run.
One more practical detail that gets missed constantly: how many spare components you ask for. A small percentage of spare sliders shipped with the order costs very little and can solve a backer issue that would otherwise become a review and a refund request. Ask for it before production rather than after, because pulling spares from finished inventory later is disruptive for everyone involved.
Zip Testing: What We Check Before Approval and Before Bulk
Three test families cover most risk, and none of them require exotic equipment. The first is lateral or crosswise strength, which loads the closed chain sideways and measures resistance to the elements peeling apart. Suppliers commonly publish figures for this, but our advice is to request the actual test report for the exact chain and slider combination you are buying, because published values often cover a different slider or a different tape. Typical programmes perform this during development rather than on every bulk run.
The second is cycle testing, repeatedly opening and closing the closure to simulate use life. A reasonable development target for a daily-carry reward bag is somewhere in the 500 to 5,000 cycle range depending on how premium the tier is, and the useful outcome is not just whether it survives but how the feel changes across those cycles. A closure that arrives smooth and becomes coarse after 500 operations is going to generate complaints even though it technically passes.
The third is environmental and chemical behaviour. For metal hardware this means corrosion resistance under salt exposure, which matters because sea freight and coastal use are both real. For all chains it also includes colour transfer from tape dye and compliance screening for restricted substances where your backers or retail partners require it. Bulk inspection itself runs at AQL 2.5 to ISO 2859-1, and we recommend adding a simple functional check to the inspection plan, literally opening and closing each zip in the sample pull, because that catches more problems than any visual criterion can. Our write-up on fabric, zipper and print adhesion testing covers how these are sequenced.
What Zip Upgrades Cost Against Your MOQ and Timeline
Every zip choice has a money number and a time number, and keeping both visible stops unpleasant surprises. On the money side, stepping from a #5 to a #8 chain, moving from generic to branded, adding a coated water-resistant face, or specifying a custom tooling puller each add incrementally, and on a bag with three or four closures those increments compound. What we ask creators to do is decide which closures are load-bearing and which are access-only, then spend on the former and economise honestly on the latter.
On the time side, remember that our production programme runs on a MOQ of 500 pcs per style and per colourway, and that speciality components are usually subject to their own minimum purchase quantities and their own procurement windows. A custom puller with logo tooling can add meaningful lead time before sampling can even start, and a branded chain in a less common colour may need to be ordered in a single lot. All of this sits on top of the 6 to 10 working day sampling window for standard builds, or 12 to 15 working days for complex ones, and the 35 to 50 days of bulk production that follows sample approval.
The practical mitigation is simple and worth repeating: lock components before you lock the pattern. If you are still debating whether to use a branded chain when the sample goes into production, the delay is not the few days it takes to decide, it is the procurement window that opens afterwards. Our guide to MOQ, units, colourways and SKUs covers how component choices ripple into order planning, and our article on why three sampling rounds is normal explains where component changes fit into that sequence without pushing your delivery date.
Writing the Zip Line Into Your Specification
A complete zip line is short enough to fit in one table row per closure, and writing it that way removes almost every ambiguity. Here is the checklist our team uses when reviewing a creator's component list:
- Every closure listed separately with its location, for example main compartment, front pocket, internal slip pocket.
- Gauge written as a number, such as 5 or 8, not a descriptive word.
- Chain type stated explicitly as coil, moulded or metal, including whether it is reverse coil.
- Slider configuration described: single or double, auto-lock or non-lock, opposing or meeting.
- Puller described with material, finish, shape and approximate length in millimetres.
- Tape colour specified, ideally against a pantone reference that matches or intentionally contrasts the shell.
- Brand stated by name if a specific brand is required, with the product code where known.
The line most often missing is the slider configuration, and it is the one that produces the most disappointing first samples, because an auto-lock versus non-lock difference changes the entire daily experience of the bag while looking identical in photographs. The second most common omission is tape colour, which is trivially cheap to get right and surprisingly visible to fix wrong.
A note on wording that saves time: if you want a specific brand, write the brand name and the code. If you want the performance level but not necessarily the brand, write the performance requirements instead, for example gauge, cycle-life target and finish standard, and ask for two costed options. That second approach often gets you equal performance for less money, and it keeps your supply options open for the reorder that you will almost certainly want after a successful campaign.
Send us your component list and target quantity and we will quote two zip options per opening, with FOB Xiamen terms, T/T 30/70 payment and AQL 2.5 inspection built into the number.
Frequently Asked Questions
What zip size should I use for a backpack main compartment?
A #5 chain is the default answer for a backpack main compartment and most everyday carry bags, offering a good balance of strength, weight and visual scale. Step up to a #8 chain where the opening is long and curved, such as around a duffle lid, or where the closure sits against something rigid like a laptop panel. Reserve a #3 chain for internal pockets and small pouches where light weight matters more than load.
Is a YKK zipper worth the extra cost for a crowdfunding reward bag?
Usually yes for closures that carry load or that backers operate constantly. The premium buys consistency across production runs, documented test data for the specific chain, and the likelihood that the same product code is still available when you reorder in year two. A practical compromise is to use a branded chain on the main opening and consider generic options on low-risk internal pockets.
Are water-resistant zippers actually waterproof?
Not on their own, and this distinction is worth being precise about with backers. A coated reverse-coil chain genuinely resists water passing through the closure, and water-repellent tape beads light spray, but neither makes an assembly waterproof without seam treatment and geometry working too. The highest value addition per unit of cost is usually an overlapping storm flap, which often outperforms an expensive coated chain with nothing behind it.
What does the number 5 mean on a size 5 zip?
It refers to the approximate width in millimetres of the closed elements, so a larger number means bigger teeth and a heavier-duty closure. It is a thickness class rather than an exact measurement, and it tells you nothing on its own about chain type, slider quality or tape strength, which is why a complete zip line needs gauge, chain type, tape and slider specified separately.
How long should a zipper on a reward bag last?
Development cycle testing for a daily-carry reward bag typically targets somewhere between 500 and 5,000 open and close cycles depending on how premium the tier is. The useful measure is not only survival but how the feel changes across those cycles, because a closure that starts smooth and becomes coarse after 500 operations generates complaints even though it technically passes.
What is the MOQ for custom zippers on bags?
Our production programme runs on a MOQ of 500 pcs per style and per colourway, and zip choice does not lower that floor. Speciality components can carry their own minimum purchase quantities and procurement windows, so a custom logo puller or a less common branded chain in a specific colour may need to be ordered as a single lot before sampling starts.
How much does upgrading a zip add to unit cost?
It depends on which steps you take. Moving up one gauge, switching from generic to branded, adding a coated water-resistant face and commissioning custom puller tooling each add incrementally, and those increments compound across the three or four closures on a typical bag. We quote each opening separately so you can spend on load-bearing closures and economise honestly on access-only ones.
Should I choose metal or coil chain for a commuter backpack?
Coil is usually the better engineering answer for a quiet everyday bag because it runs smoothly, flexes well around curves and tends to be quieter against clothing and seat backs. Metal delivers a stronger premium signal and is best used as an accent on a single visible front pocket, giving you the perceived value in photography without the daily rattle.
What causes a zip to split open when the bag is full?
It is rarely a defect in the chain itself. Most often it is gauge too light for the opening length, or insufficient stitch anchoring holding the tape into the shell rather than any defect in the chain itself. Long curved openings apply more leverage from the contents, and closures sitting against rigid panels get no fabric give to absorb load, so both situations justify stepping up one gauge.
Do I need to specify the slider type or just the chain?
Yes, always specify the slider, because it changes daily experience while looking identical in photographs. State whether you want single or double sliders, auto-lock or non-lock behaviour, and the puller material, finish and length. A non-lock slider on a backpack main compartment can creep open as the bag moves, and backers interpret that as a broken zip rather than as a spec choice you never actually made explicitly.
How do you test zippers before bulk production?
Three families cover most risk: lateral or crosswise strength loaded across the closed chain, cycle testing repeated opening and closing, and environmental checks such as corrosion behaviour for metal parts plus colour transfer from tape dye. Bulk inspection then runs at AQL 2.5 to ISO 2859-1, and we recommend adding a simple functional check of opening and closing every zip.
Can I use different zip sizes on the same bag?
Yes, and well designed bags usually do exactly that, because it puts money where load actually occurs. A typical pattern is a #8 or heavy #5 chain on the main opening, #5 on external pockets and #3 on internal organisation pockets, which keeps weight down while putting spend where load actually occurs. Just make sure the finish family is consistent so the mix reads intentional rather than accidental.
People Also Ask
What is the best zip size for a bag?
A #5 chain for most main compartments and external pockets, stepping up to #8 for long curved openings or sports bags, and down to #3 for internal pockets and small pouches.
Is YKK the only good zip brand?
No. Recognised brands offer documented test data and multi-year code availability, but performance-based specifying, covering gauge, cycle-life target and finish standard, often gets equal results for less money and keeps reorder options open.
Do water-resistant zips work without a storm flap?
They resist water passing through the closure but still leak under sustained rain, especially where the opening curves. Adding an overlapping storm flap usually delivers more real-world protection per unit of cost.
What is the difference between coil and metal chain?
Coil is a continuous spiral sewn to tape, making it smoother, lighter, quieter and field-repairable. Metal uses crimped elements, giving a stronger premium signal, more weight and a less forgiving behaviour on tight curves.
How many open and close cycles should a bag zip survive?
Development targets commonly sit between 500 and 5,000 cycles depending on tier positioning. Judge how the feel changes across those cycles, not just whether the closure keeps working.
Why does my zip slider come off the end?
Because top stop retention was not specified or was too weak for how hard the bag is used. Specify the top stop detail explicitly and check it during sample approval rather than assuming it is standard.
Can I put my logo on the zip puller?
Yes. A custom puller with logo tooling adds cost and can add procurement lead time, so decide it before sampling begins and expect the tooling delay to open well before the 6 to 10 working day build window.