Bag Hardware Sampling: Zippers, Buckles, D-Rings and Logo Hardware
Hardware is the slowest and least forgiving variable in a bag sample, because every non-stock part adds sourcing time and every custom part adds a mould. Plan hardware in three groups: stock parts that can be sampled in 6 to 10 working days, modified stock parts such as a branded zipper pull that add plating and engraving time, and fully custom moulded parts that add tooling before anything can be built. Approving the wrong group first is the most common cause of a second sample round.
- Why hardware is the slowest variable in a bag sample
- Zipper selection: coil, vislon and reverse coil
- Sliders, pullers and tape colour: the parts backers touch
- Buckles, ladder locks and quick-release hardware
- D-rings, O-rings and webbing interface points
- Logo hardware: metal plates, zipper pulls and rivets
- Tooling and mould charges for custom hardware
- Plating, coating and colour matching on metal parts
- Testing hardware on the sample before approval
- A hardware sampling schedule that fits 6 to 10 working days
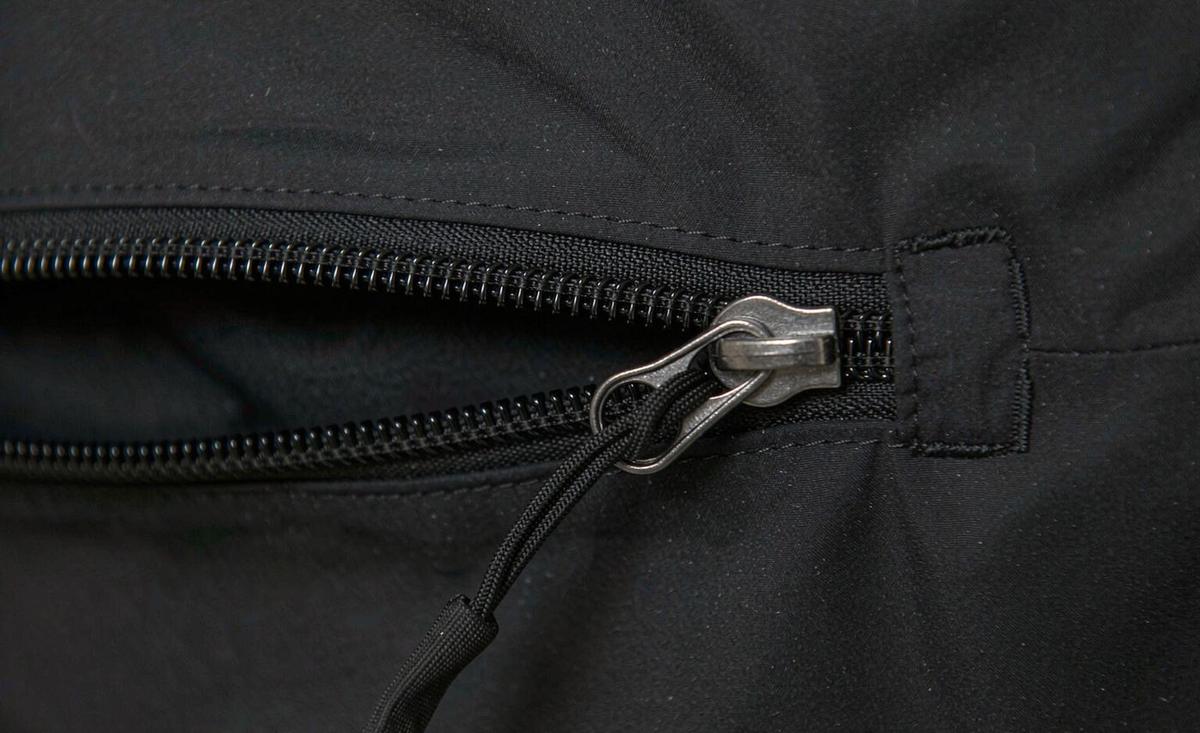
Fabric decisions are reversible. Hardware decisions are not, at least not inside a sampling window. If you change the shell fabric after the first sample, the workshop cuts a new panel and the cost is a few days. If you decide after the first sample that the main zipper should be a reverse coil water-resistant type instead of the standard coil that was fitted, the part has to be sourced, and if it is not a stock item in the right colour, that is 2 to 4 weeks before the build can even start. This asymmetry is why hardware deserves its own planning session before sampling begins.
The practical consequence for a crowdfunding creator is that hardware determines whether your sample lands in 6 to 10 working days or in 12 to 15. The standard figure of 6 to 10 working days for a sample assumes stock materials and stock hardware. The 12 to 15 working days figure for a complex build largely reflects hardware: moulded parts, plated finishes, custom pullers and any component that is not sitting on a shelf. Our production team asks about hardware in the first briefing call precisely because it is the variable that moves the date.
This article walks through the five hardware families that appear on most reward bags, what the options are within each, what each option costs in money and time, and the checks that should be run before a sample is approved. It also covers the two questions that cause the most friction: who pays for a mould, and how close does a plated finish get to a Pantone reference. The full sampling sequence is set out in our crowdfunding bag sample and prototyping guide.
Sort every hardware item on your specification into stock, modified stock and custom moulded. The three groups have completely different lead times, and the custom group drives the sample date.
Why hardware is the slowest variable in a bag sample
The reason is structural rather than procedural. Fabric is held in rolls and can be cut to any quantity, so a workshop can hold a plausible range of shell materials in stock and substitute freely. Hardware is held as finished items in specific sizes, colours and finishes, which means the inventory is not a roll of material but a matrix. A number 5 coil zipper in black is a different stock-keeping unit from the same zipper in grey, and both are different from a number 8. A single bag that uses two zipper sizes, two webbing widths and two buckle sizes can easily require twelve distinct stock units to be pulled together before the first stitch.
The second reason is that hardware is bought in box quantities from component specialists, not made in the workshop. A zipper in a specific tape colour typically carries a minimum ordered length, and a moulded buckle carries a minimum piece count that can run into the thousands. That is fine at bulk, where a 500 pcs run consumes the minimum several times over, but at sample stage it means the workshop is buying more than it needs and either holding the balance against your bulk order or absorbing it. This is a legitimate part of the sample fee, and it is why a sample with unusual hardware costs more.
The third reason is dimensional dependency. Hardware is not chosen in isolation; it is chosen in relation to the panel it attaches to. A 25 mm ladder lock needs 25 mm webbing, which needs a 25 mm opening in the pattern, which affects the seam allowance and the reinforcement. Changing the hardware size after the pattern is made means changing the pattern, which is a second round. Choosing the wrong hardware first is therefore one of the most expensive mistakes available in sampling, and it is entirely avoidable with a specification review.
The mitigation is simple and worth doing early: build a hardware schedule before the tech pack is finalised. One line per item, with the type, the size, the finish, the colour reference, whether it is stock, and the quantity per bag. Our sourcing partner maintains a stock hardware library covering the common zipper sizes, buckle types and ring sizes, and a specification built against that library can usually be sampled within the standard 6 to 10 working days. A specification built without reference to it can take three times as long.
Zipper selection: coil, vislon and reverse coil
Zippers do more work than any other component on a bag, and they fail in public. A bag that arrives with a jammed or split zipper is the single most common cause of a negative backer review in this category, and it is almost always a selection error rather than a fitting error. There are three families to choose between. Coil zippers use a nylon or polyester coil sewn to a tape. They are flexible, quiet, inexpensive and the default for most backpacks and pouches. Vislon or moulded-tooth zippers use individual plastic teeth. They are stiffer, louder, more resistant to grit, and read as more technical and more expensive.
Reverse coil, also called invisible coil, turns the coil to the inside so the tape shows a clean face on the outside. It is the standard choice for a water-resistant main opening, because a reverse coil can be paired with a polyurethane-coated tape and a close-fitting slider to give genuine shower resistance. It costs more than standard coil, typically a meaningful premium per metre, and it is more sensitive to fitting quality: a reverse coil that is not sewn straight shows immediately, because the tape is the visible surface. For a bag at a USD 90 to 160 reward tier this is usually the right choice for the main opening.
Sizing follows a convention worth knowing. Zippers are specified by gauge, and the common sizes on bags are number 3, 5, 8 and 10, where the number roughly relates to the width of the teeth in millimetres. A number 3 suits a small interior pocket, a number 5 suits a main compartment on a daypack, a number 8 suits a duffel or a large opening, and a number 10 is heavy-duty and rarely needed on a reward bag. Using a number 5 throughout where a number 3 would do adds cost and weight; using a number 5 where an number 8 is needed guarantees field failures.
Two specification details separate a considered choice from a default one. The first is chain type: a zipper can be supplied as continuous chain cut to length, or as a finished zipper with stops. Continuous chain is cheaper at bulk and is standard on production bags, but it is more labour-intensive to fit and produces more variance at sample stage. The second is bottom configuration: closed-end for a pocket, open-end for a jacket-style opening, and two-way for a duffel where the bag needs to open from either end. Getting the bottom configuration wrong is a common and entirely avoidable second-round cause.
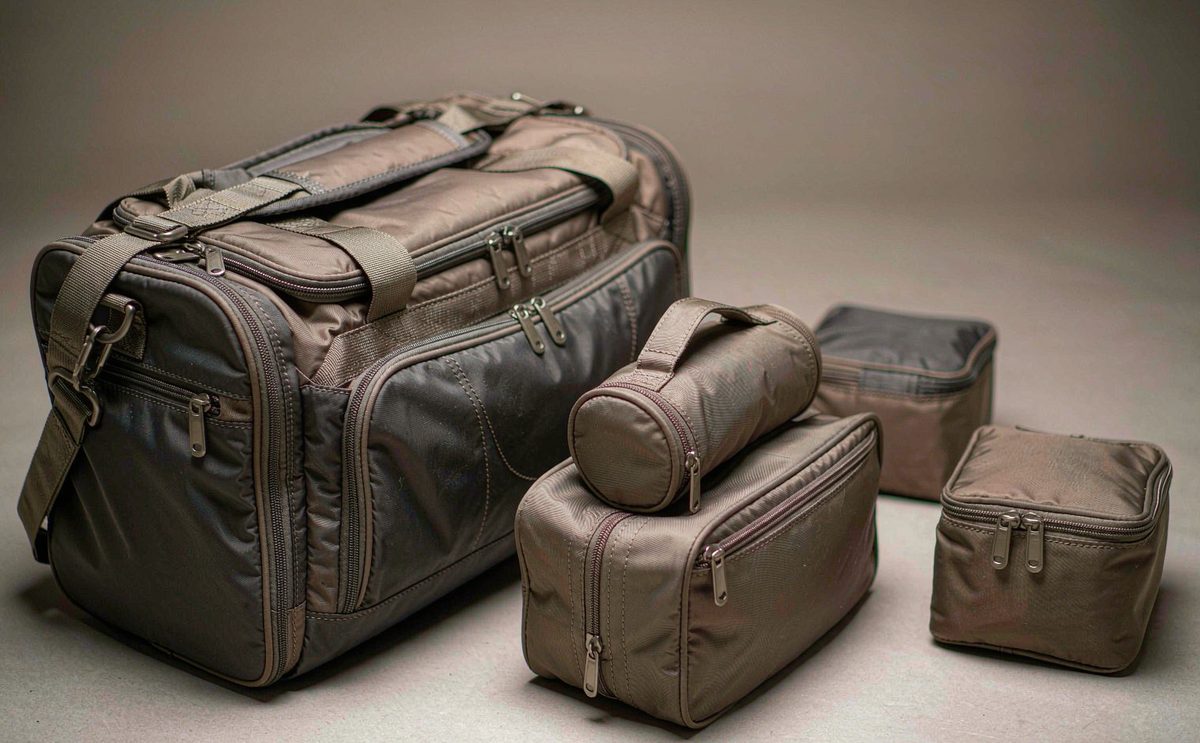
Sliders, pullers and tape colour: the parts backers touch
If the chain is the engineering, the slider and puller are the product. They are the parts a backer touches every single time they open the bag, and they are the parts photographed most often in a campaign video. A auto-lock slider holds position under load and is the right default for a backpack strap pocket or any vertical opening. A non-lock slider moves freely and suits a horizontal opening on a pouch. A reverse-mount slider is used with reverse coil. Choosing the wrong lock type produces a zipper that creeps open under load, which reads as poor quality even when nothing has actually broken.
Pullers are where branding usually lands, and there are four routes with very different economics. A stock metal puller is the cheapest and is available in a range of standard shapes. A stock puller with a laser-etched or debossed logo adds a modest per-piece charge and no tooling. A custom-shaped moulded puller with your logo in relief adds a mould charge and a component minimum. A webbing or cord pull with a branded end cap is the cheapest branded option and reads well on a technical or outdoor product. In most cases the second route gives 90 percent of the perceived value of the third at a fraction of the cost.
Tape colour is the detail that most often breaks a design. Zipper tape is dyed to match or contrast with the shell, and it is dyed in batches with the same lot-to-lot variance that affects fabric. A tape that matched the shell perfectly on the sample can be a shade off on the bulk run if the two were dyed in different lots. The practical rule is to specify the tape colour at the same time as the shell colour and ask for them to be matched from the same reference, which our colour programme handles as a single approval rather than two. Contrast tape is more forgiving, because a deliberate contrast hides small variance.
There is a functional point about tape colour that catches people out. Dark tape on a light-coloured shell shows dirt, and light tape on a bag that will be used outdoors shows wear. For a reward bag that will be photographed by backers six months after delivery, the mid-tone options age better than either extreme. This is a small decision that has an outsized effect on how the product looks in the reviews that follow the campaign, which is the marketing you do not pay for.
Buckles, ladder locks and quick-release hardware
Buckles divide into load-bearing and adjustment categories, and confusing them is where field failures come from. A side-release buckle on a sternum strap or a compression strap is load-bearing and should be specified by its rated strength, not its appearance. A ladder lock used to adjust webbing length is an adjustment part and mainly needs to grip reliably under tension. The same physical size of buckle can be available in an acetal engineering plastic version rated for genuine load and a recycled nylon version rated for light duty, and they look almost identical in a photograph.
Material choice follows use. Acetal, often known by a trade name, is stiff, strong, holds its shape in the cold and is the right choice for a compression strap or a load-bearing closure. Nylon is tougher and more flexible, absorbs a little water and is fine for adjustment. Polypropylene is cheap and light and belongs on packaging rather than on a bag you have promised will last. For a reward bag in the USD 60 to 150 band, the difference in component cost between the right material and the cheapest is usually well under a dollar per bag, and it is the cheapest insurance available.
Cold performance is the specification line most creators never ask about and should. A buckle that is fine at room temperature can become brittle below freezing, and a bag sold to a northern-hemisphere audience in winter will see those temperatures in transit and in use. Ask for the operating temperature range on any load-bearing buckle. This is a standard data point from a reputable component maker, and a programme that cannot produce it is quoting a part it has not qualified. Our team requests the data sheet for every load-bearing component before it goes into a specification.
Sizing discipline matters more here than anywhere else. Match the hardware to the webbing, not the webbing to the hardware. Decide the strap width the product needs for comfort and load, then specify the buckle and ladder lock in that width. The common error is choosing a buckle that looks right and then discovering it only comes in a width that makes the strap uncomfortable. Strap widths on reward bags typically land at 20 mm for light duty, 25 mm for a daypack sternum strap and 38 mm or 50 mm for a shoulder strap carrying real weight.
D-rings, O-rings and webbing interface points
Rings look trivial and cause a disproportionate share of quality complaints, because they are the points where load transfers from fabric to hardware. A D-ring has a straight side and a curved side and is used where a strap needs to pivot in one plane, typically for a shoulder strap attachment. An O-ring is a full circle and allows rotation in any direction, which suits a strap that gets twisted. A rectangular ring or slider is used for length adjustment and is effectively a ladder lock in metal. A spring hook or lobster clasp is used where a strap needs to be detachable.
The failure mode is almost never the ring. It is the webbing loop that holds the ring. A D-ring on a backpack is normally captured in a folded webbing loop that is bar-tacked to the body, and the bar tack is what carries the load. A loop with a single row of stitching, or a loop sewn into a seam allowance rather than into a reinforced panel, will tear out long before the ring deforms. When you review a sample, pull hard on every ring attachment. If the fabric around it distorts noticeably, the reinforcement is not adequate regardless of how the ring looks.
The second interface issue is metal against abrasion. A metal ring rubbing directly on a coated fabric will wear through the coating, and a ring rubbing against a webbing loop will eventually cut it. Two cheap mitigations solve most of this: specify a webbing wrap rather than a direct metal-to-fabric contact, and specify rounded rather than flat ring profiles so the contact area is larger. Both are specification decisions that cost nothing at bulk and prevent the kind of wear that shows up in photographs six months after delivery.
Finish consistency across the bag is the third point. A bag rarely uses only one metal finish; a typical build has rings, a zipper puller, rivets and possibly a magnetic closure, and if these come from different production runs the anodised or plated colours will not match exactly. The reliable way to avoid this is to specify all metal parts from one finish reference and confirm them together at sample stage. Where that is not possible, deliberately contrasting finishes, such as black hardware against a gunmetal puller, hide variance far better than two nearly identical finishes.
Logo hardware: metal plates, zipper pulls and rivets
Branded hardware is the highest-impact branding available on a bag, because it is metal, it is three-dimensional and it is touched constantly. It is also the easiest place to overspend. Ranked by cost, the routes run roughly as follows: a rivet or eyelet with a stamped logo is the cheapest and works well on canvas and webbing; a stock puller with a laser-etched or debossed mark is next; a woven or rubber label sewn into a seam is comparable and very effective; a cast metal plate is more expensive and heavier; and a fully custom moulded puller or buckle is the most expensive because it carries tooling.
For most crowdfunding bags at a first run, the sensible configuration is two branded touchpoints: an etched or debossed puller on the main zipper, and a woven label or small metal plate on the front panel or a strap end. That is what a backer sees in the unboxing and what shows in a photograph. Adding a third and fourth branded component increases cost and lead time without a measurable increase in perceived value, and each additional custom part is another thing that can be wrong on the sample. Our custom backpack branding guide covers the branding routes in more depth.
One technical constraint governs metal logo parts: minimum feature size. A cast or etched logo cannot hold detail below roughly 0.3 to 0.5 mm depending on the process, and fine serif type or thin strokes will fill in or disappear. Before approving artwork for a metal part, check it against that limit. The usual fix is to simplify the mark to a bolder version for hardware use while keeping the detailed version for print. This is a design task, not a production problem, and it is much cheaper to solve before the artwork goes to tooling than after.
Attachment method matters as much as the part. A metal plate can be riveted, sewn through holes, or heat-staked, and each has implications. Rivets are strong and visible as a design element but need access to both sides of the panel, which means the plate has to be placed before the bag is closed. Sewn plates are more forgiving on placement and can be added later but can work loose. On a lined bag, check on the sample whether the rivet back is visible or palpable through the lining, because a rivet that a backer can feel through the lining reads as unfinished work.
Tooling and mould charges for custom hardware
A mould is a durable tool that makes your specific part, and it is charged once, up front, before any sample is built. Understanding what drives the charge helps you decide whether the part is worth it. The three drivers are cavity count, meaning how many parts the mould produces per cycle; part complexity, meaning undercuts, moving elements and surface finish; and material, because a mould for a glass-filled engineering plastic has to be harder and better cooled than one for a soft polymer. A simple single-cavity mould for a zipper pull sits at the low end; a multi-cavity mould for a complex buckle sits far higher.
| Route | Tooling charge | Added lead time | Component minimum | Best for |
|---|---|---|---|---|
| Stock part, no branding | None | 0 days | None | Pouches, totes, first samples |
| Stock part, laser etched logo | None or minimal | 2 to 5 days | Often 500 to 1,000 pcs | Main zipper puller, plates |
| Stock part, custom plating | None, plating charged per lot | 5 to 10 days | By lot weight | Matching a brand colour on metal |
| Custom moulded puller | Moderate to high | 15 to 25 days | Usually 3,000 to 10,000 pcs | Established brands, re-orders |
| Custom moulded buckle | High | 25 to 40 days | Usually 5,000 to 10,000 pcs | Second wave, proven volume |
| Woven or rubber label | Low digitising fee | 3 to 7 days | Usually 1,000 to 3,000 pcs | Front panel, strap end branding |
The component minimum is the number that catches creators, and it is frequently larger than the 500 pcs bag minimum. A custom moulded puller may carry a component minimum of 3,000 to 10,000 pieces, because the component maker has to run the mould economically. At 500 bags with two pullers each, that is 1,000 pieces consumed and the rest held. Two questions follow, and both should be asked in writing: who stores the balance, and for how long. The standard answer is that the balance is held against your re-orders for an agreed period, commonly 12 to 24 months, and is forfeited or re-invoiced after that.
There is also a timing trap. The mould charge is payable before the mould is cut, which is before the sample is built, which is before you know whether the design works. That means the most expensive branding decision is committed at the point where you know least about the product. Our campaign bag specialist generally advises first-time creators to sample with a stock part and an etched logo, confirm the design, and move to a custom mould on the second wave or the re-order, when the volume justifies it and the design is proven.
If you do go custom, two protections are standard and worth asking for. The first is mould ownership stated in writing, including where the mould is held and what happens if you move the programme. The second is a first-article sample from the mould before the full component run is made, so you can approve the actual moulded part rather than approving a render and discovering the detail did not hold. A first article costs a few days and prevents a component minimum of defective parts, which is the most expensive outcome available in this category.
Plating, coating and colour matching on metal parts
Metal finishes are specified by process, and the process determines both the appearance and the durability. Anodising is an electrochemical conversion of the aluminium surface and produces a hard, integral finish in a limited palette, strong on blacks, greys, bronzes and a range of dyed colours. Electroplating deposits a metal layer such as nickel, chrome or black nickel onto a base and gives a brighter, more jewellery-like finish that is more prone to wear at edges. Powder coating and painting give the widest colour range and the least durability. Physical vapour deposition gives a hard, even finish at a higher cost.
The honest answer on matching a Pantone reference on metal is that it is a close approximation, not a match. An anodised finish on aluminium absorbs dye into a porous oxide layer and the resulting colour depends on the alloy, the bath temperature and the time, so two batches can differ visibly. A painted finish can be mixed closer to a reference but will chip. A realistic specification gives a reference plus an acceptable range, rather than a single target. In practice a tolerance of roughly plus or minus one step on a grey scale is achievable and is what our team works to.
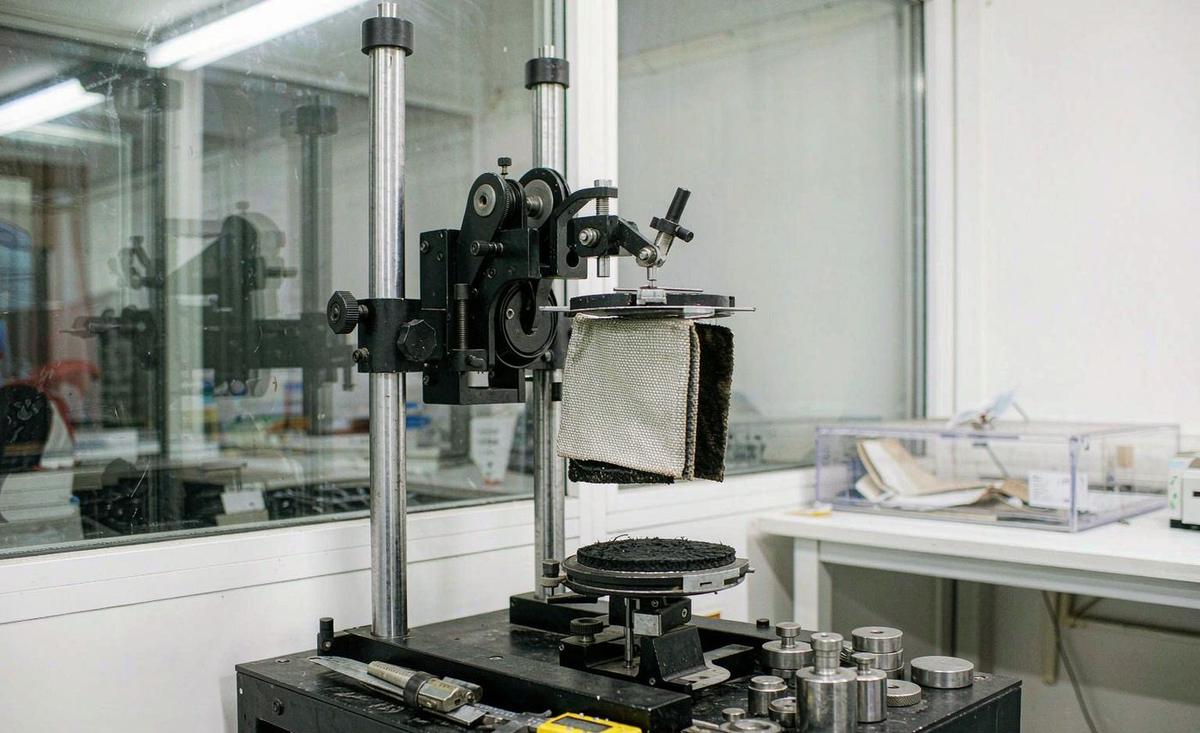
Durability should be tested rather than assumed, and two tests are cheap and informative. The first is a abrasion test, in which the finished part is rubbed with a standard abrasive under a defined load for a defined number of cycles, and the finish is then assessed for base metal showing through. The second is a salt spray test for corrosion resistance, which matters for any bag that will see sweat, rain or coastal air. Both are standard laboratory procedures with defined durations, and the report is worth having in the backer update file.
Colour consistency across components is the practical problem. If the shell fabric, the webbing, the zipper tape and the ring finish are all nominally the same brand colour, they will not match, because they are four different materials coloured by four different processes. The workable approach is to choose one anchor material, usually the shell fabric, approve it first against the lab dip, and then approve each other component against the approved physical swatch rather than against the original reference. Our team does this as a single hardware and trim approval round so the parts are judged side by side under the same light.
Testing hardware on the sample before approval
A sample review that only looks at the bag photographs the product but does not qualify it. Five checks take about twenty minutes and catch most of what goes wrong. The zipper cycle test: run every zipper its full length 20 to 30 times and listen. It should be smooth and consistent, with no catch at the point where the chain meets the stop, and the slider should not ride up on a closed-end zipper. The pull test: with the bag loaded to a realistic weight, pull each strap attachment, ring and buckle hard and look for distortion in the surrounding fabric.
The buckle engagement test: fasten and release every buckle 20 times and check that the release force is consistent and that the tangs do not show stress whitening, which is the first sign of a part that will fatigue. The drop test: load the bag to its realistic maximum and drop it from about 1 metre onto a hard floor, then open every compartment and check that nothing has popped. The rub test: rub the ring and puller finishes against a light cloth to check for loose plating, and rub the tape against the shell to check for colour transfer.
Two checks relate to things backers notice rather than things that break. The noise test: pick the bag up and walk with it. Loose pullers rattle against the body, and a rattle on a premium-priced bag is the kind of detail that gets mentioned in a review. The one-handed test: can the main compartment be opened one-handed while the bag is being worn? On a sling or a crossbody this is the difference between a product that gets used and one that gets returned to the cupboard.
Record the results. A sample approval file should include the hardware schedule with the approved part reference for each line, the photographs of the sample including close-ups of each hardware item, the results of the five checks above, and the laboratory reports where testing was commissioned. That file is what the bulk inspection is measured against, and the inspection standard used at bulk is AQL 2.5 to ISO 2859-1. Without an approved reference the inspection has nothing to compare the goods to, which is why the sample file matters more than the sample itself.
A hardware sampling schedule that fits 6 to 10 working days
The standard 6 to 10 working days sample window is achievable, but only if hardware is settled before the clock starts. The sequence our programme coordinator runs is a four-step gate. Step one is the hardware schedule, produced during the briefing, listing every item with type, size, finish, colour and stock status. Step two is the stock confirmation, where each item is checked against what is actually held or can be brought in within 3 working days, and anything longer is flagged before it becomes a delay.
Step three is the trim approval round, in which the fabric swatch, webbing, tape and any plated or anodised part are mounted on one board and approved together against the reference. This happens before the build, not after, because changing a trim after the bag is made means remaking the bag. Step four is the build, which is the 6 to 10 working days everybody counts. The mistake most creators make is counting only step four and treating the other three as administrative, when in practice the first three are where the schedule is won or lost.
When a custom part is unavoidable, the calendar changes and should be planned as a two-track process. The mould track runs in parallel: drawing approval, mould cutting, first article, component run. That is typically 15 to 25 days for a puller and 25 to 40 days for a complex buckle. The bag track runs independently: pattern, material, first build in the standard window using a stock substitute part. The two tracks meet at the second round, when the custom part is fitted to an otherwise approved bag. This is the reliable way to keep a 12 to 15 working day complex build from becoming a two-month detour.
The final piece of planning is the bulk component booking. Hardware for the run is ordered when the sample is approved, not when the bulk starts, because component lead times do not compress just because the bag line is waiting. On a 35 to 50 day bulk window, the component order should be placed at approval so that the parts are in hand before the cutting starts. Our team books hardware against the approved sample and confirms receipt before the production slot opens, which is one of the reasons the bulk window holds rather than slipping. The inspection standard applied once that bulk run is finished is covered in our bag QC and compliance guide.
Send us your bag specification with a hardware schedule, and our production team will confirm which parts are stock, quote any tooling, and hold your sampling window.
Key takeaways
- S
- o
- r
- t
- h
- a
- r
- d
- w
- a
- r
- e
- i
- n
- t
- o
- s
- t
- o
- c
- k
- ,
- m
- o
- d
- i
- f
- i
- e
- d
- a
- n
- d
- c
- u
- s
- t
- o
- m
- b
- e
- f
- o
- r
- e
- s
- a
- m
- p
- l
- i
- n
- g
- s
- t
- a
- r
- t
- s
- .
- S
- t
- o
- c
- k
- k
- e
- e
- p
- s
- t
- h
- e
- b
- u
- i
- l
- d
- a
- t
- 6
- t
- o
- 1
- 0
- w
- o
- r
- k
- i
- n
- g
- d
- a
- y
- s
- ;
- c
- u
- s
- t
- o
- m
- a
- d
- d
- s
- a
- m
- o
- u
- l
- d
- t
- r
- a
- c
- k
- t
- h
- a
- t
- m
- u
- s
- t
- r
- u
- n
- i
- n
- p
- a
- r
- a
- l
- l
- e
- l
- .
Frequently Asked Questions
How long does custom bag hardware take to sample?
Stock hardware can be sampled within the standard 6 to 10 working days. A stock part with a laser-etched logo adds 2 to 5 days. Custom plating adds 5 to 10 days per lot. A fully custom moulded puller adds 15 to 25 days including the mould, and a complex moulded buckle adds 25 to 40 days. Plan the mould track in parallel with the bag build.
What is the difference between a coil and a vislon zipper?
A coil zipper uses a nylon or polyester coil sewn to tape. It is flexible, quiet and inexpensive, and it is the default for most backpacks and pouches. A vislon zipper uses individual moulded plastic teeth. It is stiffer, louder, more resistant to grit and reads as more technical and more expensive, which suits an outdoor or technical product. Choose on the product position: coil for a quiet everyday carry, vislon for a technical or outdoor read.
Which zipper size should I use on a reward backpack?
Number 3 for a small interior pocket, number 5 for a main compartment on a daypack, number 8 for a duffel or large opening and number 10 only for heavy duty. Using a heavier gauge than needed adds cost and weight, while using too light a gauge on a loaded opening guarantees field failures. Confirm the gauge at the sample review, because a gauge change after approval means another full round.
Do I need a custom mould for a branded zipper pull?
Usually not. A stock puller with a laser-etched or debossed logo gives most of the perceived value with no tooling and a lead time of 2 to 5 days. A custom moulded puller carries a mould charge and a component minimum often between 3,000 and 10,000 pieces, which is hard to justify on a first 500 pcs run. Move to a mould on the re-order, when the design is proven and the volume genuinely justifies the tooling.
Who owns the mould if I pay for custom hardware?
You should, and it should be stated in writing along with where the mould is held and what happens if you move the programme. Also ask about the component minimum and how long the unused balance is stored against re-orders, which is commonly 12 to 24 months before it is forfeited or re-invoiced. Also ask for a first article from the mould before the full component run, so you approve a real part rather than a drawing.
Can metal hardware be matched to a Pantone colour?
Approximately, not exactly. Anodising absorbs dye into a porous oxide layer and varies with alloy, bath temperature and time, so batches differ visibly. Painted finishes get closer but chip. Specify a reference plus an acceptable range, around plus or minus one step on a grey scale, and approve against a physical swatch. Approve a physical sample of the finished part, because the achievable colour depends on the alloy and the bath as well as on the reference.
What causes a D-ring to pull out of a bag?
Almost never the ring itself. It is the webbing loop that captures it and the stitching that attaches the loop to the body. A loop with a single row of stitching, or one sewn into a seam allowance rather than a reinforced panel, tears out under load. Pull hard on every ring during the sample review and look for distortion in the surrounding fabric.
How do I test hardware on a sample?
Run every zipper 20 to 30 full cycles and listen for catching. Fasten and release every buckle 20 times and check for stress whitening on the tangs. Load the bag and drop it from about 1 metre, then open every compartment. Rub plated finishes against a light cloth to check for loose plating, and walk with the bag to listen for rattling.
What buckle material should I specify for a load-bearing strap?
Acetal, which is stiff, strong and holds its shape in the cold, is the right choice for compression straps and load-bearing closures. Nylon is tougher and more flexible and suits adjustment parts. Polypropylene is cheap and light and belongs on packaging rather than a bag promised to last. Ask for the operating temperature range. Specify the material in writing, because the two options look almost identical in a photograph and behave very differently under load.
How much does a custom mould cost for bag hardware?
It depends on cavity count, part complexity and material. A simple single-cavity mould for a zipper pull sits at the low end, while a multi-cavity mould for a complex buckle with undercuts sits far higher, because a glass-filled engineering plastic needs a harder, better-cooled tool. Always get a first article from the mould before the full component run. Ask for the cavity count and the part complexity to be itemised, because those two lines drive most of the charge.
When should bulk hardware be ordered?
At sample approval, not at the start of bulk production. Component lead times do not compress because the bag line is waiting, and against a 35 to 50 day bulk window the parts need to be in hand before cutting starts. Confirm physical receipt of the components before the production slot opens. Waiting until bulk starts is a reliable way to lose two weeks, because component lead times do not compress for a waiting line.
Why do my metal parts not match each other?
Because different finishes come from different production runs and processes. Specify every metal part from one finish reference and approve them together at sample stage under the same light. Where that is not possible, deliberately contrasting finishes hide variance far better than two nearly identical ones. Where one reference is impossible, a deliberate contrast hides variance far better than two nearly identical finishes.
People Also Ask
What is the best zipper for a backpack?
A number 5 coil zipper for the main compartment in most cases, or a reverse coil with a coated tape if you want shower resistance. Vislon suits a technical or outdoor look.
Is custom hardware worth it for a first campaign?
Rarely. Use a stock part with an etched logo for the first run and move to a moulded part on the re-order once the design is proven and the volume justifies the tooling.
How long does a moulded zipper pull take?
About 15 to 25 days including drawing approval, mould cutting, first article and component run. Run it in parallel with the bag build using a stock substitute.
What is a first article sample?
The first part produced from a new mould, supplied for approval before the full component run. It prevents committing to a component minimum of defective parts.
How do I stop hardware rattling?
Specify close-fitting pullers and consider a rubber or silicone coated pull. Walk with the loaded sample and listen, because a rattle on a premium bag gets mentioned in reviews.
Can I brand a bag without tooling costs?
Yes. Laser etching, debossing, woven labels and rubber patches all carry no or minimal tooling, with lead times of 2 to 7 days.
What does AQL 2.5 mean for hardware?
It is the sampling inspection standard used at bulk, ISO 2859-1 with a 2.5 acceptance quality limit. It defines how many units are checked and how many minor and major defects are permitted before a lot is rejected.
Should webbing and buckle widths match?
Yes. Choose the strap width the product needs for comfort and load, then specify the buckle and ladder lock in that width, not the other way round.