Custom Tech Pouches for Crowdfunding: Cable Organisers as Add-On Perks
A cable organiser pouch is the most efficient add-on perk available to a crowdfunding campaign because it is one size, flat, light, cheap to ship and used every day. Sizing follows cable length rather than device size: a small pouch suits short cables and drives, a medium suits a charger and two cables, a large suits a full travel kit. Minimum order is 500 pcs per style and per colourway, sampling runs 6 to 10 working days, bulk runs 35 to 50 days, and inspection holds at AQL 2.5 to ISO 2859-1.
- Why add-ons beat another reward tier
- The economics of a small flat item
- Sizing by cable length, not device size
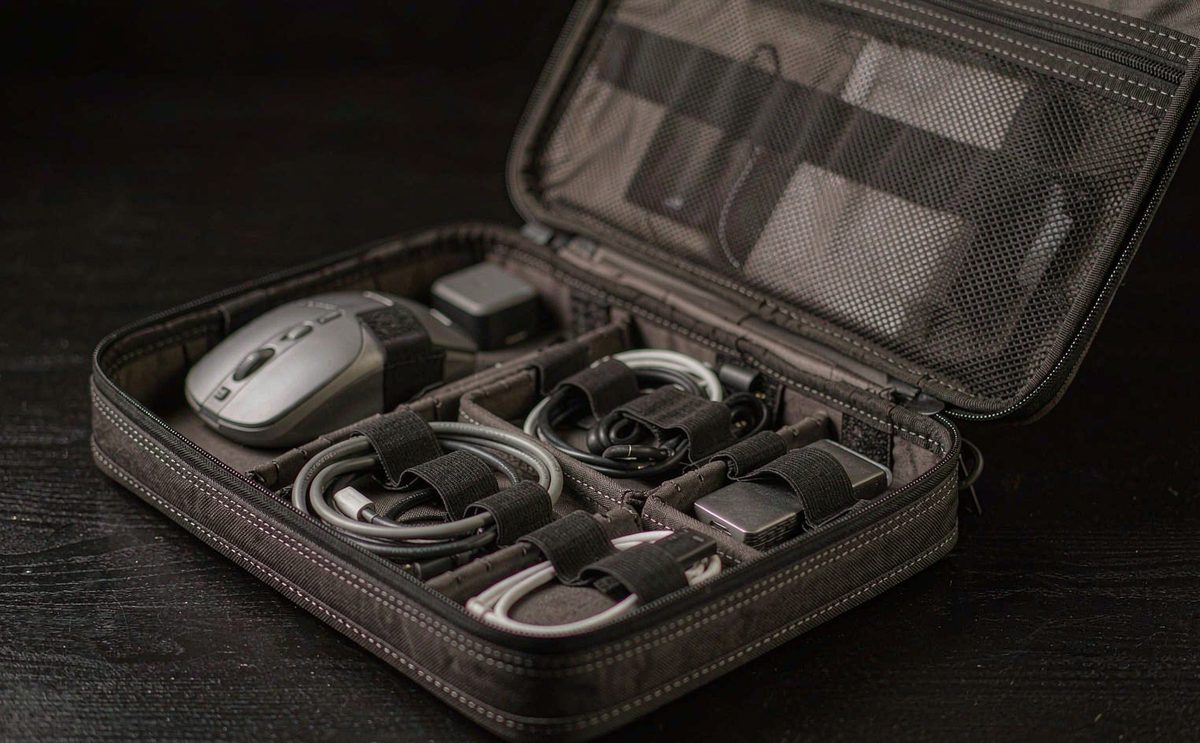
- Interior architecture: loops, mesh and dividers
- Materials: ripstop, neoprene, PU and RPET
- Closures: zip, hook-and-loop, roll-top and snap
- Branding on a small panel
- Bundling: pouch plus bag, pouch plus tote
- Pricing the add-on ladder
- Packing and shipping: the lightest thing in the box
- QC on small goods and what actually fails
Why add-ons beat another reward tier
A reward tier asks a backer to make a decision. An add-on asks a backer who has already decided whether they want one more thing. That difference is the entire commercial argument for add-ons, and it is why the highest-yield campaigns we support sell a small, cheap item after the pledge rather than adding another expensive tier before it. The add-on does not compete with the tiers, it sits on top of them.
The second advantage is that add-ons are selected by backers who are already committed. Conversion on an add-on is therefore much higher than conversion on a new tier, because the psychological work of deciding to support the campaign is already done. In programmes our production team has supported, attach rates on a well-priced accessory typically run between 25 and 55 percent of backers, depending on how clearly the add-on is shown at checkout.
The third advantage is operational. A small flat pouch is one style, one size, one pattern and one set of components, which is the simplest possible production programme and the cheapest possible thing to ship. It adds revenue without adding a SKU decision to the backer survey and without adding meaningful weight to the parcel. For a creator weighing where to spend effort before launch, an add-on is usually a better return than a fourth tier. Our laptop bag programmes almost always include one.
A tier asks for a decision; an add-on asks an already-committed backer for one more item. That is why small accessories convert at 25 to 55 percent.
The economics of a small flat item
The economics of a pouch are unusually favourable on three axes. Unit cost is low because the item uses little fabric and simple construction. Freight is almost free because a pouch weighs 60 to 150 grams and folds flat, so it adds nothing to a parcel that is already being sent. Tooling is minimal because most pouch shapes need no moulding, which keeps the sampling window at 6 to 10 working days rather than pushing it out.
Against that, the perceived value is high relative to cost, because a backer judges a pouch against shop prices for branded organisers rather than against its material content. A well-made organiser with tidy elastic loops and a good zip reads as a considered product, and it is one of the few items where the unboxing impression exceeds the cost by a wide margin. That gap is what makes it the strongest add-on in the category.
The minimum order still applies: 500 pcs per style and per colourway. For a pouch that is a modest commitment in cash terms compared with a bag, which is part of why pouches are the natural first accessory for a campaign testing whether its audience buys soft goods at all. The discipline is the same though: one colourway for the first run, a second only when the first has converted.
There is a strategic argument too. A pouch is the cheapest way for a campaign to find out whether its audience will buy soft goods at all, and that information is worth having before committing to a bag programme with seven times the unit cost. Our team frequently runs a pouch first, reads the attach rate, and then sizes the following custom bag order against real evidence rather than against a forecast. Where the budget does not stretch to both, our low minimum route lets a campaign test the category with a smaller first run.
The pattern to avoid is treating the pouch as filler. Backers can tell the difference between an accessory that was specified to solve a problem and one that was added to fill a price point, and a filler item attaches at a much lower rate and generates indifferent reviews. The distinction shows up in small decisions: whether the loops are sized for real cables, whether the depth clears a real brick, and whether the hardware matches the bag it ships with.
Sizing by cable length, not device size
The most common specification error on a tech pouch is sizing it like a device sleeve. A pouch does not hold a device, it holds cables, a brick, a drive and sometimes a small hub, and the governing dimension is therefore the length of the longest cable the pouch has to accommodate when coiled. A 1 metre cable coiled to a gentle radius occupies roughly 12 to 15 centimetres; a 2 metre cable occupies roughly 18 to 22 centimetres.
That gives three working sizes. A small pouch at roughly 20 by 12 centimetres suits short cables, a pair of earbuds, a USB drive and an adapter. A medium pouch at roughly 24 by 16 centimetres is the default and suits a charger brick, two cables and a small mouse. A large pouch at roughly 28 by 20 centimetres suits a full travel kit with a brick, three or four cables, a hub and a drive.
Depth is the dimension people forget. A charger brick is 25 to 45 millimetres thick depending on wattage, and a pouch with a flat profile will not close over a modern high-wattage brick. Our production team specifies 40 to 60 millimetres of usable depth on a medium pouch, with a gusset rather than a flat seam, so the pouch closes cleanly over a brick rather than straining around it. This is the single most common reason a pouch sample looks right and fails in use.
One more measurement decides whether the pouch works: the length of the stiffest cable. A stiff cable will not coil to a tight radius, so it demands more length than its nominal size suggests. Our production team tests with the stiffest cable in the intended kit rather than the longest, because the stiff one is the item that will not cooperate, and a pouch that holds everything except that cable is a pouch that gets complained about.
Interior architecture: loops, mesh and dividers
The interior is what a cable organiser is actually selling, and there are three elements to specify. Elastic loops hold individual cables upright and stop them tangling. The useful width is 20 to 35 millimetres per loop, and the useful count is five to nine in a row on a medium pouch. Loops that are too wide let thin cables flop; loops that are too narrow will not take a cable with a moulded strain relief at the end.
Mesh pockets hold the flat and awkward things: an adapter, a dongle, a small hub, a memory card case. A zippered mesh pocket across one whole face of the pouch is the most useful configuration, because it keeps small items visible and contained at the same time. A slip pocket without a closure loses small items the moment the pouch is opened upside down, which is exactly how people open pouches.
Dividers separate the heavy brick from the delicate things. The pattern our team recommends is a loop bank on one face, a zippered mesh pocket on the other, and a divided section sized to the brick at one end so the heaviest item sits in a predictable place. Predictability matters more than capacity: a backer wants to know where the brick goes without looking, and a pouch where everything has a home is used, while a pouch that is a single cavity becomes a drawer.
Keep the interior deliberately symmetrical or deliberately asymmetric, never accidentally so. A loop bank on one face and a flat pocket on the other is a clear design; the same two elements placed at slightly different heights reads as a mistake. Our production team specifies the interior as a drawn layout rather than as a list of features, which is the only way to be sure the two faces line up when the pouch is opened flat.
Materials: ripstop, neoprene, PU and RPET
Ripstop nylon or polyester is the default for a tech pouch. It is light, it resists tearing, the grid texture reads as technical, and it packs down to nothing. At 70D to 210D it is strong enough for the job and thin enough that the pouch stays flat. Ripstop also takes a coating well, which matters for the next point.
Neoprene gives a cushioned pouch that protects a small hard drive or a camera accessory, and it feels soft in the hand. It is thicker, it does not pack as flat, and it shows creases after being compressed in transit. Our team uses it when the pouch is protecting something fragile rather than organising cables, which is a different job.
PU-coated or TPU-laminated shells give water resistance and wipe-clean surfaces, which suit a pouch that lives in a bag alongside a water bottle. RPET is the choice when the campaign has a sustainability story, and it performs close to virgin polyester. A light-coloured lining is worth specifying in every case, because a dark interior makes a black cable on black fabric almost impossible to find.
Weight is the last material consideration and it is the one that shows up in the parcel. A pouch made from a heavy laminate can weigh twice what a ripstop pouch weighs, which matters little for one unit and matters a great deal across a thousand. Our production team quotes the finished weight alongside the unit cost for pouch programmes, because the two together decide whether the add-on stays inside the existing shipping bracket.
Closures: zip, hook-and-loop, roll-top and snap
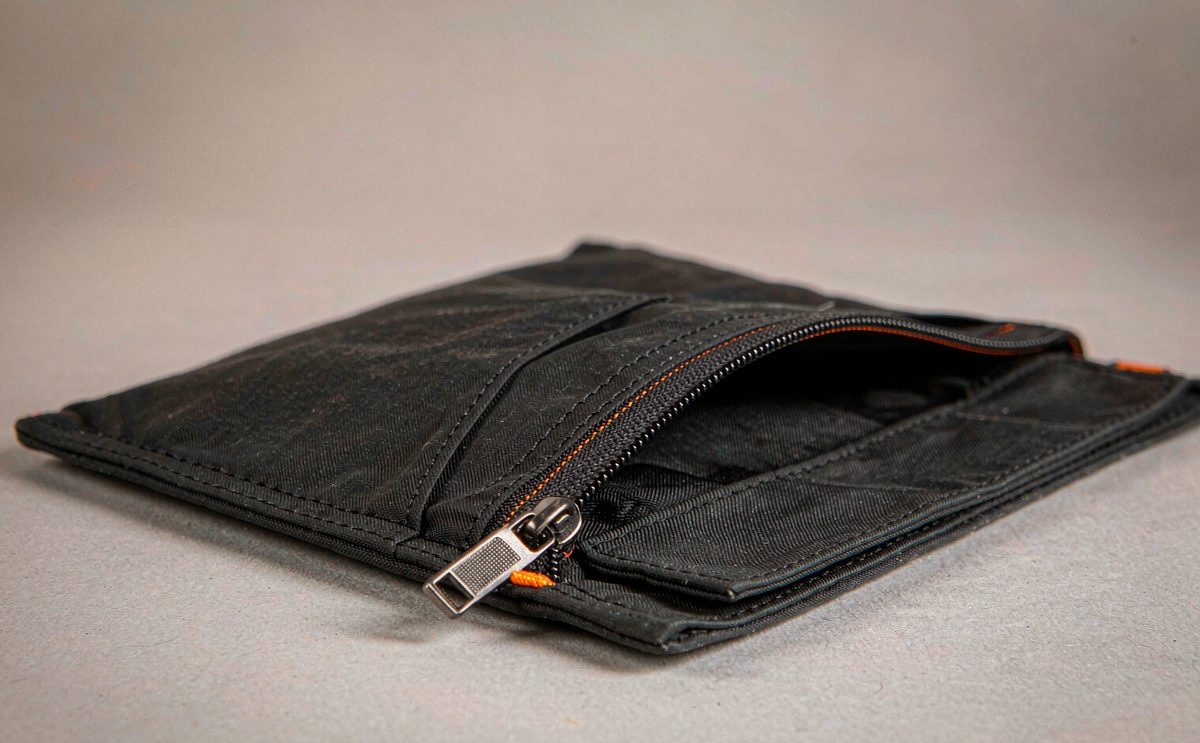
A zip is the right closure for a tech pouch in almost every case. It is secure, it is quiet, and it lets the pouch open flat like a book, which is how a cable organiser is used. The specification detail that matters is the opening geometry: a three-sided zip with a gusset lets the pouch open fully flat, while a single zip across the top makes the interior harder to reach into at the corners.
Hook-and-loop is cheap and it wears out, and it makes a noise every time the pouch is opened, which is a small thing that becomes irritating in a quiet room. Roll-top closures suit a dry bag but they make a pouch taller and less tidy for cables. Snaps are durable but they leave gaps where a thin cable can escape. Our production team specifies a #3 or #5 coil zip with a garage and a moulded puller, which is the quietest and most reliable combination at this size.
One detail that earns its cost is a webbing grab loop on the outside. A pouch that lives inside another bag needs something to pull it out by, and a small loop at one corner does that job without adding bulk. It is also the natural place to hang a carabiner if the campaign wants the pouch to be attachable to a strap.
Test the closure with the pouch loaded rather than empty. A zip that runs smoothly on an empty pouch can bind once the brick is in place and the gusset is under tension, and binding is what eventually separates the chain from the tape. Our production team runs the closure test on a loaded sample for this reason, and it is one of the checks most often skipped because an empty pouch is easier to test.
Branding on a small panel
Small items punish bad branding decisions because there is nowhere to hide. A large logo on a 24 by 16 centimetre pouch dominates the whole face and reads as merchandise. The placements that work are a woven label on a side seam or on the grab loop, a debossed or etched puller, and a printed lining. All three are visible at the moment of use and none of them shout.
Embroidery is possible on a pouch but it needs a stable fabric, and on lightweight ripstop it tends to pucker unless a backing is added. A heat transfer works well on a flat panel and allows a fine detail mark, but it should be tested on the actual coated fabric because some coatings resist adhesion. Our team runs the branding method on the sample rather than approving it on paper, which is the only way to know whether a mark survives on a particular shell.
Colour is the branding decision with the most reach on a small item. Because the pouch is usually seen inside a darker bag, a lining in the campaign colour does more for recognition than any exterior mark, and it costs nothing beyond the fabric choice. Our programme coordinator recommends matching the pouch lining to the primary bag lining so a bundle reads as one family.
| Bundle | Best paired with | Added weight | Typical add-on price band |
|---|---|---|---|
| Pouch alone | Any digital or soft reward tier | 60 to 150 g | Entry band |
| Pouch plus laptop sleeve | Slim laptop bag or sleeve tier | 150 to 300 g | Mid band |
| Pouch plus laptop bag | Commuter laptop bag tier | 300 to 600 g | Mid band |
| Pouch plus tote | Print or work tote tier | 300 to 500 g | Entry to mid band |
| Pouch plus backpack | Travel or everyday backpack tier | 400 to 700 g | Upper mid band |
| Pouch two-pack in two colours | Any tier as a multi-buy | 120 to 300 g | Value band |
Bundling: pouch plus bag, pouch plus tote
A pouch is the natural partner for almost every bag reward, and the pairing logic differs by partner. With a laptop bag the pouch completes a working kit: the machine goes in the sleeve, the cables go in the pouch, and the backer stops carrying a tangle. That is a clear narrative and it supports a bundle price well above either item alone.
With a tote the pouch solves the tote's structural weakness, which is that an open or lightly organised bag lets small items disappear. Adding a pouch converts a general-purpose tote into a work bag at a fraction of the cost of building the organisation into the tote itself. This is why pouch add-ons attach at high rates to tote tiers on the campaigns we support.
The specification rule for bundles is matched hardware and matched lining. If the pouch zip puller is shiny silver and the bag puller is matte black, the set reads as two orders that happened to ship together. Our production team draws a single hardware schedule across every item in a bundle, and the same rule applies to thread colour and to the label programme. A matched set also packs as one kit, which simplifies pick and pack at the fulfilment stage.
A third pairing that is growing quickly is the pouch with a tablet sleeve or tablet bag. Tablet users carry a charger, a stylus and often an adapter, and a pouch gives all three a home inside a slim carry solution that has no room for internal organisation. Our team covers this pairing in more detail in the tablet bag guide, and the same matched-hardware rule applies: one finish schedule across the sleeve, the pouch and any strap hardware.
Pricing the add-on ladder
Add-on pricing should be anchored to the perceived shop price rather than to the unit cost. A backer does not know what the pouch cost to make; they know what a branded organiser costs in a shop. Pricing in the range of roughly 12 to 28 dollars for a single pouch sits comfortably below that anchor while leaving a healthy margin, and it is the band our team sees convert best.
Then build a ladder rather than a single item. Three rungs work well: a single pouch at the entry price, a two-pack in two colours at a modest discount to two singles, and a pouch plus a matching flat accessory at the top. The two-pack is the highest-margin rung because it moves two units for one pick fee and one parcel, which is why our programme coordinator recommends it as the second rung almost every time.
The caution on add-on pricing is the same landed-cost guardrail that applies to tiers: total landed cost including freight, duty and a reserve at or below 30 to 35 percent of the price charged. Pouches clear this easily because they are cheap and light, which is exactly why they are the right place to look for incremental revenue. Do not give the margin away by under-pricing; an add-on at 8 dollars that could have sold at 18 leaves real money on the table for no conversion benefit.
Present the ladder visually as well. A single image showing the single pouch, the two-pack and the bundle side by side does more for add-on conversion than a list of prices, because the backer can see the step rather than having to calculate it. Our programme coordinator supplies a shot list for add-on ranges for exactly this reason, and the frames are usually taken during the same shoot as the main product.
Packing and shipping: the lightest thing in the box
A pouch is the cheapest item in the programme to ship and it should be treated that way in the packing specification. A folded pouch in a polybag weighs under 150 grams and sits below 3 centimetres thick, which means it can be added to an existing parcel with no change to the weight bracket in most services. That is the logistics argument for add-ons and it is a strong one.
Packed with a bag, the pouch should go inside the bag rather than alongside it. That protects the pouch, it reduces the outer dimensions of the parcel, and it presents the bundle as a set when the backer opens the bag. Our team specifies the packing layout for kit rewards as part of the production programme and photographs it, so a fulfilment partner works from a picture rather than from a description.
Where pouches are sold as a standalone add-on with no bag, use a soft mailer rather than a box. A boxed pouch is a dimensional-weight problem for no benefit, and it is the most common unnecessary cost we see in pouch fulfilment. If the pouch needs to feel like a gift, a printed card and a tissue wrap achieve that at a fraction of the freight cost of a carton.
Where the pouch is the only item in the parcel, add the card. A printed card with the campaign mark, the care note and a short line about what the pouch is for gives a small parcel a sense of intention, it weighs 5 grams, and it is the difference between a delivery and a gift. Our team includes the card in the packing specification rather than leaving it to the creator, so it arrives with the goods.
QC on small goods and what actually fails
Inspection holds at AQL 2.5 to ISO 2859-1 across our programmes, and on a pouch the checkpoints are concentrated in the interior because that is where the complexity is. The failures we see are elastic loop tension, loop count and spacing against the specification, mesh pocket zip length against the opening, and bar-tack reinforcement at the ends of every closure.
Loop tension is the one that matters most and the one that is hardest to see. Elastic that is too loose lets a cable fall out; elastic that is too tight makes the pouch hard to load and eventually tears the stitch line. The correct tension holds a cable firmly enough that it stays put when the pouch is shaken, and loosely enough that it can be pulled out with one hand. Our production team tests this with a real cable of the specified gauge rather than by feel.
Stitch density is the second silent failure. A pouch is a small item with a lot of short seams, and short seams are where machines are most likely to skip or to run an inconsistent stitch length. A skipped stitch on a loop attachment means the loop comes away in the first month. Our team checks loop attachment with a pull test on a sample from each production batch, which is faster and more reliable than visual inspection alone.
Finally, plan the reserve. Even at a low defect rate, a pouch programme needs 2 to 3 percent of the run held back, because a pouch is often the item a backer contacts support about first and a fast replacement is worth more than a discussion. Holding 15 units from a 500-piece pouch run costs very little and it protects the campaign's comment section during the delivery window.
Send your add-on ideas to service@junyuanbags.com and a campaign bag specialist will return a costed pouch specification with sampling and bulk dates.
Frequently Asked Questions
Why are tech pouches good add-on perks for a campaign?
Because they are one size, flat, light, cheap to ship and used every day. An add-on is selected after the pledge decision rather than instead of it, so it adds revenue without competing with the tiers. Attach rates on a well-priced accessory typically run between 25 and 55 percent of backers in the programmes our team supports.
What size should a cable organiser pouch be?
Size it by the coiled length of the longest cable rather than by any device. A small pouch at about 20 by 12 centimetres suits short cables and drives, a medium at about 24 by 16 centimetres is the default, and a large at about 28 by 20 centimetres suits a full travel kit. Allow 40 to 60 millimetres of depth with a gusset.
How deep does a tech pouch need to be?
40 to 60 millimetres of usable depth on a medium pouch, with a gusset rather than a flat seam. A modern high-wattage charger brick is 25 to 45 millimetres thick, and a pouch with a flat profile will not close over it. Insufficient depth is the most common reason a pouch sample looks right and fails in use.
How many elastic loops should a cable pouch have?
Five to nine on a medium pouch, at 20 to 35 millimetres per loop. Too wide and thin cables flop; too narrow and a cable with a moulded strain relief will not pass through. Tension should hold a cable when the pouch is shaken but allow one-handed removal.
What material is best for a custom tech pouch?
Ripstop nylon or polyester at 70D to 210D is the default: light, tear resistant, technical looking and packs flat. Neoprene suits a pouch protecting something fragile. PU or TPU laminate gives wipe-clean water resistance, and RPET suits a campaign with a sustainability story. Specify a light-coloured lining in every case.
What closure should a tech pouch use?
A number 3 or number 5 coil zip with a garage and a moulded puller. A three-sided zip with a gusset lets the pouch open flat like a book, which is how a cable organiser is used. Avoid hook-and-loop because it wears and it is noisy, and avoid a boxed parcel because dimensional weight is wasted cost.
How should a pouch add-on be priced?
Anchor to the perceived shop price rather than to unit cost. Roughly 12 to 28 dollars for a single pouch converts well and leaves healthy margin. Then build a ladder: a single pouch, a two-pack in two colours at a modest discount, and a pouch plus a matching flat accessory at the top. The two-pack is the highest-margin rung.
What is the minimum order for a custom tech pouch?
500 pcs per style and per colourway. That is a modest cash commitment compared with a bag, which is why a pouch is the natural first accessory for a campaign testing whether its audience buys soft goods. Keep to one colourway for the first run and add a second only after the first has converted.
Should a pouch be bundled with a bag or sold alone?
Both work and they serve different purposes. With a laptop bag the pouch completes a working kit and supports a bundle price well above either item. With a tote the pouch fixes the tote's weak organisation at a fraction of the cost of building it in. Specify matched hardware and matched lining across the set.
How should a pouch be packed for shipping?
Inside the bag if it is part of a bundle, which protects the pouch, reduces outer parcel dimensions and presents the set properly. Standalone, use a soft mailer rather than a box. A folded pouch is under 150 grams and under 3 centimetres thick, so it usually adds nothing to the weight bracket.
What does AQL 2.5 inspection check on a pouch?
Elastic loop tension, loop count and spacing, mesh pocket zip length against the opening, bar-tack reinforcement at every closure end, and stitch density on short seams. Loop tension is tested with a real cable of the specified gauge, and loop attachment is checked with a pull test on a sample from each production batch.
How long does sampling and bulk take for a pouch programme?
Sampling runs 6 to 10 working days because no tooling is usually required. Bulk runs 35 to 50 days from approved sample and deposit. Terms are FOB Xiamen with T/T 30/70, and we recommend holding 2 to 3 percent of the run as a replacement reserve.
People Also Ask
Are pouches better as add-ons or as reward tiers?
Add-ons. They are selected after the pledge decision, so they add revenue without competing with the tiers, and they convert at 25 to 55 percent of backers when priced and presented clearly at checkout.
What should a cable organiser pouch hold?
A charger brick, two or three coiled cables, an adapter or dongle, and optionally a small drive or hub. Give each item a home: loops for cables, a divided section for the brick, a zippered mesh pocket for small parts.
Can a pouch be branded without looking cheap?
Yes, with restraint. Use a woven label on a seam or grab loop, a debossed zip puller and a printed lining in the campaign colour. Avoid a large logo on the face, which dominates a small item.
How much does a custom tech pouch cost to make?
Less than most creators expect, because the item uses little fabric and simple construction with no tooling. Ask for a costed specification rather than a single figure, since loop count and closure choice move it more than fabric does.
Do pouches add much to shipping cost?
Very little. Under 150 grams and under 3 centimetres folded, a pouch usually adds nothing to an existing parcel weight bracket. The mistake to avoid is boxing a pouch, which creates a dimensional weight cost for no benefit.
Should pouch hardware match the bag it ships with?
Yes. A shiny silver puller on a pouch next to a matte black puller on the bag makes the set read as two separate orders. Draw one hardware schedule across every item in a bundle.
Why do pouch elastic loops fail?
Wrong tension or weak attachment. Too loose and cables fall out; too tight and the stitch line tears. Stitch density on short seams is the other silent failure, so loop attachment should be pull tested per batch.