Box Stitch, French Seam and Binding: Bag Construction That Lasts
Most reward bags fail at a seam rather than in a panel, and the seam that fails is almost always the one nobody specified. Box stitch and box-x reinforcement carry concentrated strap and handle loads, French and bound seams enclose raw edges so linings do not fray inside the bag, and binding finishes openings that would otherwise show a cut edge. Each construction adds operations, which means each one moves both unit cost and cycle time. At 500 pcs per style and colourway the additional cost per unit is usually small compared with the cost of a replacement run. This guide explains what each technique does, where it belongs on a bag, how it behaves under load and abrasion, and how to write it into a tech pack so the sample matches the production run.
- Why construction details decide whether a bag survives
- Seam allowance, stitch density and thread choice
- Box stitch and box-x: where load concentrates
- French and bound seams: enclosing raw edges
- Binding, piping and opening edge finishing
- Bartacks, rivets and reinforcement at stress points
- Seam sealing and waterproof construction
- What construction choices cost in time and money
- Inspecting construction on sample and in bulk
- Writing construction into the tech pack
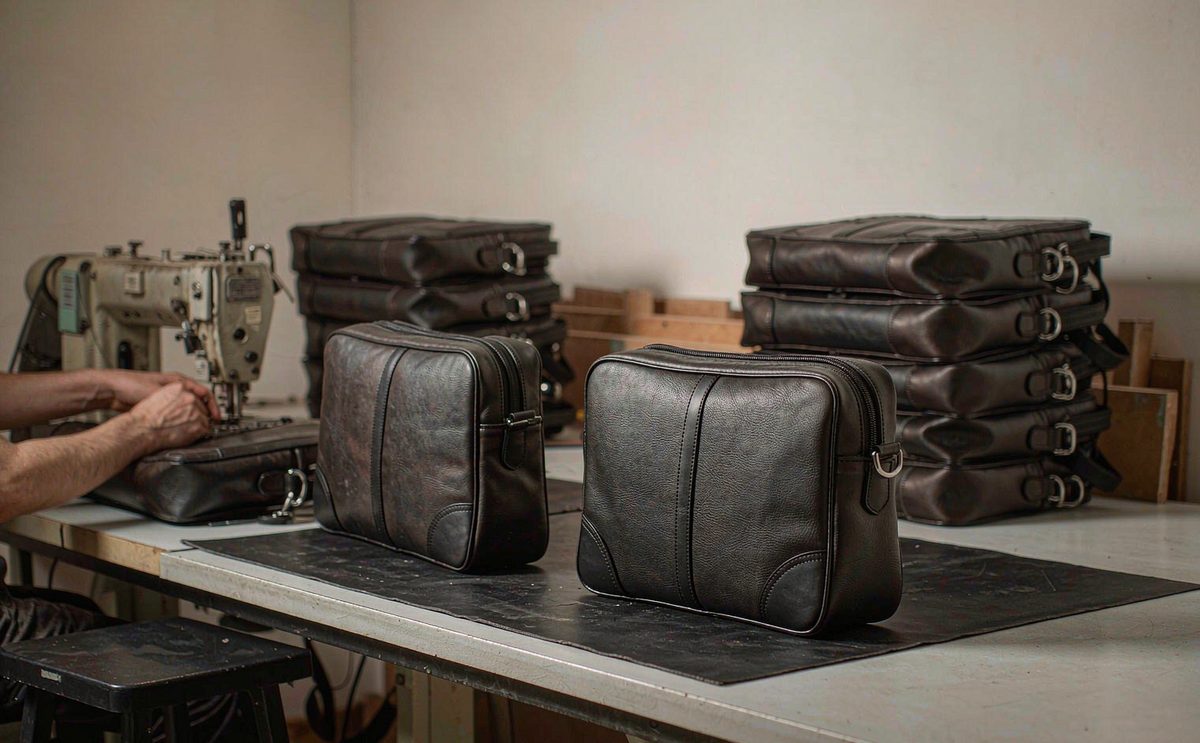
Fabric choice gets the attention and construction does the work. A reward bag made from excellent material with the wrong seam will fail earlier than a bag made from ordinary material with the right one, because failures start where panels meet. Straps pull away at the attachment, linings split at the seam allowance, piped openings fray at the corner, and zipper ends open where the tape was not captured. None of these are visible in the campaign video, which is exactly why they are under-specified. This article walks through the construction vocabulary a creator needs in order to review a sample properly, and it forms part of the wider custom bag programme for Kickstarter rewards. Every technique described here is available at 500 pcs per style and per colourway, and each one is an operation on the line rather than a material purchase, which is what makes it affordable at campaign volumes.
A seam is a system: allowance, stitch density, thread, needle and reinforcement all have to be specified together. Changing one without the others usually makes the joint weaker, not stronger.
Why construction details decide whether a bag survives
The reason construction is under-specified is that it is largely invisible in the two artefacts a campaign is sold on: the render and the photograph. Both show surfaces. The buyer of a reward bag experiences the opposite, because they load it, overfill it, drag it and wash it, and every one of those actions puts force into a joint. Our production team sees the same pattern repeat across programmes: the complaint is rarely that the fabric wore through in the middle of a panel, and almost always that something came apart at an edge, an attachment or a closure.
Construction also decides how the bag feels, which matters more than creators expect for perceived value. A bag with a bound interior and no visible raw edges reads as finished even when the materials are modest, while a bag with overlocked interior seams and visible thread tails reads as cheap even when the shell fabric is expensive. Backers compare the object against retail bags they already own, and interior finishing is where that comparison is usually decided. This is a cheap place to spend money, because binding tape and an extra pass cost far less than upgrading the shell fabric.
There is a schedule dimension too. Every additional construction operation adds handling time on the line, and handling time is what stretches a 35 to 50 day bulk window. A bag with five reinforcement operations per unit takes longer to sew than one with two, and at 500 units that difference is measured in days rather than minutes. The purpose of specifying construction early is not to add operations everywhere, it is to put the operations where the load actually is and leave them off where it is not.
Seam allowance, stitch density and thread choice
A seam is defined by four variables that have to be considered together. Seam allowance is the width of fabric turned into the joint, and too narrow an allowance lets the stitch line sit close enough to the cut edge to pull through it. Stitch density, usually expressed as stitches per inch, controls how the load is distributed along the seam: too few stitches and each one carries more force, too many and the needle perforates the fabric so densely that the seam itself becomes a tear line. Thread must be compatible with the fabric weight and with the needle size, and the needle must be sized so it separates yarns rather than cutting them.
In our observation, most reward bags run a seam allowance in the range of roughly 8 to 12 mm on body panels, tighter allowances on small components and wider allowances where the seam will be bound or topstitched afterwards. Stitch density typically sits around 7 to 9 stitches per inch on medium-weight polyester and lower on heavy canvas, where a denser seam would perforate the weave. These are observation ranges rather than standards, and the correct numbers for your bag depend on the substrate, so the useful move is to ask the workshop to state them on the tech pack rather than leaving them to operator habit.
Thread selection is where cheap programmes quietly fail. A bonded polyester or nylon thread of appropriate ticket number is the default for bags, because it resists abrasion and holds up under UV far better than cotton-covered core spun thread used in apparel. Using an apparel thread in a bag is a classic mismatch: it looks fine at packing and degrades after months of sun and flexing. Ask for the thread specification by fibre and ticket number, and check that the needle size stated on the travellers matches it. A needle that is too large leaves holes that a seam can tear along.
- Seam allowance, body panels
- Typically 8-12 mm, observation range
- Stitch density
- Typically 7-9 stitches per inch on medium-weight polyester
- Thread
- Bonded polyester or nylon, ticket stated on the tech pack
- Needle
- Sized to separate yarns rather than cut them
- Minimum order
- 500 pcs per style and per colourway
- Bulk window
- 35-50 days, FOB Xiamen, T/T 30/70
Box stitch and box-x: where load concentrates
A box stitch is a rectangular stitch pattern, and box-x adds a diagonal cross inside the rectangle. Both are reinforcement patterns applied at points where force enters the bag rather than being distributed across it: handle attachments, strap ends, webbing anchors, D-ring tabs and haul loops. The geometry matters because a straight run of stitching parallel to the load concentrates stress at the two ends of the run, while a closed rectangle distributes it around the perimeter, and the diagonal cross stops the rectangle from distorting into a parallelogram under shear.
Placement matters as much as the pattern. A box stitch on a handle should extend onto the body panel or onto a reinforcement patch, not sit entirely on the webbing, because the failure mode is the webbing tearing away from the shell along the top of the stitch box. Where the shell fabric is light or stretchy, our sourcing partner adds an internal reinforcement patch so the load spreads into a wider area of the panel. That patch is invisible from outside and is one of the highest-value additions available at campaign volumes.
The cost of a box-x is small in absolute terms and meaningful in aggregate. Each pattern is a programmed stitch sequence that takes a few seconds, and a bag may carry four to eight of them. That is minutes of additional sewing time per unit, which at 500 units is a line-day or two rather than a budget line that changes the reward price. Compared with the alternative, which is a handle that pulls away in month six and a replacement run at full unit cost plus freight, the reinforcement is not a difficult decision.
- Use box or box-x at handle ends, strap anchors, webbing tabs and haul loops
- Extend the pattern onto the body panel or a reinforcement patch, not only onto the webbing
- Add an internal reinforcement patch behind every anchor on lightweight or stretchy shells
- Keep the stitch box inside the seam allowance so it does not sit on the cut edge
- Count the reinforcement points and list them on the tech pack so none are dropped in bulk
French and bound seams: enclosing raw edges
A plain seam leaves a raw edge inside the bag. On an unlined tote that edge is the first thing to fray, and on a lined bag it is hidden but still present, collecting lint and eventually unravelling at the ends. A French seam solves this by sewing the panel wrong sides together first, trimming, then turning and sewing again so the raw allowance is fully enclosed inside the second stitch line. The result is a clean joint from both sides with no exposed edge, at the cost of a second pass and a slightly narrower finished allowance.
A bound seam takes the opposite approach: the raw allowance is wrapped in a tape or a strip of fabric and stitched through, so the edge is covered rather than enclosed. Binding is more forgiving on curved seams and on heavy or bulky fabrics where turning a French seam would be impractical, and it is the standard solution on interiors where a decorative contrast tape is wanted. It is also the more repairable of the two, because a worn binding can be replaced without unpicking the structural seam.
Choosing between them is mostly a question of fabric weight, seam curvature and how much bulk the joint can accept. French seams add two layers inside the seam, which is fine on light lining fabrics and unacceptable on heavy canvas corners, where the bulk would prevent the corner from turning cleanly. Bound seams add one layer of tape and sit flat, which is why they are common on duffel interiors and on the arms of structured totes. Ask for the interior to be specified panel by panel rather than globally, because a single instruction such as bind all internal seams will be interpreted differently on different panels.
Binding, piping and opening edge finishing
Openings are the hardest part of a bag to finish well. A top opening on a tote, a zippered main compartment or a lid on a duffel all present a cut edge that has to be covered, and the three common solutions are binding, piping and facing. Binding wraps the edge in tape, piping inserts a cord inside a fabric sleeve along the edge and adds structure plus a decorative line, and facing turns the fabric back on itself to create a clean hem. Each has a different visual result and a different tolerance for curvature.
Piping is the one most often requested and most often misplaced. It looks good in a render because it creates a defined line, but it adds bulk at corners and it requires the cord to be eased around curves without puckering. On a tight internal radius, a piped seam will either pucker or pull the panel out of shape, and both are visible. Our campaign bag specialist will usually suggest binding with a contrast tape on tight radii and reserving piping for long straight runs, where it performs well and gives the structured look creators want.
Corners deserve their own note. Nearly every opening failure we see originates at a corner, because that is where two bound or piped runs meet, where the tape has to be joined, and where the bag is picked up and put down most often. Specify how the tape ends are joined, whether they are overlapped or butted, and whether the corner is reinforced with a small bartack underneath. This is a three-second operation that removes an entire category of warranty claim, and it is the kind of detail that separates a production sample from a prototype.
Bartacks, rivets and reinforcement at stress points
A bartack is a dense cluster of zigzag stitches used to anchor a point rather than join a length. It is the standard way to secure a webbing end, a strap keeper, a pocket corner or the base of a zipper tape, and it works because it creates a small, extremely strong block of stitching that resists pulling in any direction. Bartacks appear on nearly every quality bag, and their absence is a reliable signal that a sample was made quickly rather than correctly.
Rivets and metal reinforcement serve a similar function where stitching cannot reach or where the load is too high for thread alone. A rivet through a handle anchor spreads load into the panel and adds a visual detail that reads as durable. The cautions are real though: rivets need compatible washers so they do not pull through coated fabric, they add a hardware component with its own lead time and colourway, and on children's items they introduce a small-parts consideration that belongs in the safety review. Ask whether the rivet is decorative or structural, because a decorative rivet that is expected to carry load will disappoint.
Where to put reinforcement is best decided by looking at how the bag is carried and emptied. A gym bag is lifted by one handle while loaded, so the handle anchors and the base seam carry the load. A camera insert is lifted by a grab handle and slid in and out of another bag, so the side seams and the grab handle take the wear. A laptop sleeve is pulled out of a backpack by a corner, so that corner needs reinforcement. Our programme coordinator asks creators to describe the three most likely abuse actions and then maps reinforcement to them, rather than reinforcing everything.
Seam sealing and waterproof construction
A seam that is structurally excellent can still leak, because every needle hole is a potential path for water. Seam sealing addresses this with a tape applied over the stitch line under heat and pressure, which bridges the perforations. It is a separate operation from sewing, it requires the tape chemistry to match the coating on the fabric, and it is the reason genuinely waterproof bags cost more than water-resistant ones with identical silhouettes. If your campaign copy promises waterproof performance, the seam treatment is where that promise is either delivered or broken.
Taping works well on flat and gently curved seams and poorly on tight corners and on seams that cross a zipper. Where a taped seam meets a bound seam, the two finishes have to be sequenced so one does not undermine the other, and on complex shapes the honest answer is sometimes a welded construction instead. Welding removes the needle holes entirely by joining material with heat rather than thread, which is excellent on TPU-coated fabrics and unavailable on canvas or on natural fibres. The testing side of this decision is covered in Waterproof Bag Testing: Seam Sealing and IPX Ratings.
For creators, the practical guidance is to match the claim to the construction. Water-resistant is achievable with coated fabric, a storm flap over the zipper and no seam treatment, and it is the right claim for most lifestyle reward bags. Waterproof requires taped or welded seams, coated zippers or well-designed flaps, and a test to prove it. Over-claiming in the campaign and under-delivering in construction is the fastest route to a comment thread that damages the re-order, and the custom bag programme treats claim and construction as one review item.
What construction choices cost in time and money
| Operation | Added handling | Typical placement | Value in use | Watch out for |
|---|---|---|---|---|
| Box or box-x stitch | Seconds per point | Handle ends, strap anchors, webbing tabs | Very high, prevents detachment | Pattern sitting only on webbing rather than the panel |
| Bartack | Seconds per point | Pocket corners, keeper ends, zipper bases | High, anchors point loads | Skipped on bulk when not listed on the tech pack |
| Internal reinforcement patch | One extra piece per anchor | Behind every external anchor on light shells | Very high, spreads load | Bulk at corners if the patch is too large |
| French seam | A second stitch pass | Light linings, straight interior seams | High, no raw edge inside | Too much bulk on heavy canvas |
| Bound seam | One tape pass | Interiors, curved seams, duffel arms | High, clean and repairable | Tape joins left exposed at corners |
| Piping | Cord plus sleeve pass | Long straight edges, structured openings | Medium, mostly visual | Puckering on tight internal radii |
| Seam taping | Heat and pressure pass | Waterproof shells, main seams | Essential for waterproof claims | Tape chemistry mismatched to coating |
| Rivets | Hardware plus setting | Handle anchors, decorative stress points | Medium, spreads load | Pull-through without washers, small-parts rules |
The pattern across that table is consistent: the operations that prevent detachment and enclose raw edges are cheap, and the operations that add visual structure or waterproof performance are more expensive. For a reward programme this argues for spending on reinforcement and interior finishing and being honest about structural claims. In our observation, a bag with good reinforcement and a bound interior reads as better made than the same silhouette with a more expensive shell fabric and an unfinished interior, and the former costs less.
The time cost is real but manageable. Each additional operation adds sewing or handling minutes, and these accumulate across the 35 to 50 day bulk window rather than the sampling window, because a single sample is made by one operator while bulk runs through a line. This is why construction decisions belong in the tech pack before the pre-production sample, not after. A change that adds two operations per unit after bulk has started means either resequencing the line or accepting a later delivery date, and neither is attractive once backers have been given a month.
Inspecting construction on sample and in bulk
Reviewing a sample means pulling on things. Grip each handle and strap and pull firmly in the direction it will be loaded, then look at whether the stitch box moves, whether the webbing puckers away from the panel, and whether any stitch line sits closer than about 3 mm to a cut edge. Turn the bag inside out and run a finger along every interior seam to check for raw edges, skipped stitches and loose thread tails. Open and close every zipper twenty times and watch whether the tape ends are captured and whether the slider catches on the binding.
The checks that catch the most expensive defects are the ones done on the corners and at the anchors. Press each corner of an opening and look for a gap in the binding join. Flex a piped seam along its length and watch for puckering that only appears when the fabric is under tension. Count the reinforcement points against the tech pack, because a dropped bartack on one variant is invisible in a photograph and obvious in use. The full review sequence is set out in Bag Sample Approval: Stitch, Zippers, Print Registration.
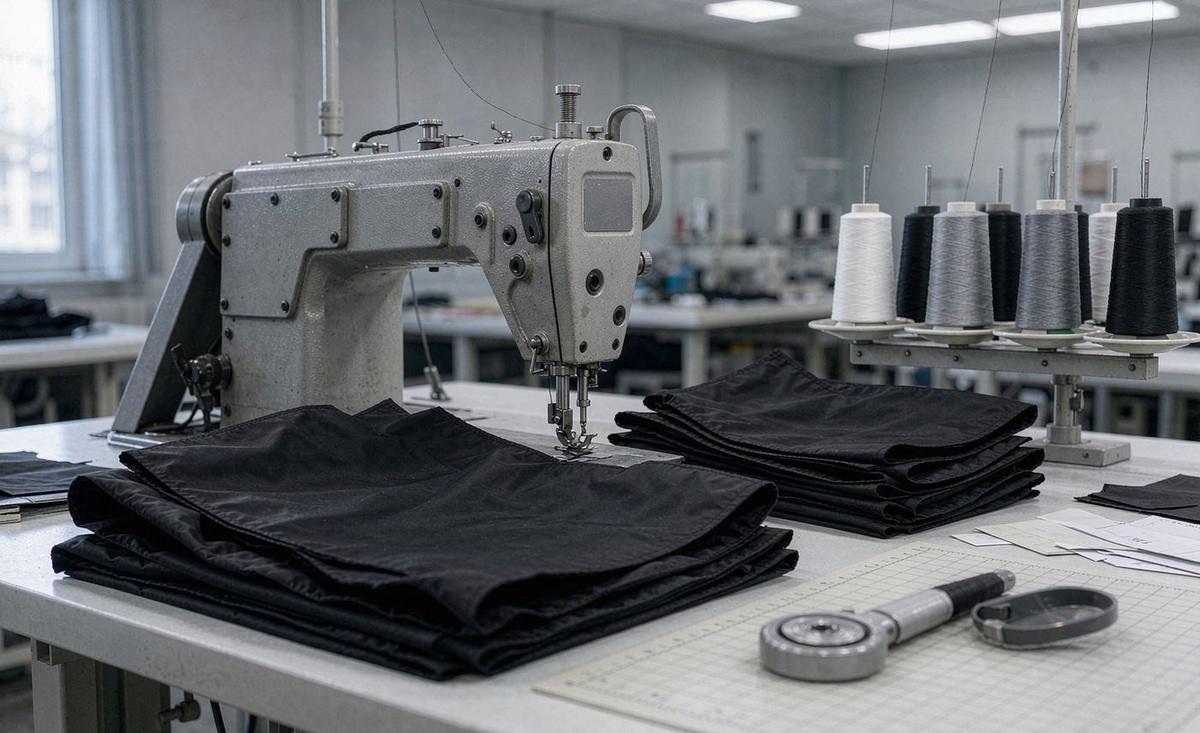
In bulk, construction has to be written into the defect definitions used at inspection. Inspection under AQL 2.5 to ISO 2859-1 counts defects against categories, and if dropped reinforcement, open seam ends and untrimmed binding joins are not named as defects, they will be counted as minor or missed entirely. Agree the defect list at pre-production, reference the golden sample for judgment calls, and ask for photographs of any defect found so the category can be corrected on the next lot. Tolerances and categories are discussed in Custom Bag Defects: Acceptable Tolerance Under AQL 2.5.
Writing construction into the tech pack
The tech pack is where construction stops being a conversation and becomes a specification. For each seam, state the seam type, the allowance, the stitch density, the thread and needle, and whether the raw edge is enclosed, bound or overlocked. For each attachment point, state the reinforcement pattern, its dimensions, and whether there is an internal patch behind it. For each opening, state the finishing method and how corners and tape joins are handled. This level of detail is standard in the industry and it is what allows a quotation to be accurate rather than indicative.
Where a creator does not know which construction to specify, the honest approach is to describe the use case and ask for a recommendation with the reasoning attached. A request that says the bag will be lifted by one strap while loaded with 8 kg, and will be slid in and out of a locker daily, produces a far better specification than a request that says make it durable. Our production partner will propose the reinforcement map, cost it, and show where an operation can be dropped if budget requires it, which is a more useful conversation than negotiating a unit price against an incomplete specification.
The commercial frame around all of this stays constant. Minimum order is 500 pcs per style and per colourway, sampling runs 6 to 10 working days and 12 to 15 working days for complex builds, bulk runs 35 to 50 days, inspection is held to AQL 2.5 to ISO 2859-1, and terms are FOB Xiamen with T/T 30/70. Construction choices move cost inside that frame but they do not change it, which means a creator can decide reinforcement on engineering grounds and still keep the campaign calendar intact. The twelve sections of a bag tech pack show where each of these lines belongs.
Send us a brief describing how the bag will be carried and loaded, and our production team will propose a reinforcement map you can cost before the campaign goes live.
Frequently Asked Questions
What is a box stitch on a bag and why is it used?
A box stitch is a rectangular reinforcement pattern sewn where force enters the bag, such as a handle end or a strap anchor. It distributes load around a perimeter instead of concentrating it at the two ends of a straight stitch run. Box-x adds a diagonal cross that stops the rectangle distorting under shear, which is why it is preferred on high-load attachments.
How is a French seam different from a bound seam?
A French seam encloses the raw allowance inside a second stitch line, so no cut edge is visible from either side. A bound seam wraps the raw edge in tape and stitches through it. French seams suit light fabrics and straight runs, while binding suits curved seams and heavier materials where turning a French seam would create too much bulk.
Does adding reinforcement increase the unit cost much?
Usually not in relative terms. Each box-x or bartack takes seconds, and even six reinforcement points per unit add minutes of sewing time. Set against the cost of a replacement run plus freight if handles detach in month six, reinforcement is one of the cheapest protections available at the 500 pcs per style and colourway minimum.
Should every seam on a reward bag be bound?
Not necessarily. Binding every interior seam adds operations and bulk where it is not needed, particularly on heavy canvas corners. A better approach is to specify panel by panel: bind curved and visible interior seams, use French seams on light straight linings, and use reinforcement at the anchors. Ask for a recommendation based on the fabric weight.
What stitch density should I specify for a polyester backpack?
In our observation most medium-weight polyester bags run around 7 to 9 stitches per inch, with lower density on heavy canvas where a denser seam would perforate the weave. These are observation ranges rather than standards. The useful step is to have the workshop state allowance and density on the tech pack so bulk matches the approved sample.
Can a bag be waterproof without taped seams?
Not reliably. Every needle hole is a potential water path, so a coated fabric with sewn seams is water-resistant rather than waterproof. Waterproof performance generally needs taped or welded seams plus coated or flapped zippers. If the campaign copy says waterproof, the construction and a test to prove it should be specified together.
Where do bag handles usually fail?
At the attachment rather than in the webbing. The usual mechanism is the stitch box tearing away from the shell along its top edge, because the pattern sat on the webbing instead of extending onto the panel. An internal reinforcement patch behind the anchor, with the box extending onto it, is the standard fix and costs very little per unit.
Are rivets better than stitching for handle anchors?
They spread load differently and are often used together. A rivet is excellent at stopping pull-through on a flat anchor, but it needs a compatible washer on coated fabric and it adds a hardware component with its own lead time. For most reward bags, a box-x plus an internal patch is sufficient, and rivets are added where the design also wants them.
How do I check construction quality when I receive a sample?
Pull each handle in its loading direction, turn the bag inside out and run a finger along every seam for raw edges and skipped stitches, flex piped seams for puckering, and count reinforcement points against the tech pack. Open and close every zipper around twenty times. Construction defects are found by loading the sample, not by photographing it.
Will construction changes delay my production slot?
Changes made before the pre-production sample usually fit the existing plan. Changes made after bulk starts mean resequencing the line or accepting a later date, because extra operations accumulate across the 35 to 50 day window. Decide reinforcement during sampling, where each iteration costs 6 to 10 working days rather than weeks of bulk time.
Are construction defects covered by AQL inspection?
Only if they are named as defect categories. Inspection under AQL 2.5 to ISO 2859-1 counts defects against an agreed list, so dropped reinforcement, open seam ends and untrimmed binding joins must be written into that list at pre-production. Otherwise they are likely to be classed as minor or missed entirely during sampling inspection.
Can I specify different construction for different colourways?
Construction should stay identical across colourways of the same style, because changing it creates two specifications and doubles the approval work. Colourway changes affect fabric, thread and tape colour, not seam type or reinforcement. Keeping construction constant is also what allows the 500 pcs per style and colourway minimum to be planned cleanly across variants.
People Also Ask
What is box stitching on a backpack?
A rectangular reinforcement stitch, often with a diagonal cross, applied where straps and handles attach. It spreads load around a perimeter instead of concentrating it at the ends of a straight line of stitching.
What is a French seam used for?
It encloses the raw fabric edge inside a second stitch line, so no fraying edge is visible from either side of the panel. It suits light linings and straight seams, and adds a second sewing pass.
What does binding mean in bag making?
Binding wraps a raw edge in tape or a fabric strip and stitches through it. It finishes openings and interior seams, sits flatter than a French seam on heavy fabric, and can be replaced if it wears.
Why do bag straps tear off?
Usually because the reinforcement stitching sat on the webbing rather than extending onto the body panel, so it tore away along its top edge. An internal patch behind the anchor prevents this.
How many stitches per inch should a bag have?
Medium-weight polyester bags typically run 7 to 9 stitches per inch in our observation, with lower density on heavy canvas. The important thing is that the number is written on the tech pack so bulk matches the sample.
Do taped seams make a bag waterproof?
Taping bridges the needle holes that would otherwise leak, and it is essential for a waterproof claim. It needs the tape chemistry to match the fabric coating, and it is difficult at tight corners.
Is piping worth the extra cost?
Piping gives a structured decorative line and works well on long straight edges. It adds bulk and can pucker on tight radii, so many programmes use contrast binding on curves instead.